

Trusted by:
University of Southern California
Warner Bros.
Volvo
Amazon
Stanford University
Updated: September 14, 2026
11 min read
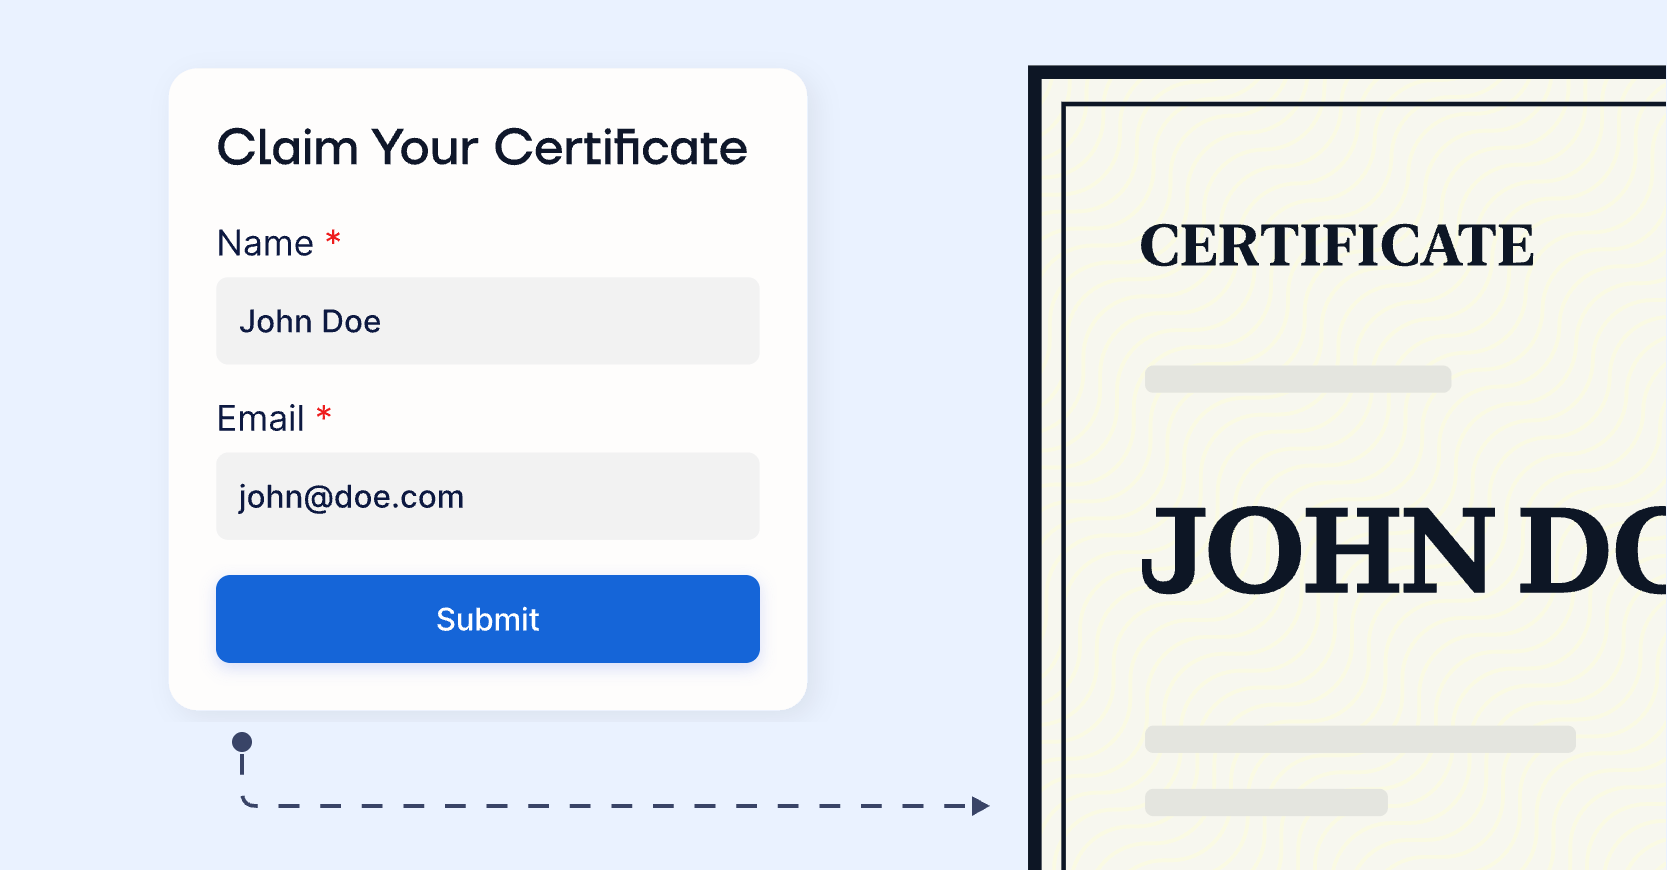
After every webinar, course, or event, the same messages start arriving: someone never got their certificate, someone joined late, someone's name is spelled wrong. Here's how to turn those requests into a form that issues the certificate for you.
Research with AI:
Issuing certificates by hand has a hidden cost, and it isn't the issuing itself. It's everything after: follow-up emails, people who somehow weren't on the list, and name corrections that arrive three days later.
There's a simpler way around it. Instead of collecting names yourself and sending certificates out one by one, you publish a short form. People fill in their details, and the certificate is created and emailed automatically. You can have it go out the moment they submit, or hold requests so you can look them over first.
This guide walks through the whole setup, start to finish, with no coding and no extra software beyond the platform issuing your certificates.
A certificate request form lets people enter their own name and email, so the certificate is built from what they typed instead of what you typed.
The setup has two parts: the form itself, and a rule that issues the certificate whenever someone submits it.
You choose whether certificates go out instantly or wait as drafts for your approval, which is what makes this workable for anything where attendance actually matters.
Sharing is how you decide who gets in: send the link to your attendee list, or show a QR code at the end of a session so only the people still in the room can claim.
Every request is recorded in one place, so you can always see who asked and when, whether or not you're issuing automatically.
Recipients don't need an account to request or receive a certificate.

Self-service works best when you don't have a clean list of recipients at the moment you're ready to issue. If the list keeps changing after the event ends, chasing it is the expensive part, and a request form removes that work entirely.
That covers more situations than it sounds like:

Webinars and live events. Registration lists and attendance lists rarely match cleanly. People register and don't show, show without registering, or join from a colleague's screen. A form lets the people who actually attended raise their hand.
Self-paced courses. There's no cohort and no end date, so learners finish whenever they finish. Batching certificates monthly means someone always waits three weeks for a course they completed on day one.
Membership and renewal cycles. Members need proof of standing at different times, usually when someone else asks for it. A standing request form means they don't have to email you and wait.
Reissues and corrections. Someone lost the email, changed jobs, or needs their name spelled the way it appears on their license. Pointing them at a form is faster than digging through your records.
Where it fits less well is anywhere the certificate carries real weight, and you're the one who has to confirm the person earned it. A professional qualification, a compliance sign-off, an exam result: those need a judgment call that a form can't make for you.
Even then, self-service still does most of the work. Letting people ask, and deciding afterward, is different from letting people ask and having certificates go out unchecked. You keep the approval, and you still lose the inbox back-and-forth.
The obvious benefit is time saved. The one worth more is accuracy.
When you build a recipient list yourself, every detail on it passes through you. You copy names from a registration export, a spreadsheet, or a chat log, and you inherit whatever was wrong in the source plus whatever went wrong in the copying. A name gets truncated. An email has a typo nobody notices until it bounces. Someone's surname loses an accent because the export dropped it.
You also inherit the corrections. Each one arrives days later, when the certificate is already in someone's inbox with their name misspelled, and fixing it means reissuing.
When recipients fill in their own details, that changes in three ways worth naming:

The name is the one they want. People know how they want to appear on a certificate. Some use a middle initial, some use a professional name that differs from the one on your registration list, some have a title that matters in their field. You'd have no way of knowing any of it.
The email is one they actually check. Registration data goes stale. People change jobs and lose access to the address they used to sign up. Someone requesting a certificate today gives you an address that works today.
Mistakes become visible immediately. If someone mistypes their own email, they notice within minutes when nothing arrives, and they submit again. That's a very different situation from a bounce you have to discover, diagnose, and chase.
None of this makes errors disappear. What it changes is when they surface: at the moment the details are entered, by someone who knows what the right answer is, instead of days later when the certificate has already gone out.
Two things need to exist before the form does. Both take a few minutes.
A Certifier account. Sign up free, no card needed. The free Starter plan includes up to 250 credentials a year, and Forms and automations are available on every plan, so you can build this whole setup and run real requests through it without paying for anything.
A certificate template. This is the design that gets issued when someone submits the form, so it has to exist before you can connect the two. If you don't have one yet, start from a ready-made certificate template and edit it, which is faster than designing from scratch.
Whichever route you take, pay attention to the attributes on the template. Anything that changes from one recipient to the next, like their name, a course title, or a completion date, needs to be an attribute rather than fixed text, because those are the fields the form will fill in later. Fixed text stays the same on every certificate you issue.
That's the whole prerequisite list. Once you have an account and a template with the right attributes, the form takes a few minutes.
This is the part your recipients see: a short page where they enter their details and submit a request. You'll find it in Certifier under Assets, in the Forms section.
Click Create form, then choose to start from a template or from scratch. For this, pick Credential Request, which is built for exactly this situation, so most of the work is already done.
The template comes with the usual fields, and you can change any of them. Two questions worth working through before you add anything:
What has to appear on the certificate? The name, at minimum. If your certificate design also shows a course title or a completion date, each of those needs a field here to fill it in.
What do you need in order to trust the request? If you plan to look over requests before approving them, ask for the one thing you'll check: a registration reference, the date they attended, or the email they signed up with. It doesn't need to be much, just something you can match against your own records.
You can add short-answer, single-choice, dropdown, date, email, link, and number fields. A data-collection consent checkbox is added automatically once you've added your first field.
Look at the form the way a recipient will before you send it anywhere. It's shown on a hosted page that inherits your Certifier branding, so if you've set up your logo, colors, and custom domain under Branding, the form picks them up automatically. If you haven't configured branding yet, it uses Certifier's default look.
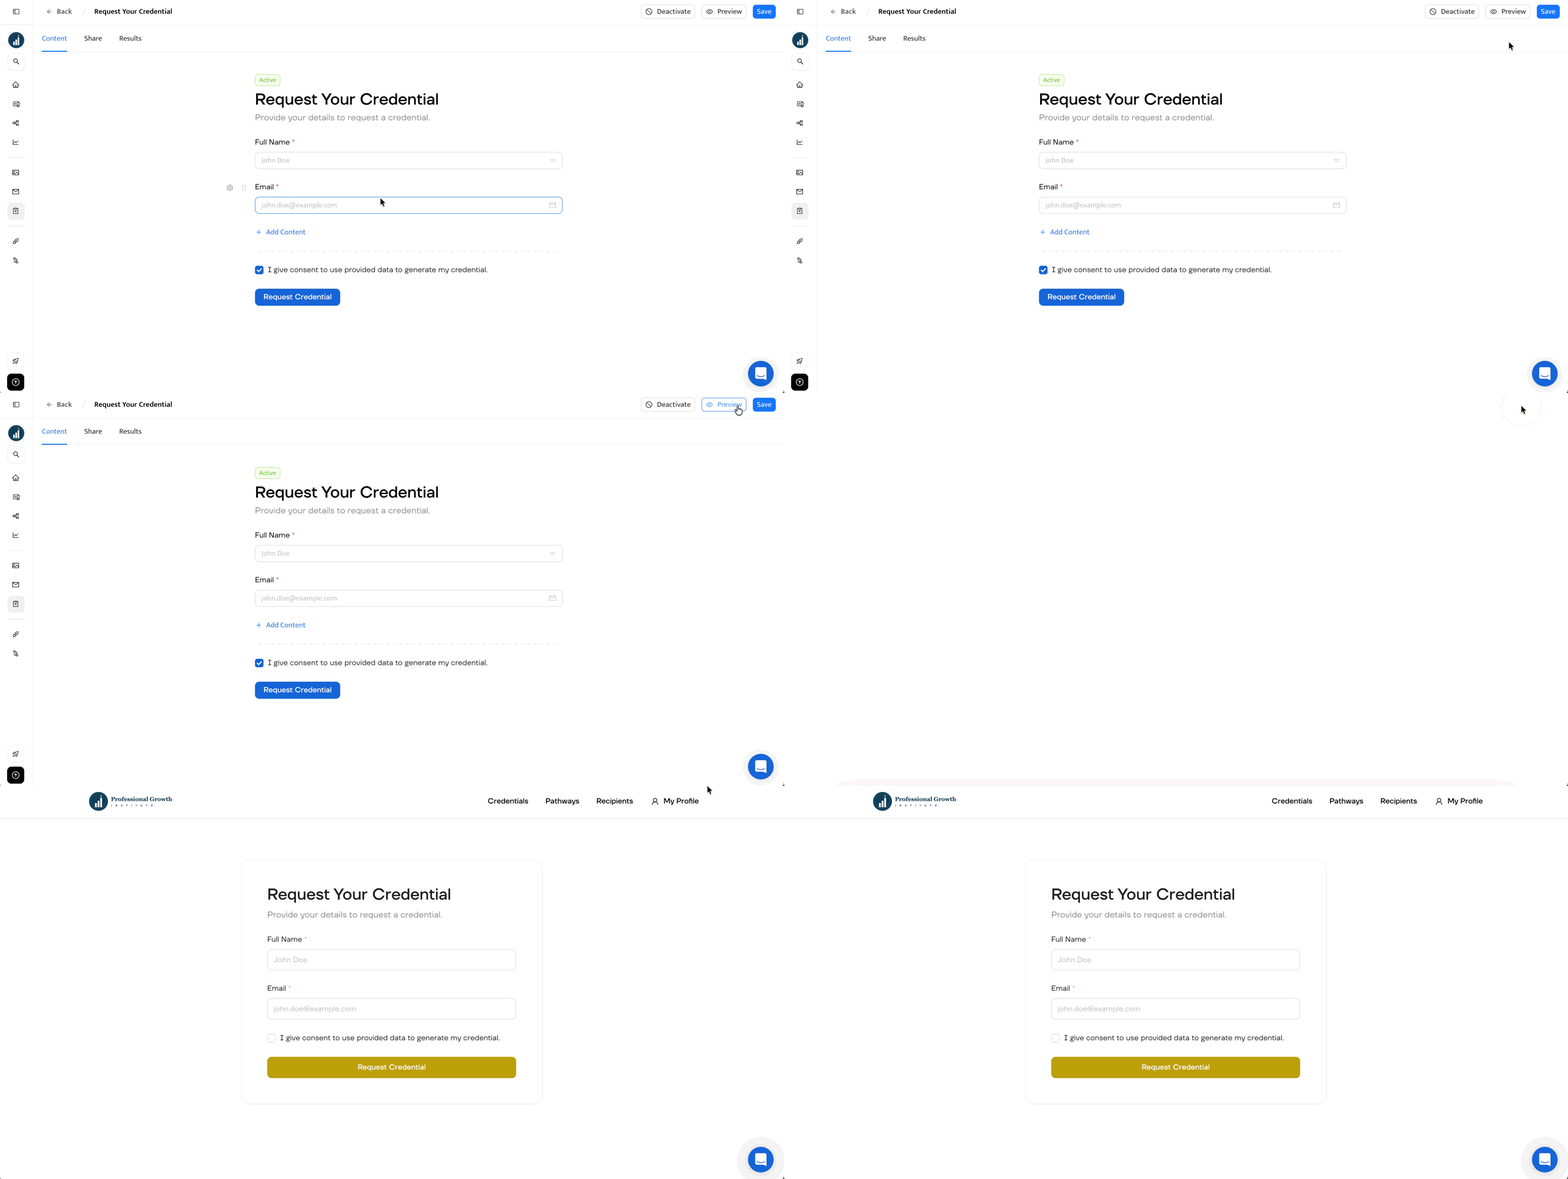
Right now the form collects requests and stores them. It doesn't do anything with them. The piece that closes the loop is an automation: a standing rule that fires when a response arrives, creates the certificate, and emails it.
You set it up once, and it runs on every submission from then on.
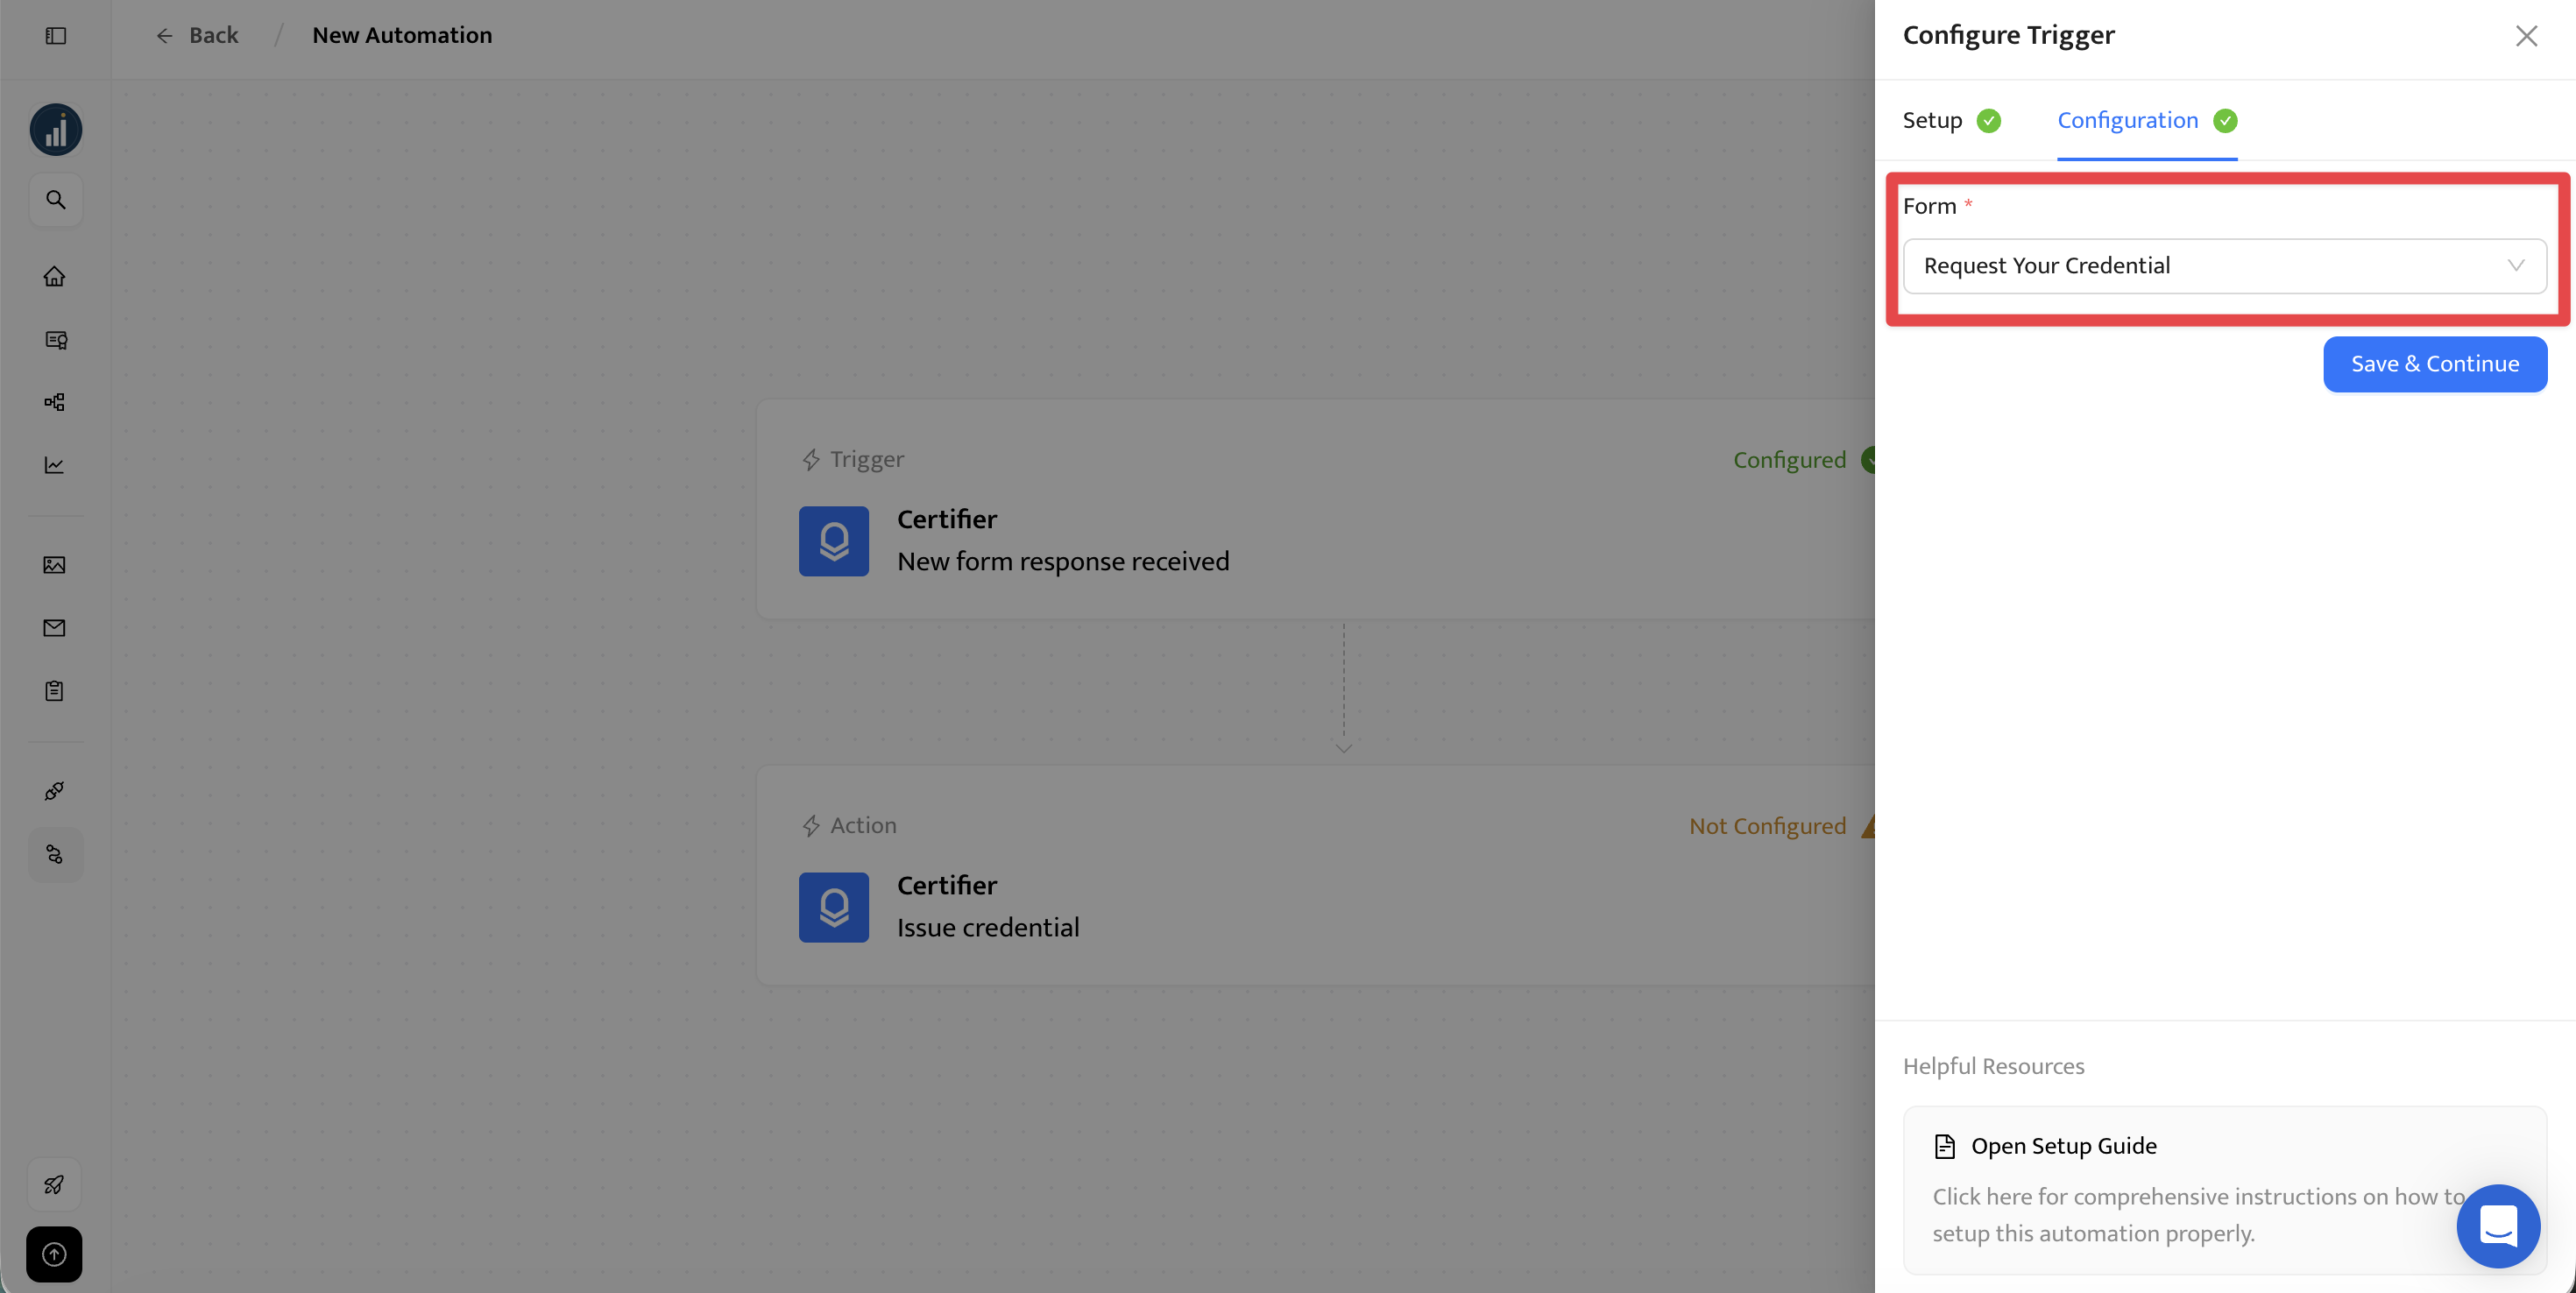
Go to Automations and click Create Automation. Choose the template for issuing a credential when a new form response is received in Certifier Forms, and press Use Template.
Point it at the form you just built as the source of new responses, then save and continue.
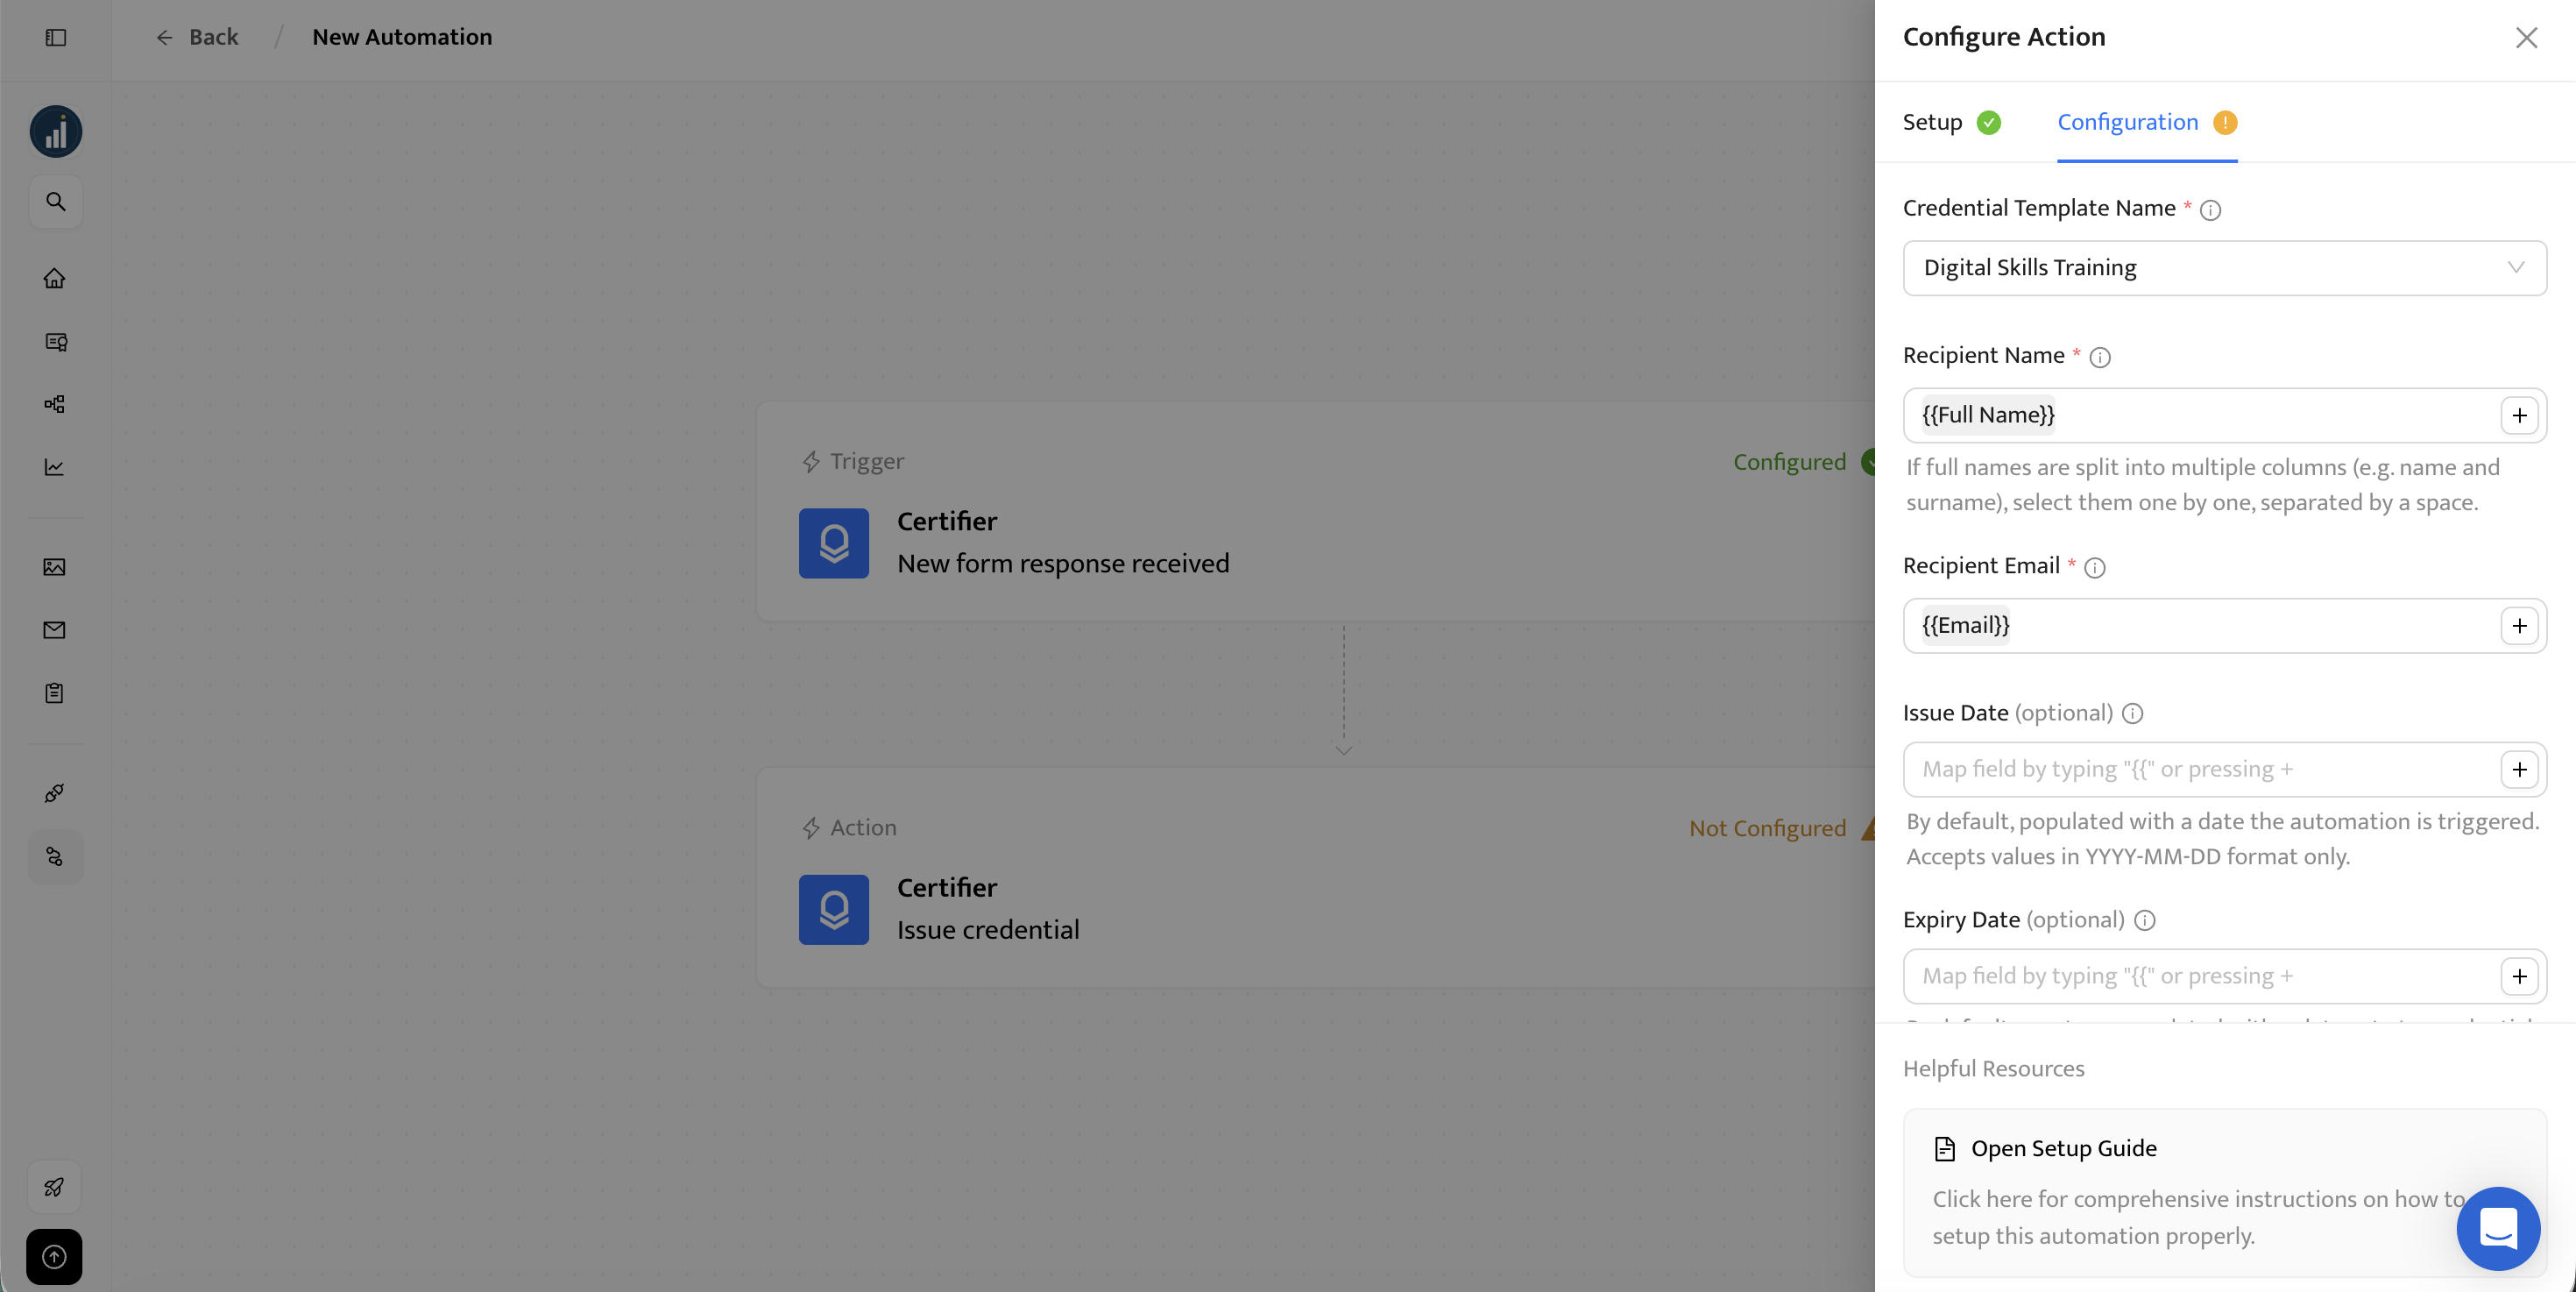
This is the step that does the actual work, and the only one worth slowing down for.
Your certificate has placeholders on it: the spot where a recipient name goes, the spot where a course title goes. Your form has fields collecting those same things. Here you connect them, so the platform knows that what someone typed in the "Full name" field belongs in the name placeholder on the template.
Two setup fields behave differently and it's worth knowing why:
Issue date: leave it empty and it's filled in automatically with the date the certificate is created. That's usually what you want.
Expiry date: comes from your certificate template unless you override it here. If your certificates don't expire, ignore it.
Two toggles control this. Issue Credential decides whether the certificate is created straight away (True) or saved as a draft for you to publish later (False). Leave it to True for now, since that's the straightforward version of self-service. Send Credential decides whether the certificate is emailed to the address the person entered. Keep it set to True.
Turn the automation on, then fill in your own form as if you were a recipient. Submit it.
Go to All credentials. Your test certificate should be there, built from what you typed. Check your inbox too, since the email should have arrived.
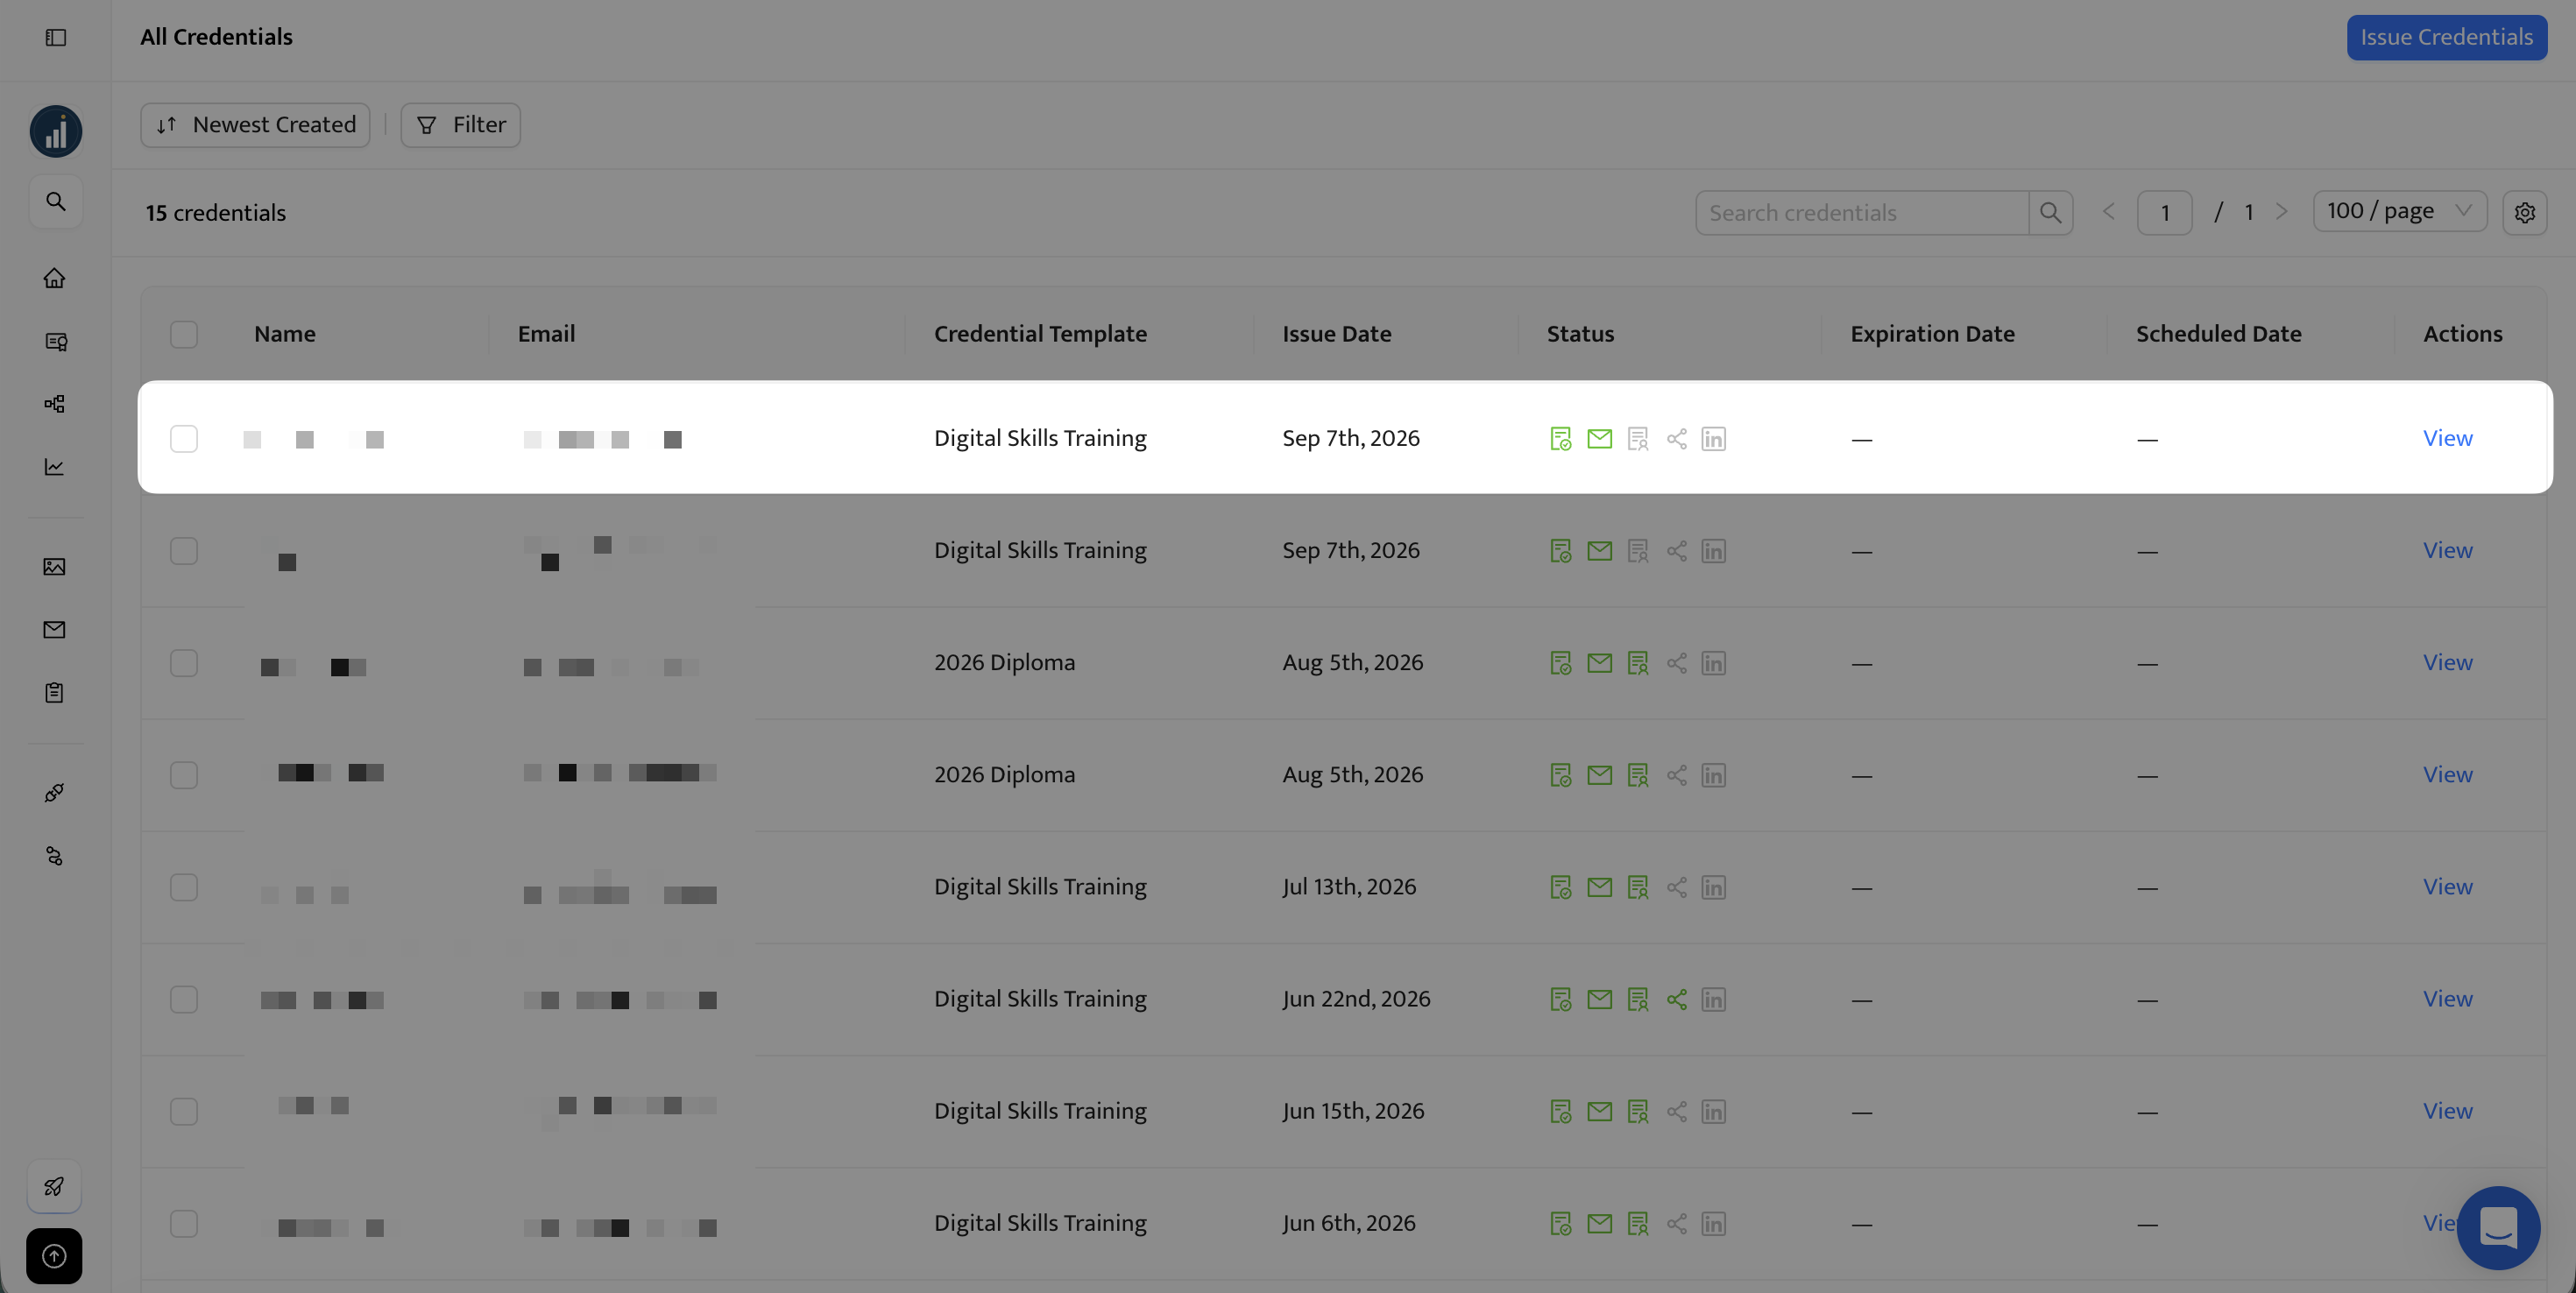
The natural question at this point: if people request their own certificates, what stops someone who wasn't there from getting one?
The answer is that requesting and receiving are separate. The form is deliberately open: anyone who opens the link can ask, which is exactly what you want, since you don't know in advance who'll need a certificate. You keep the decision about which requests become certificates.
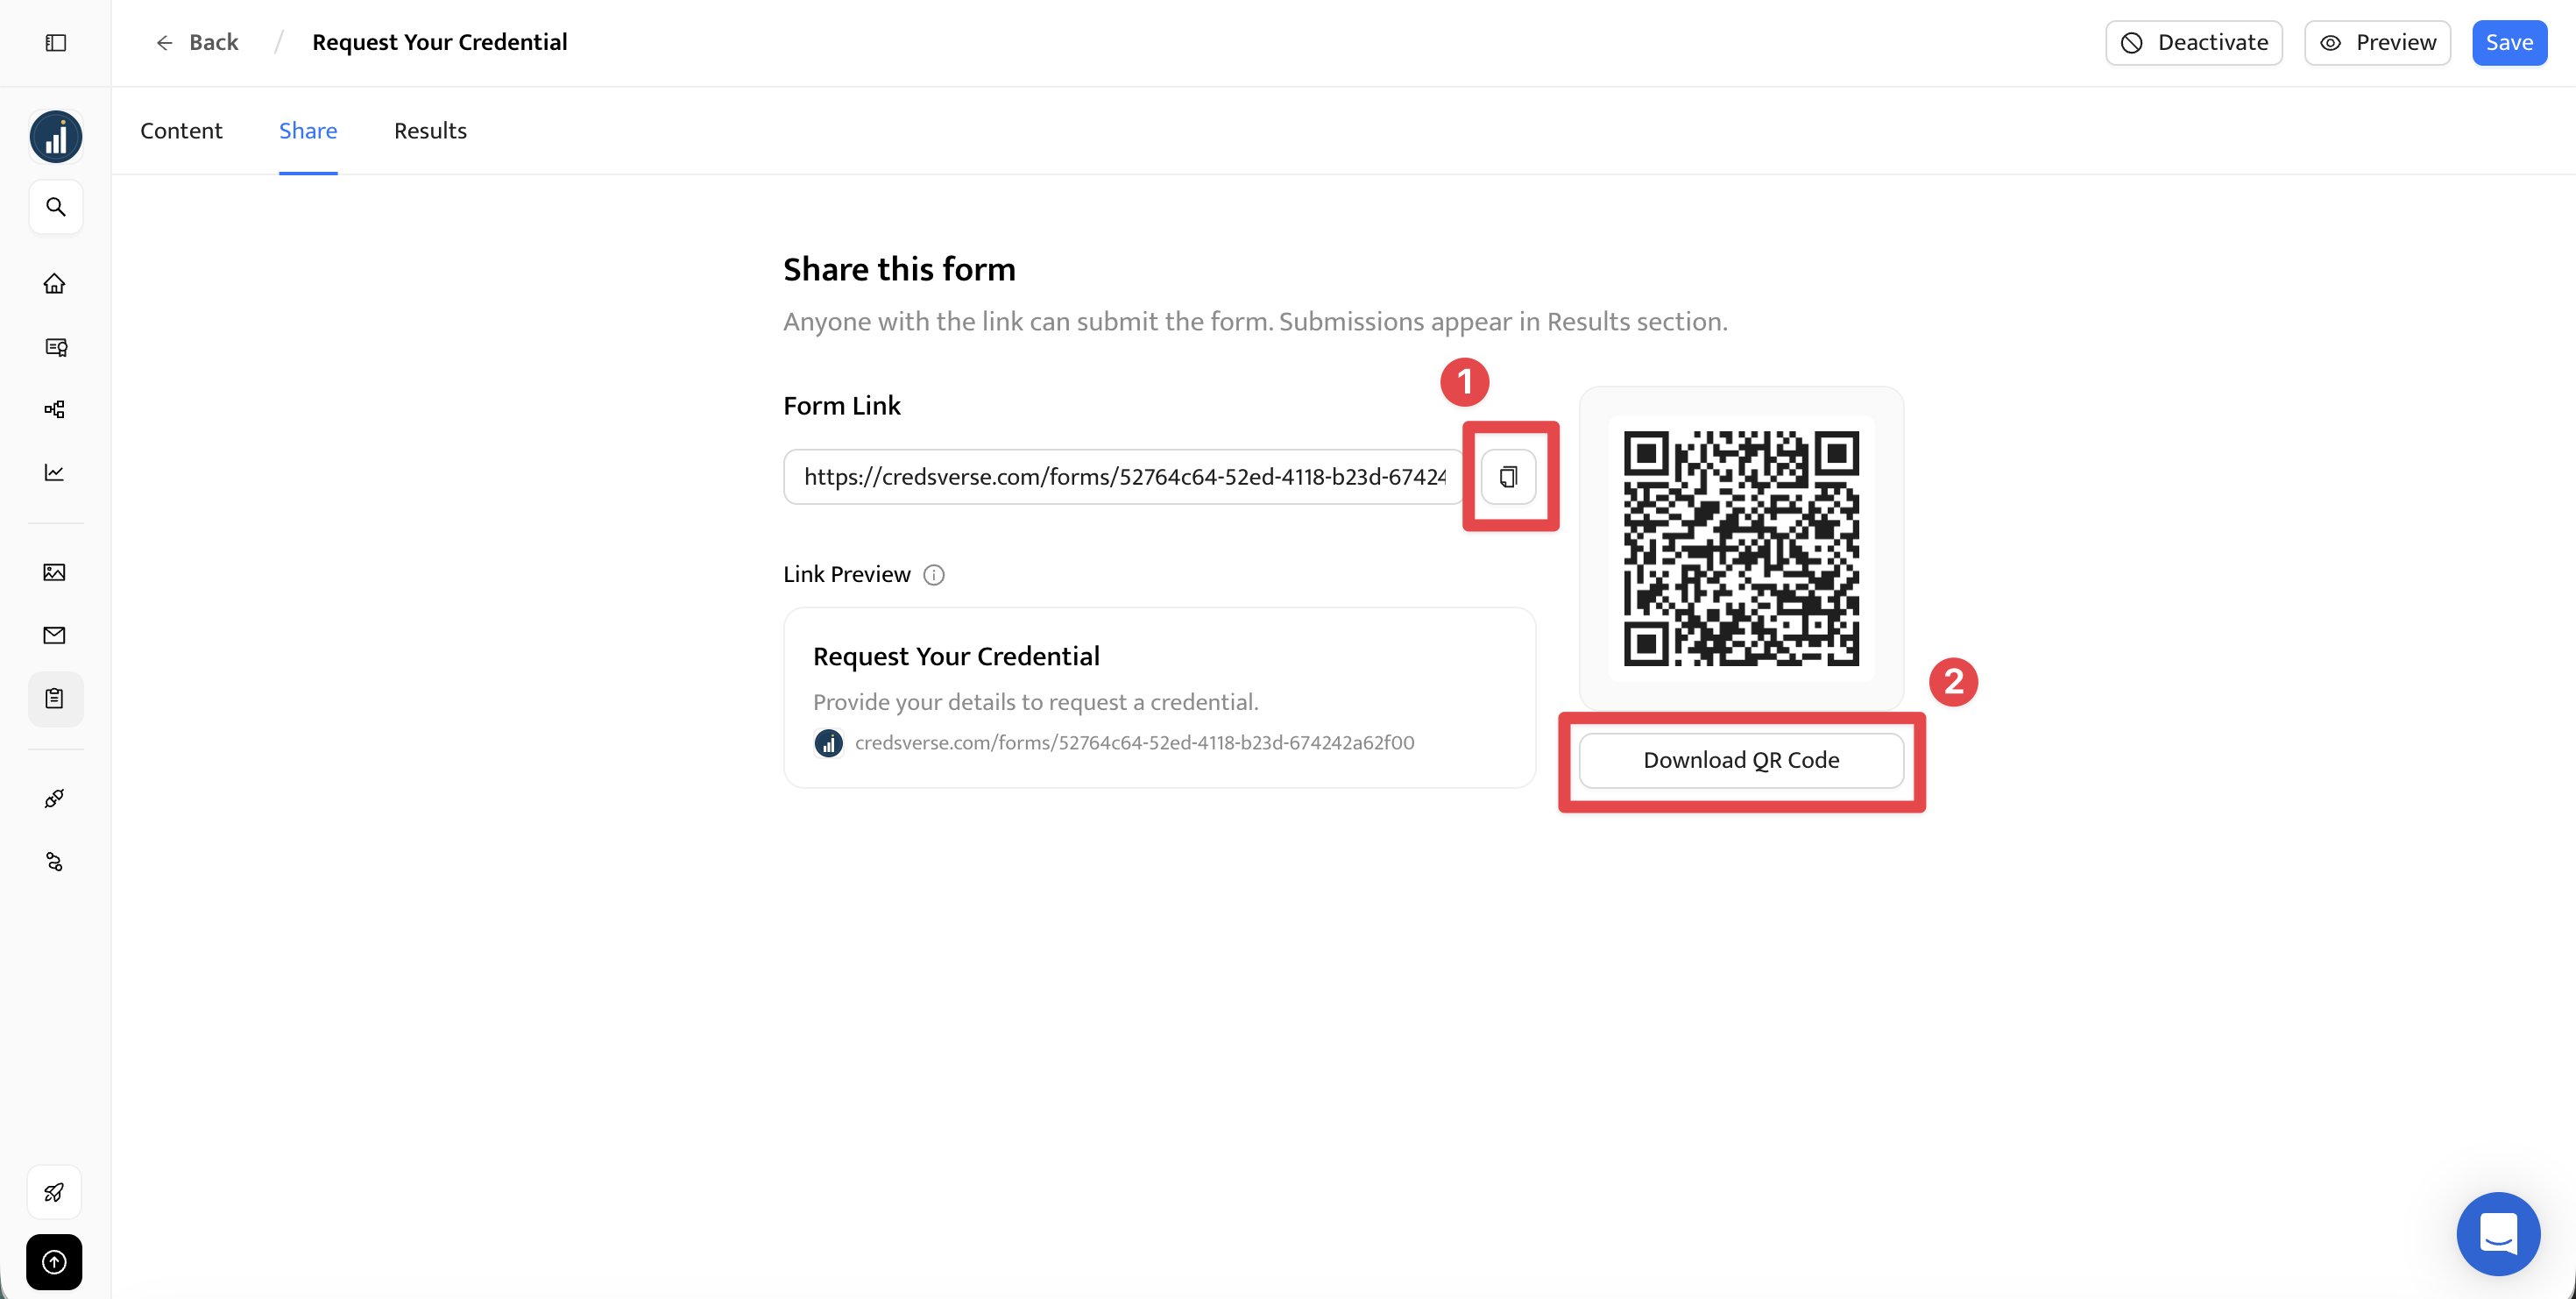
Distribution is your first and simplest filter. A form only reaches the people you put in front of it, so where you share it decides who asks in the first place.
Every form has its own URL. Drop it into a follow-up email to your attendee list, add it to a course completion page, put it in the members' area of your site, or include it in the confirmation people get when they register. The audience is whoever you sent it to.
This is the right choice for anything ongoing: self-paced courses where people finish at different times, membership certificates people need on their own schedule, a standing reissue request for anyone who's lost their copy. The link sits there and works whenever someone needs it.
The same form is available as a QR code, which changes how it's useful. Put it on your closing slide and the people still watching at the end can scan and claim. Print it on a table card at an in-person workshop. Show it on screen during the final five minutes.
A QR code shown at the end of a live session is one of the cleanest filters you can get: the people who scan it are, by definition, the people who were there when you showed it.
Neither is airtight, since links can be forwarded. But for most sessions, "the people who received the email" or "the people still in the room" is a close enough match to who earned a certificate.
The second control is the automation setting from the previous section, and it gives you a genuine approval step.
Set it to hold requests, and submissions arrive as drafts instead of certificates. Nothing sends. You open the list, check the requests against whatever you know (your attendance report, your gradebook, your membership records), and approve the ones that hold up.
Use this whenever the certificate carries weight: professional credentials, compliance training, anything with a result behind it.
A rule of thumb: if an extra certificate costs you nothing, issue it immediately. If it would cost you something, review first. Attendance certificates and reissues sit comfortably in the first group. Anything a regulator, employer, or licensing board will look at belongs in the second.
One practical note: the same person can submit more than once, and each submission is treated as a new request. Review mode catches that too: duplicates show up side by side in the list, and you approve one.
Every submission is recorded, whether you're issuing automatically or not.
The form itself has a Results tab listing every response that's come in, with what each person entered and when. That's your record of who asked, and it works even if you never build an automation. Plenty of people start with just the form and add issuing later.
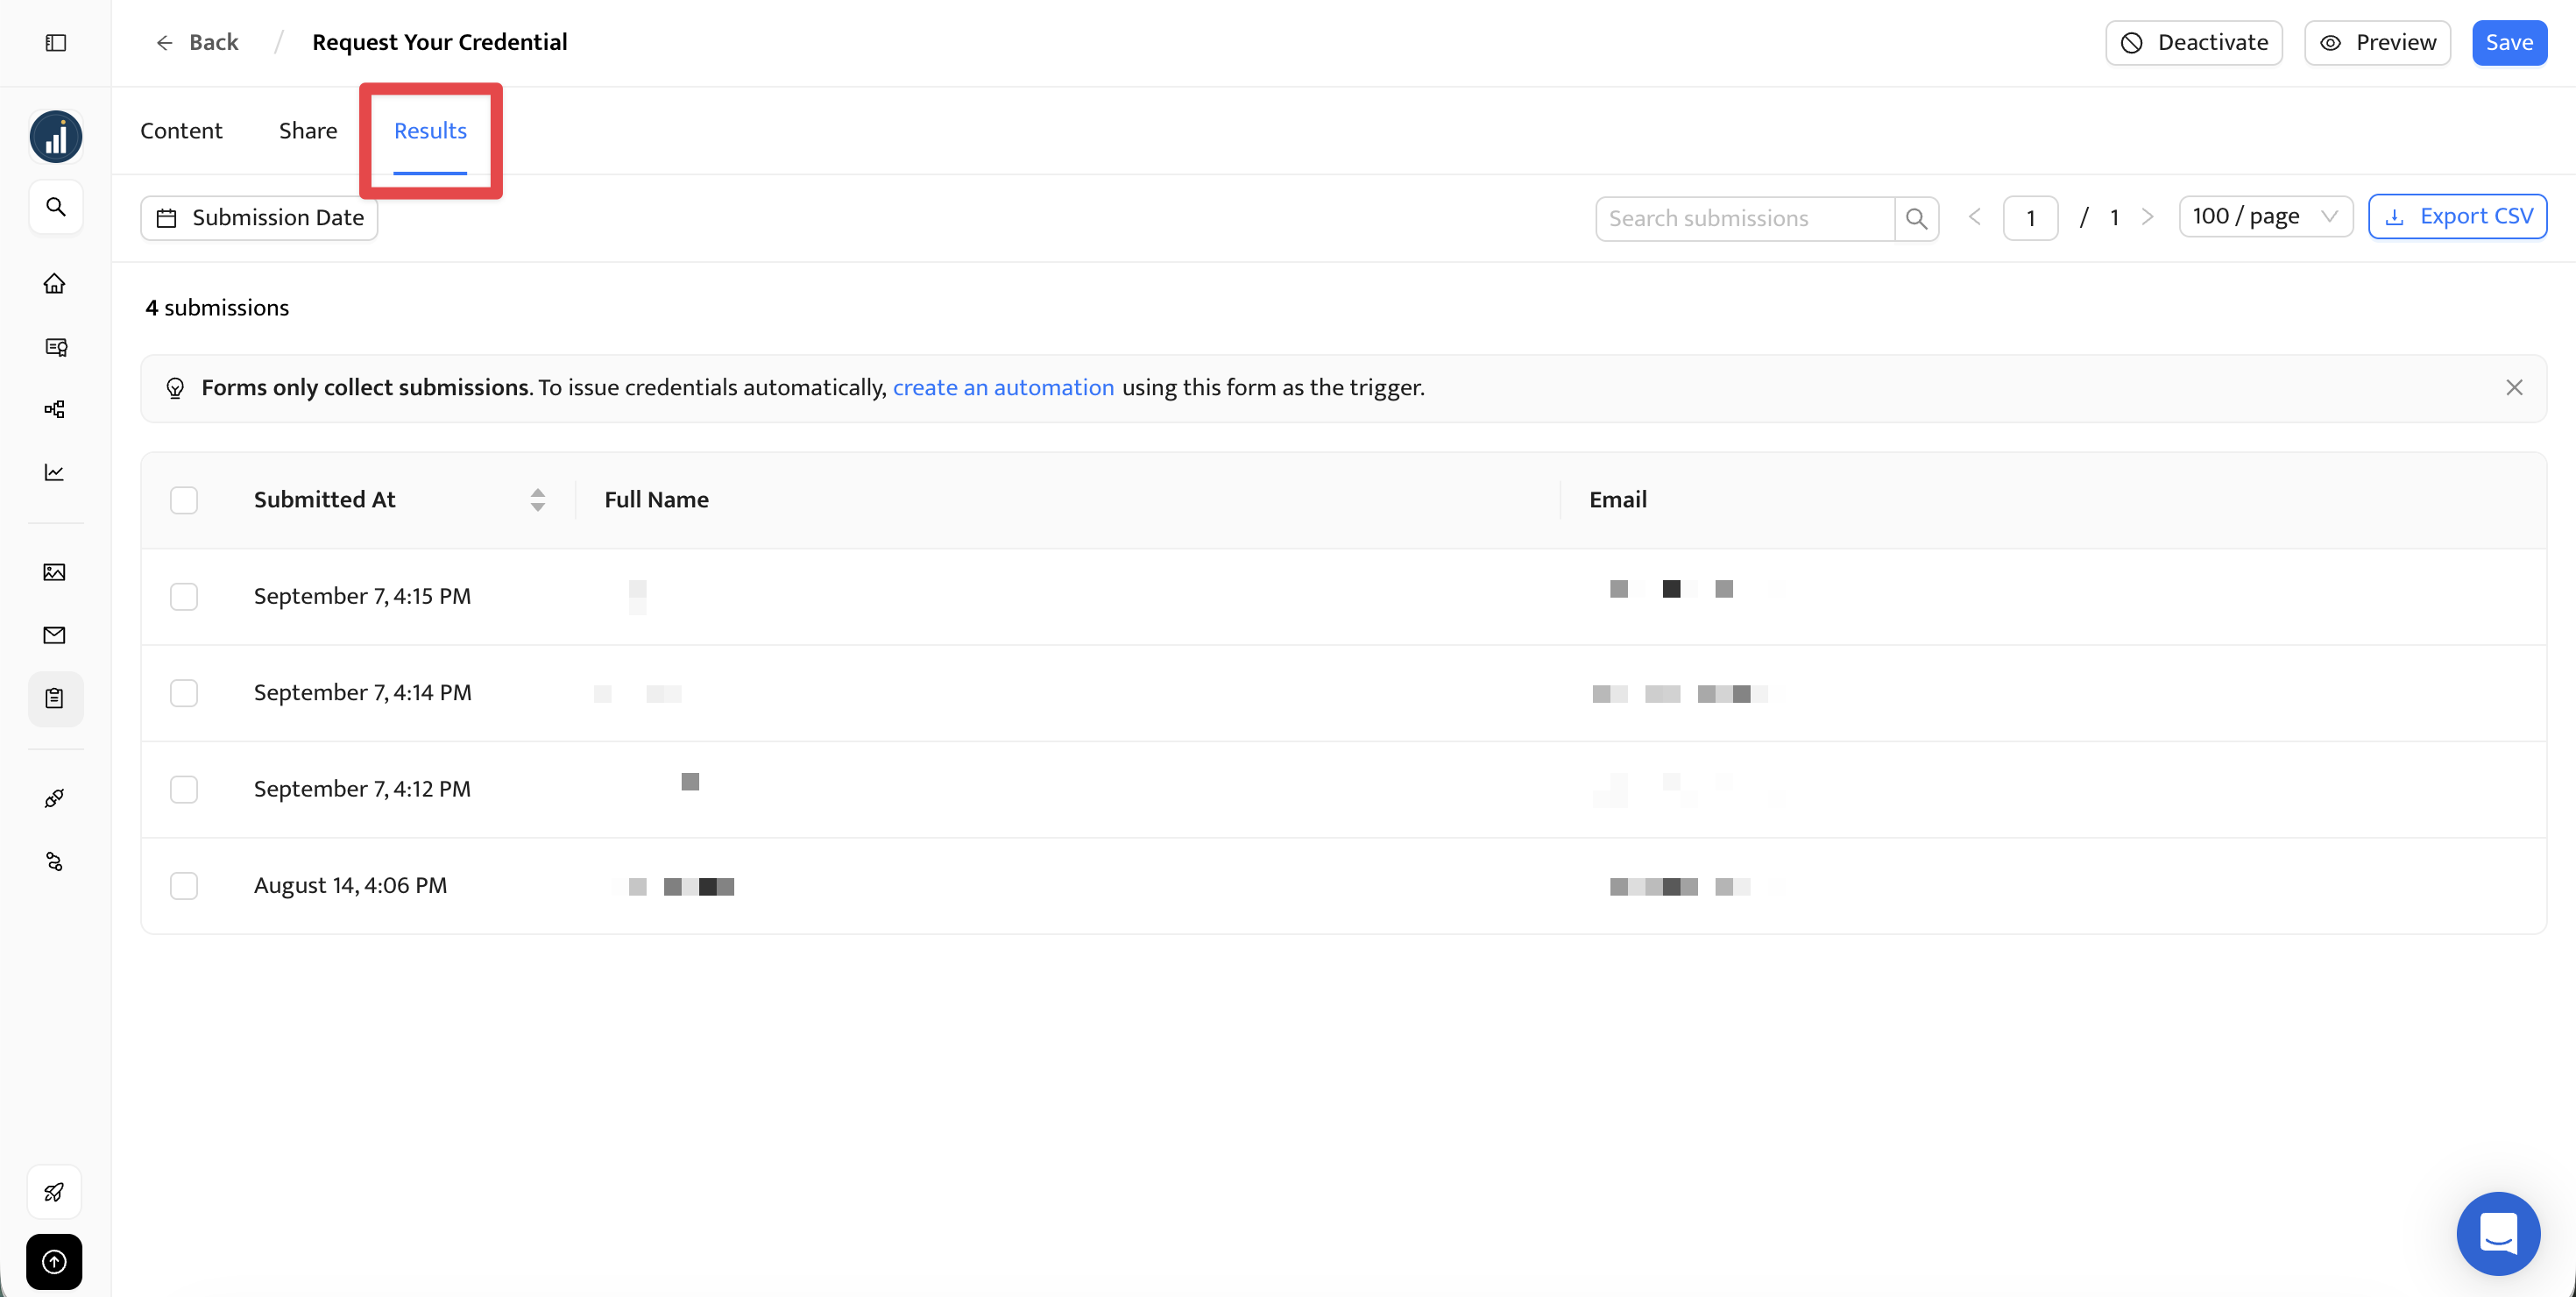
If you are running an automation, its history shows every time it fired and every certificate it produced. Between the two, you can answer the questions that come up later: how many people requested certificates after a session, whether a particular person submitted, whether someone's certificate was actually issued or is still sitting as a draft.
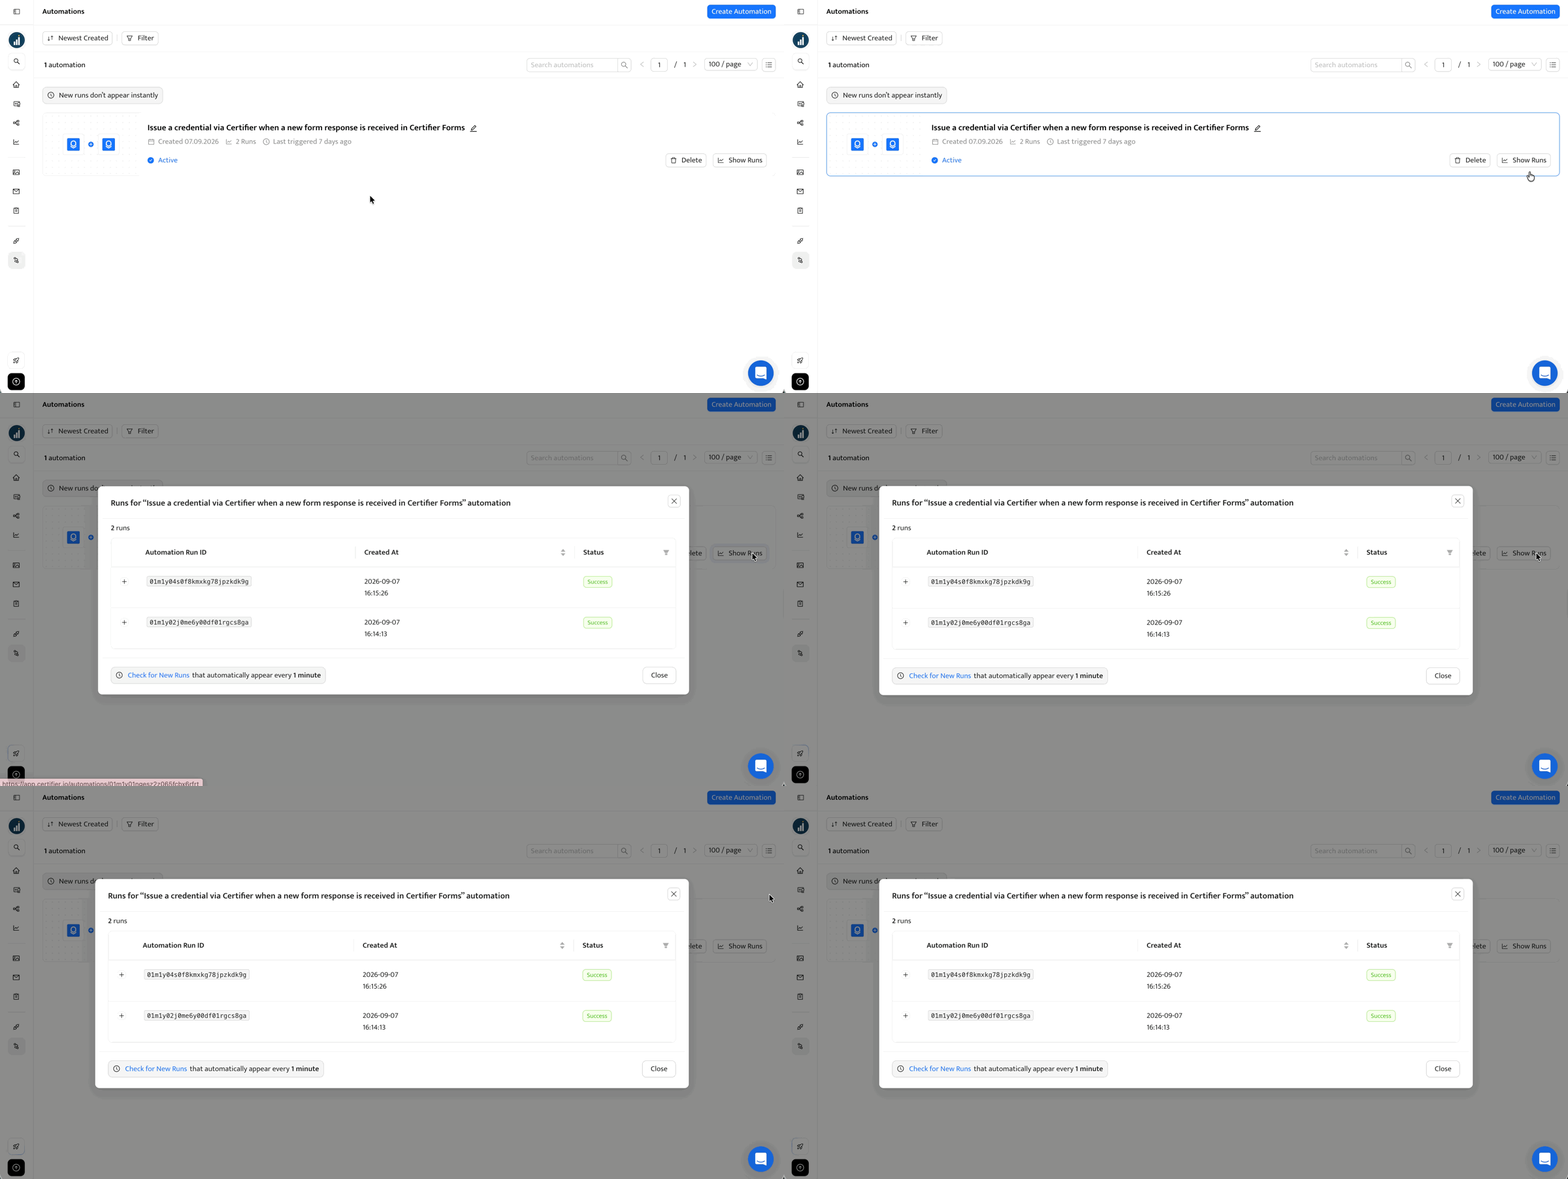
Worth checking after your first live session, if only to see how many requests arrive when you're not chasing anyone.
From the recipient's side, it's one form and one email. They fill out the form, submit it, and the certificate arrives. No account, no password, no software to install. If they lose the email later, the certificate lives at its own link, so it's still there.
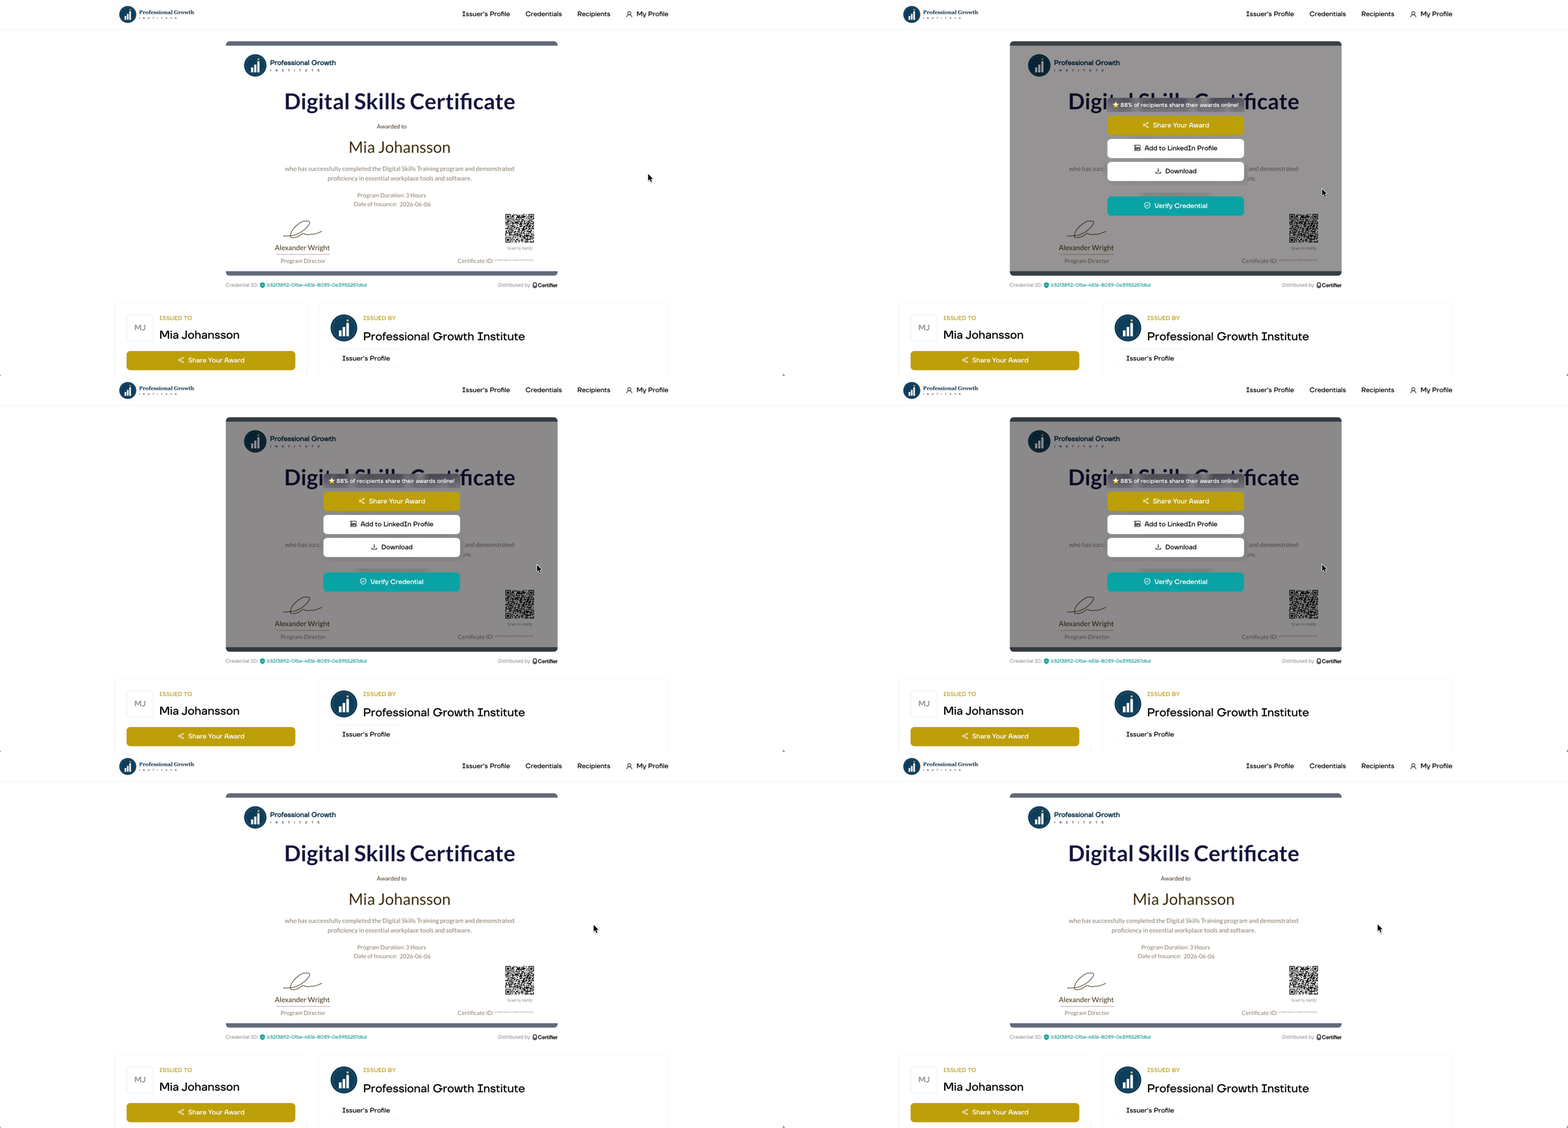
They receive a verifiable digital certificate, not a PDF attachment. Anyone they show it to, whether an employer, a licensing board, or a client, can confirm it's real and that you issued it, without contacting you. They can add it to LinkedIn, share the link, or download it.
Certificate requests won't stop arriving. What changes is whether they arrive as emails you answer one by one, or as form submissions that resolve themselves.
Forms and automations are available on every Certifier plan. If you haven't issued credentials before, sign up for a free account and start with your next session.

- copywriting
- B2B content marketing
- content strategy
- on-page SEO
- storytelling
Growth Marketer (Freelance)
Anita Coltuneac is a freelance B2B SaaS marketer with 5+ years helping tech companies grow organic visibility, build authority, and support pipeline. She uses storytelling to turn product expertise into useful content.


