Trusted by:
Updated: December 05, 2025
8 min read
How to Make Automated Personalized Certificates: A 2026 Guide
Unlock the power of automation and see how quickly you can create personalized certificates in 2026. Compare manual vs automated certification workflow. And see how Certifier will help you set up a batch of personalized certificates in minutes!
Creating personalized certificates manually is a pain. You craft, send, and customize each certificate by hand. Getting it to a lot of people can take days or even weeks. Also, mistakes are more likely to happen since manual data input is quite prone to errors.
It's not the same with automated personalized certificates. Automation makes it easy to quickly make and send thousands of different certificates in minutes. Especially if you use a certificate generator that minimizes the amount of work involved (hello, Certifier!).
We’ll show you how to finally create DIY personalized certificates with the tool that makes the work easier and faster.
What is the role of automation in personalized certificates?
In a nutshell: automated certification workflow allows you to generate personalized certificates tailored to each recipient without manual effort. When you upload the data, the bulk certificate generator fills out the needed information on its own. This allows you to generate and send even thousands of unique certificates in a matter of few clicks. It minimizes both – the time spent on each certificate and the risk of making any error.
Manual vs automated certification workflow
Crafting beautiful certificates manually, without the aid of suitable software, could turn into a significantly time-intensive task. You have to design the theme of the certificate design, then, one by one, enter each recipient’s data.
In the end, you still have to send dozens of the same emails to different email addresses, updating the recipient’s name in the subject line every time and copy-pasting the content. Besides being prone to human error, this tedious process is utterly inefficient as a whole... But this doesn't have to be your case.
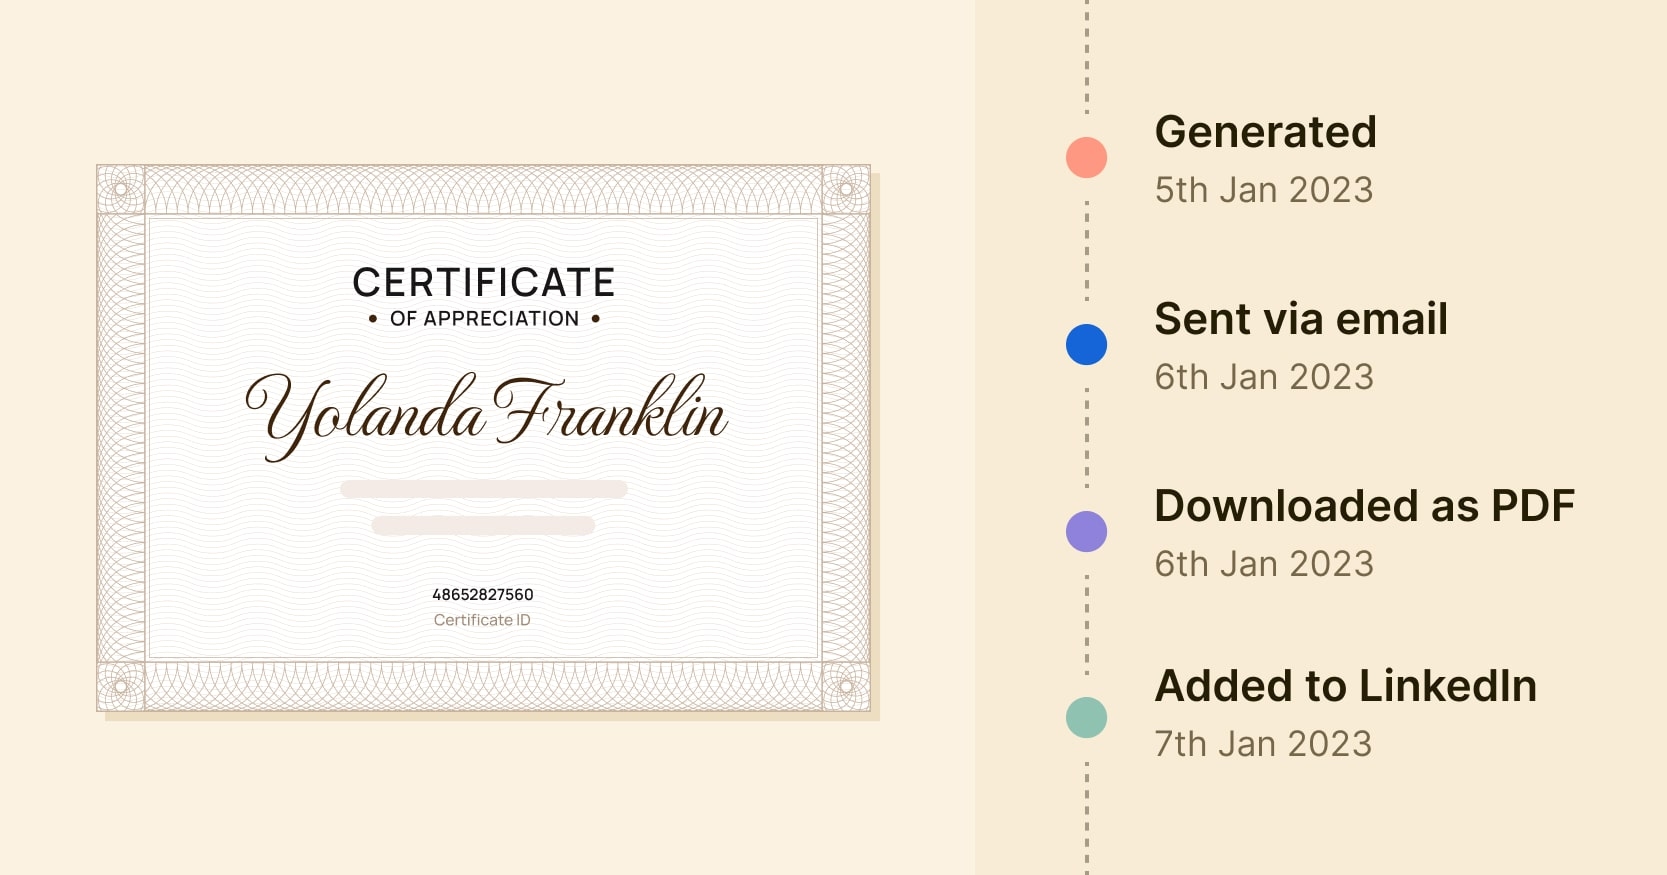
Certifier is the digital certificate maker that provides comprehensive features for auto certificates – from creation to management. And there will be nothing surprising about it, except for the fact that it allows its users to create personalized certificates in a matter of a few minutes.
(According to our data, the top 1% of Certifier issuers create personalized certificates in 5 minutes).
Certifier is this knight on the white horse with a map in his hand. It will keep you from getting into trouble and streamline the certification process for you.
Choose professionally-designed certificate templates.
Put your own stamp on editable certificates.
Generate even thousands of personalized certificates with different names at once.
Send personalized certificates with a one-click.
Check the status of your certificate.
Do you want to get into details?
Create and Send Digital Credentials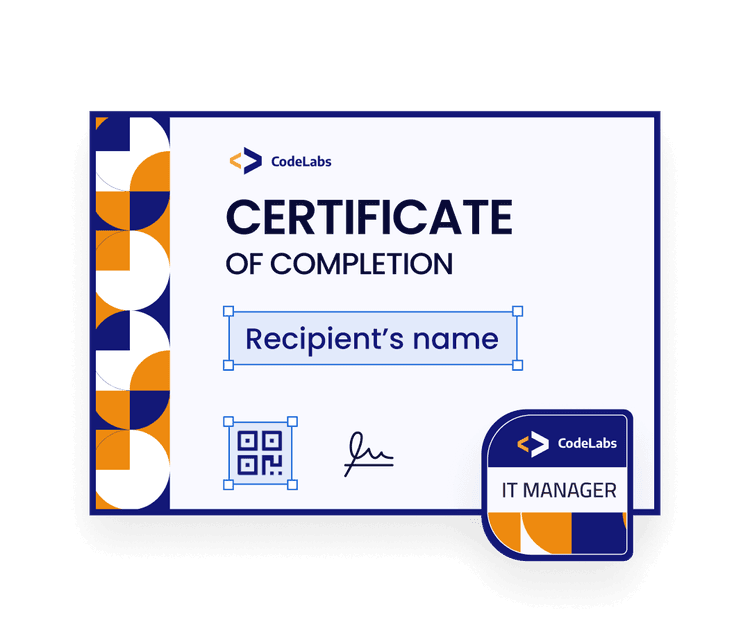
Step 1: Sign up to Certifier to create a personalized certificate
Sign up for a free Certifier account to get access to the super handy certificate editor with which it all begins. You can also connect your Google account to make signing up even easier.
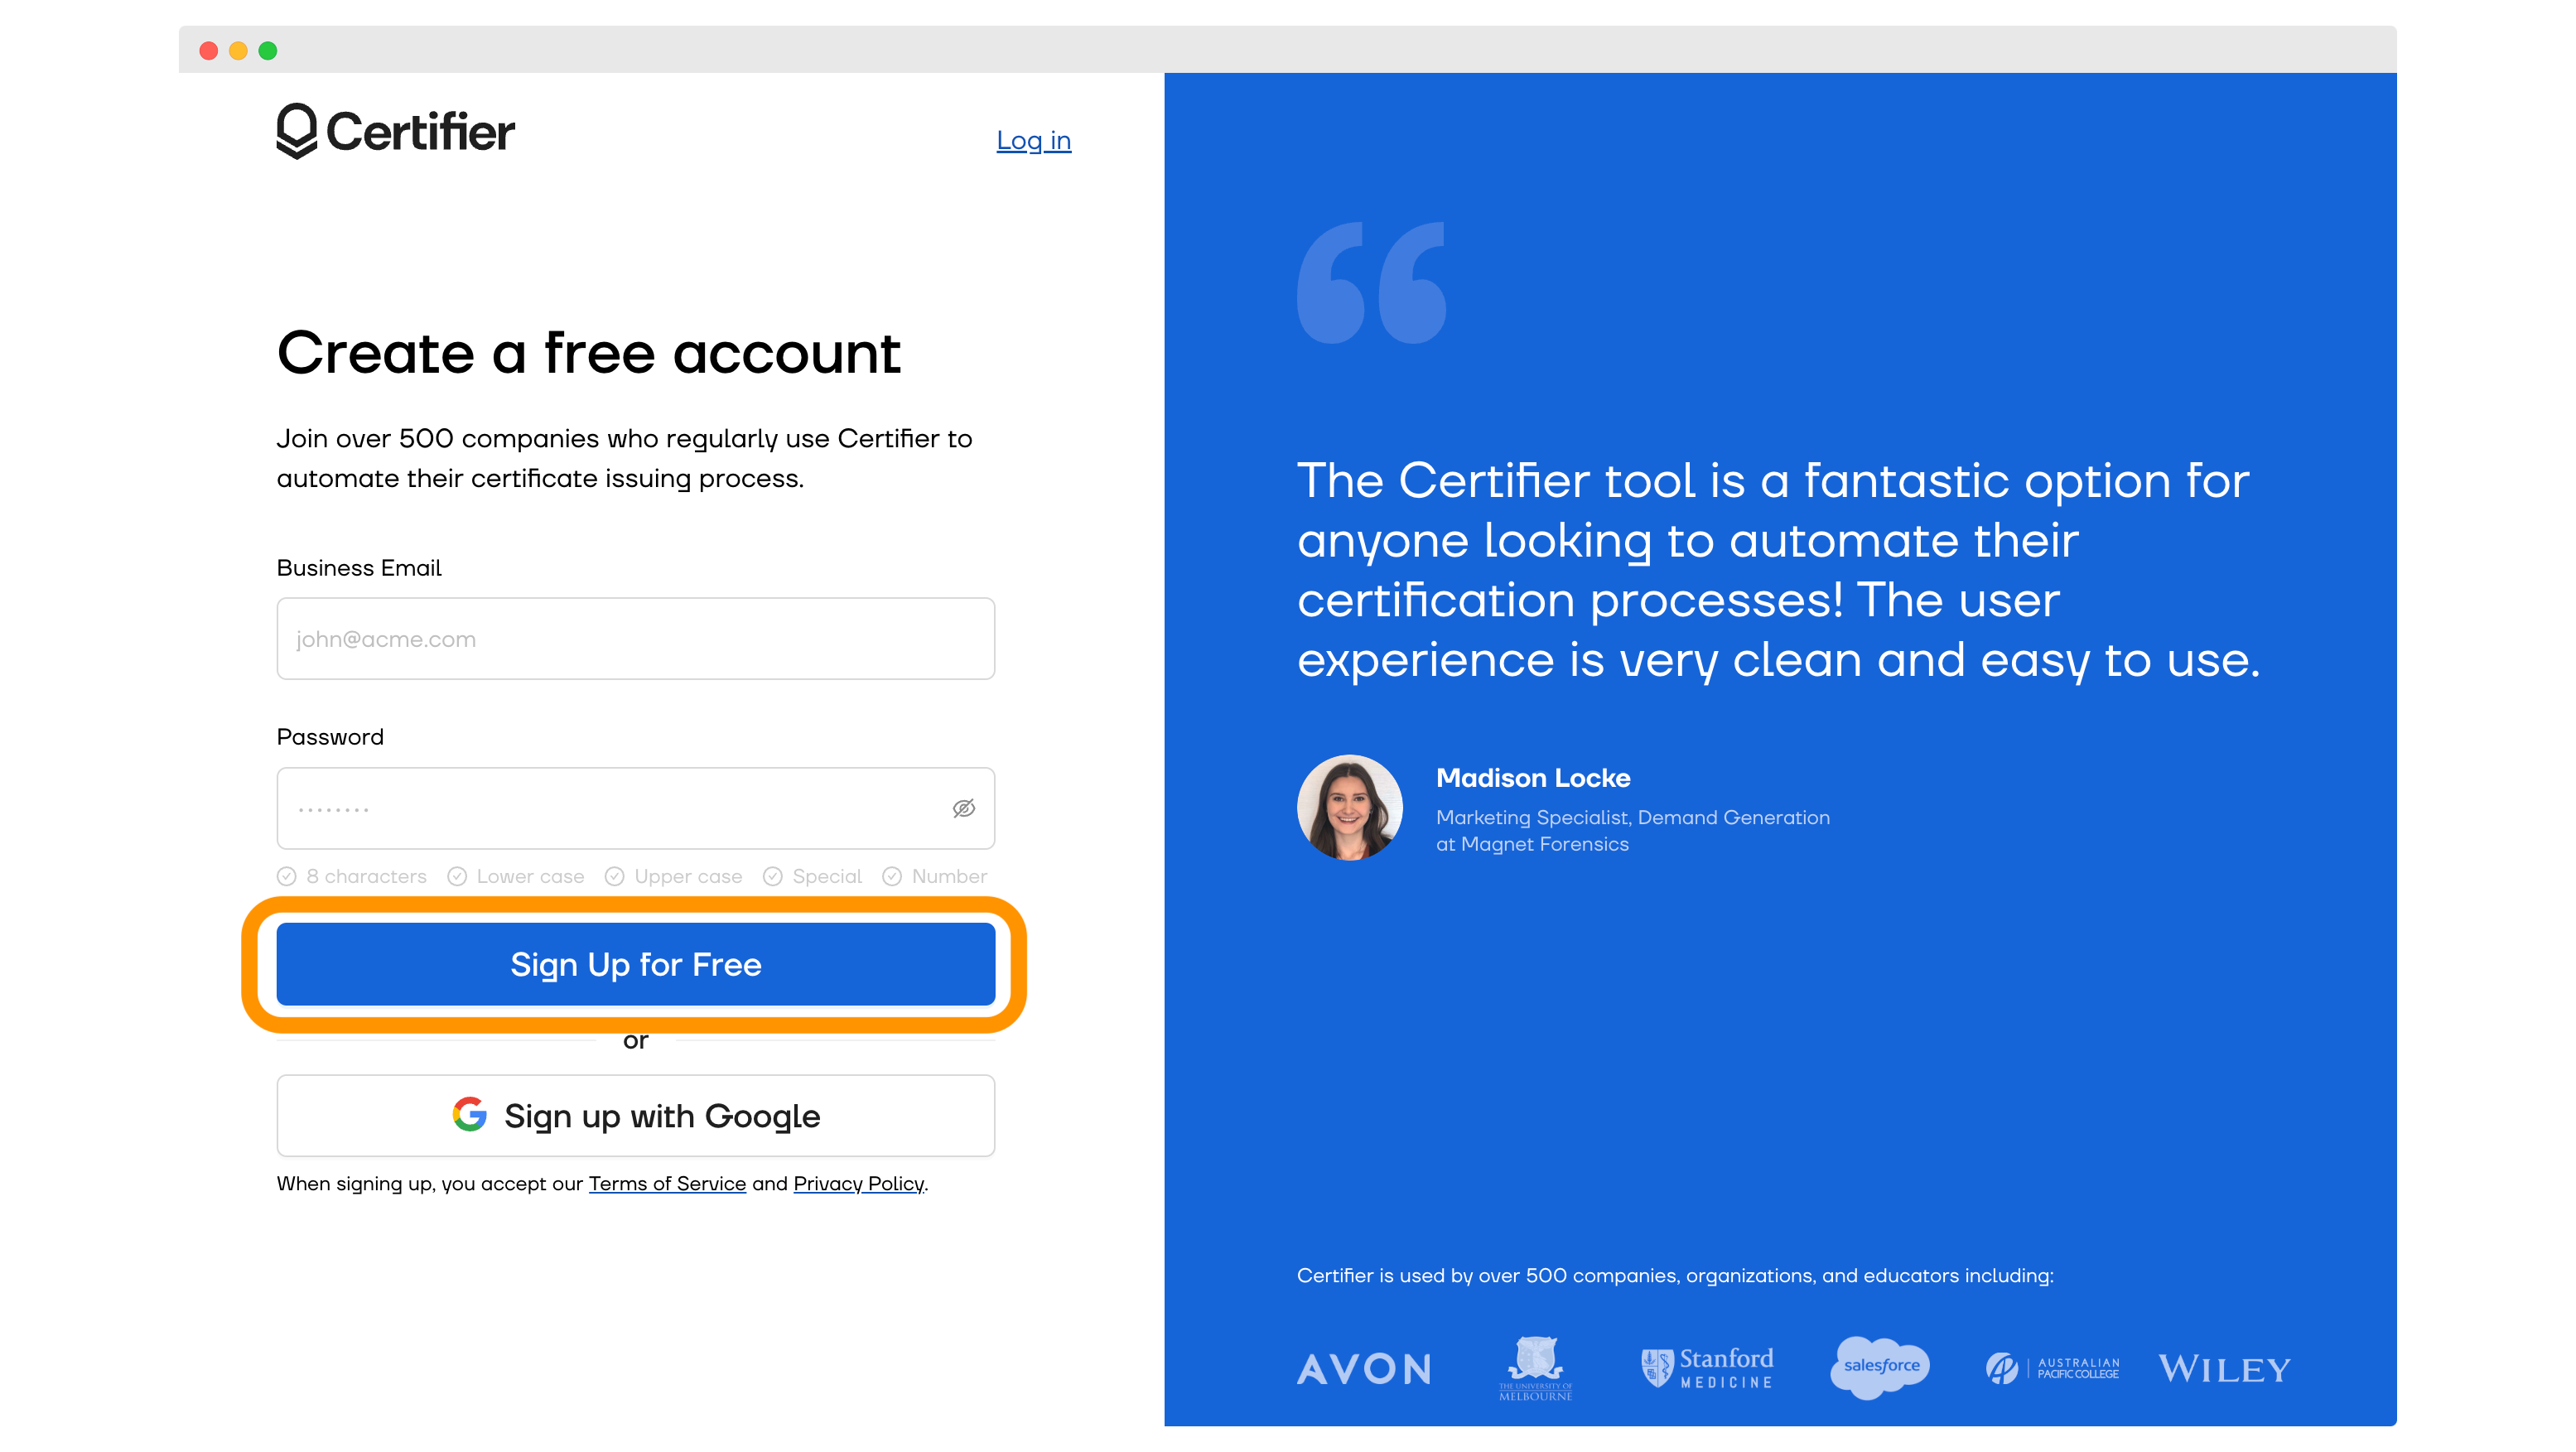
It costs you nothing to create the Certifier account. Up to 250 certificates, you can use this certificate creator totally for free (mass generation, sending, and thousands of certificate design templates included!). Your email address and password are all you need to do it.
Please note: You don’t need any third-party software to generate your personalized certificates. The whole process takes place in one free app – Certifier.
Then, if you automate the certification, you can track the certification program progress with Certifier. Under the Credentials tab you can have an automated certification workflow under control. See how many:
Emails were bounced and need to be resent.
Emails were delivered.
Emails were opened.
Emails were engaged with.
Shares the credentials got on social media like LinkedIn.
Step 2: Choose a ready-made certificate template
Go to the Designs within the Certifier tool and click the Create Design button. Choose Certificate Design from the list.
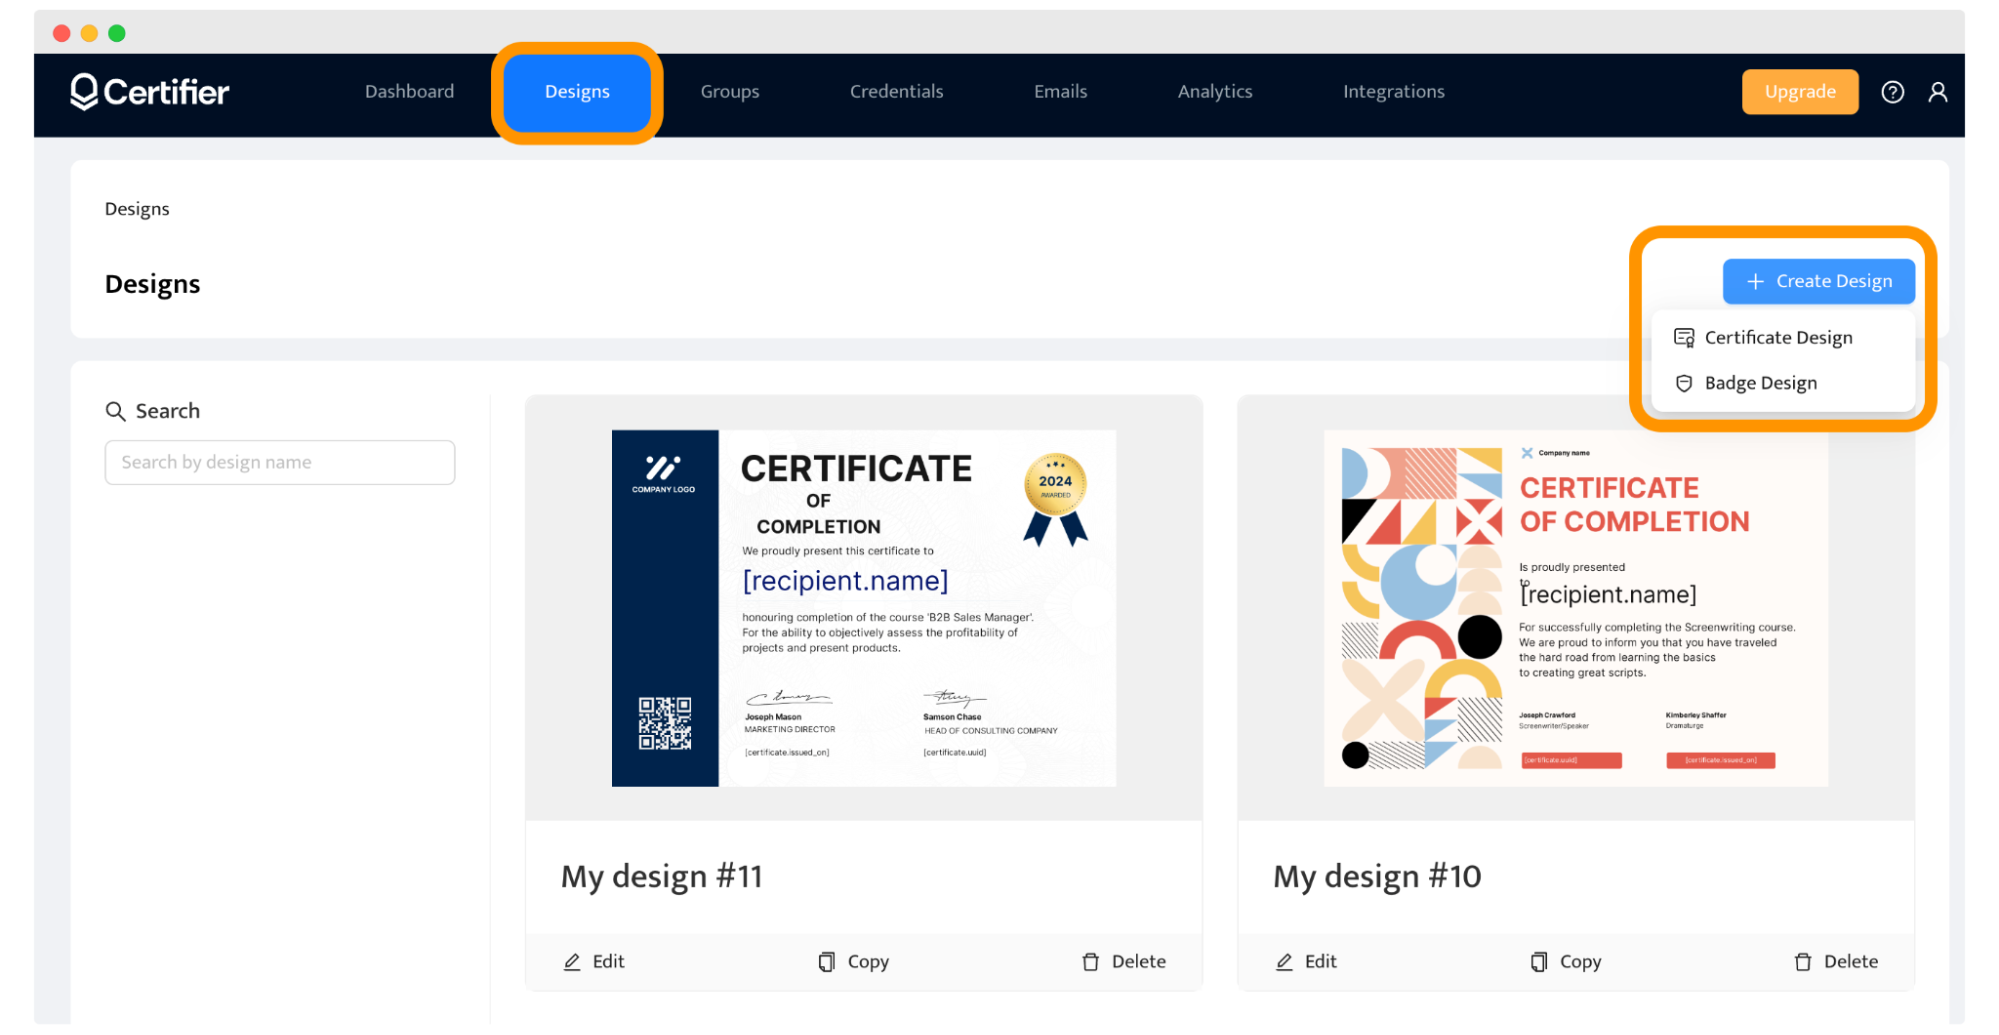
Now comes the fun part. You can unleash your creativity. Choose from 2000 + Certifier templates – all of them are fully customized and free to suit your branding needs. If you still prefer to create something on your own, just start crafting your certificate from scratch (though we still recommend templates).
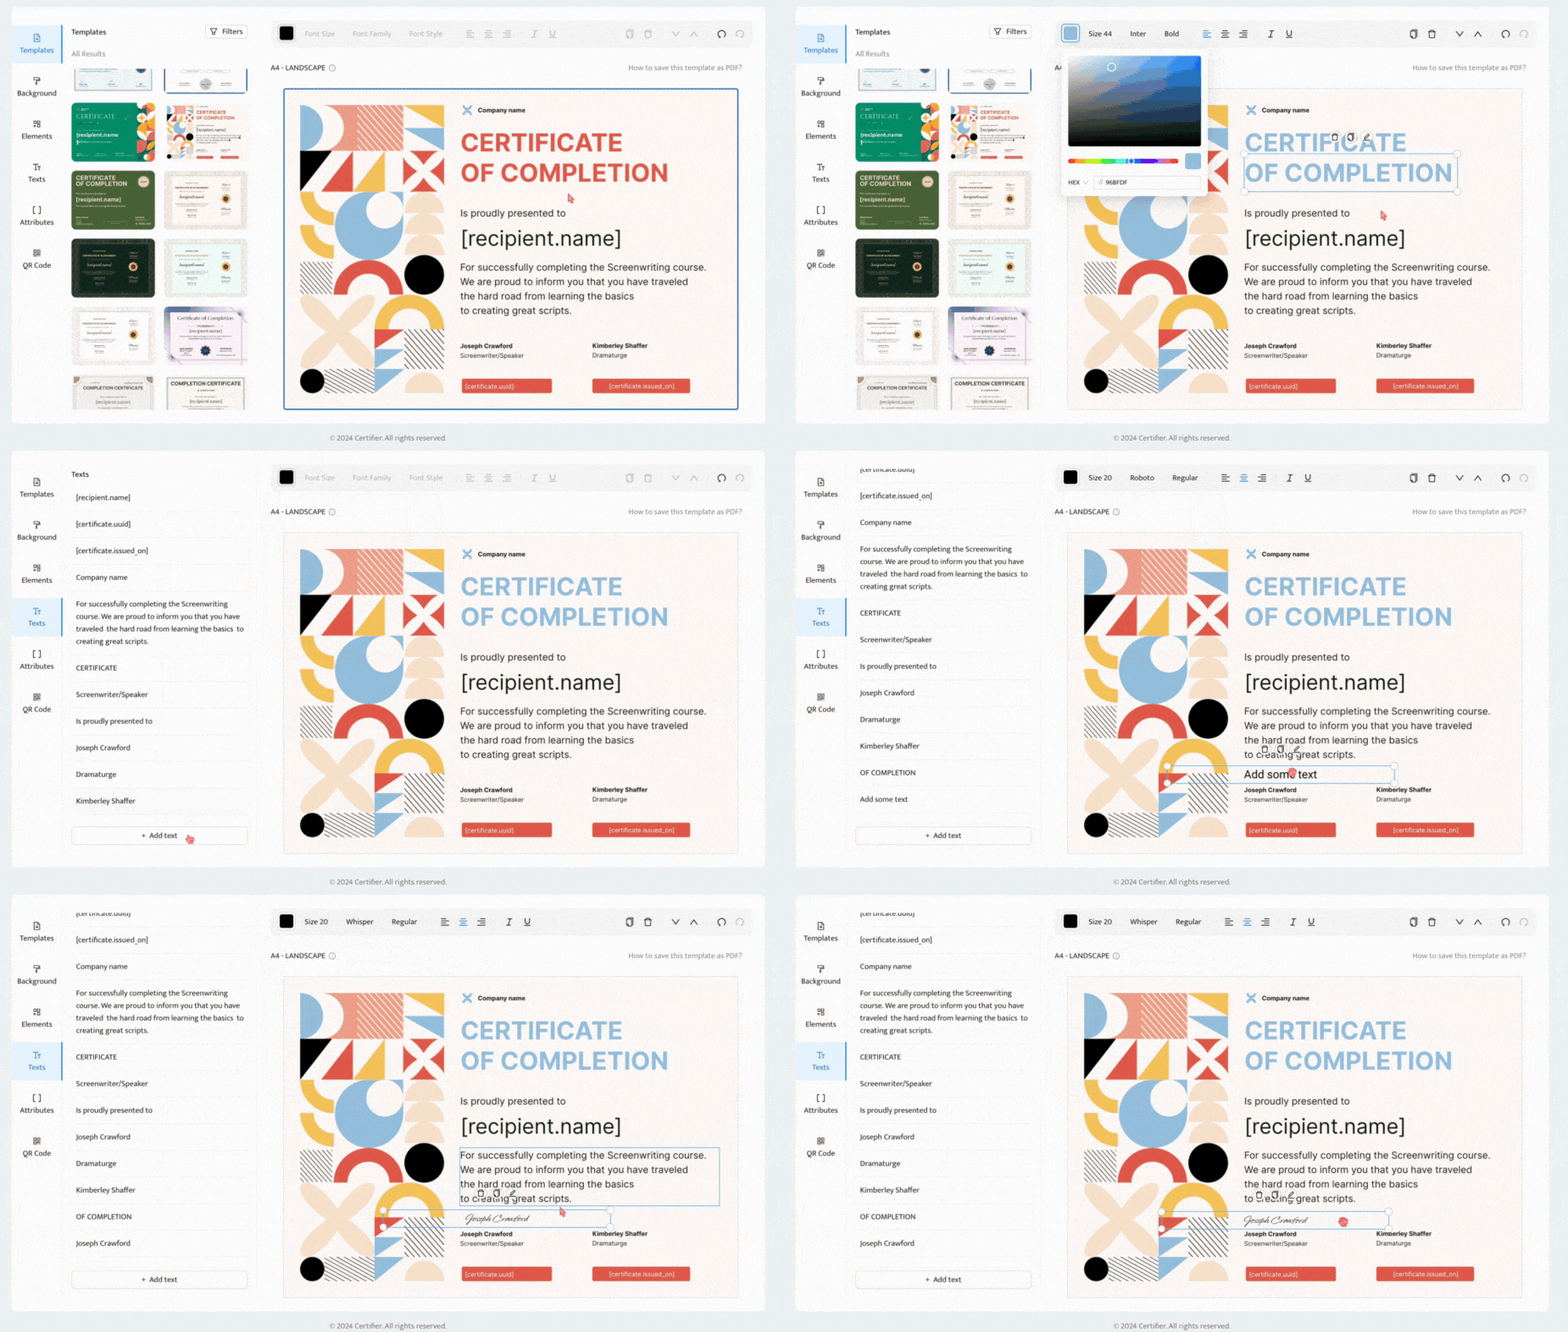
In the Certifier drag-and-drop certificate builder, you have many editing options, such as adding your own elements or custom backgrounds. It's also possible to remove elements from the template if they don't suit you. You can always change the colors and certificate fonts as well.
So if you want to include your own background, logo, or any other graphic element that comes to mind – you can do that just by clicking Elements from the left-hand menu and then the Upload Image button.
Step 3: Add dynamic attributes to create personalized certificates automatically
In the Certifier editor, there is a special tab called “Attributes.” This conceals the real certificate automation power, which allows you to customize certificates for every recipient.
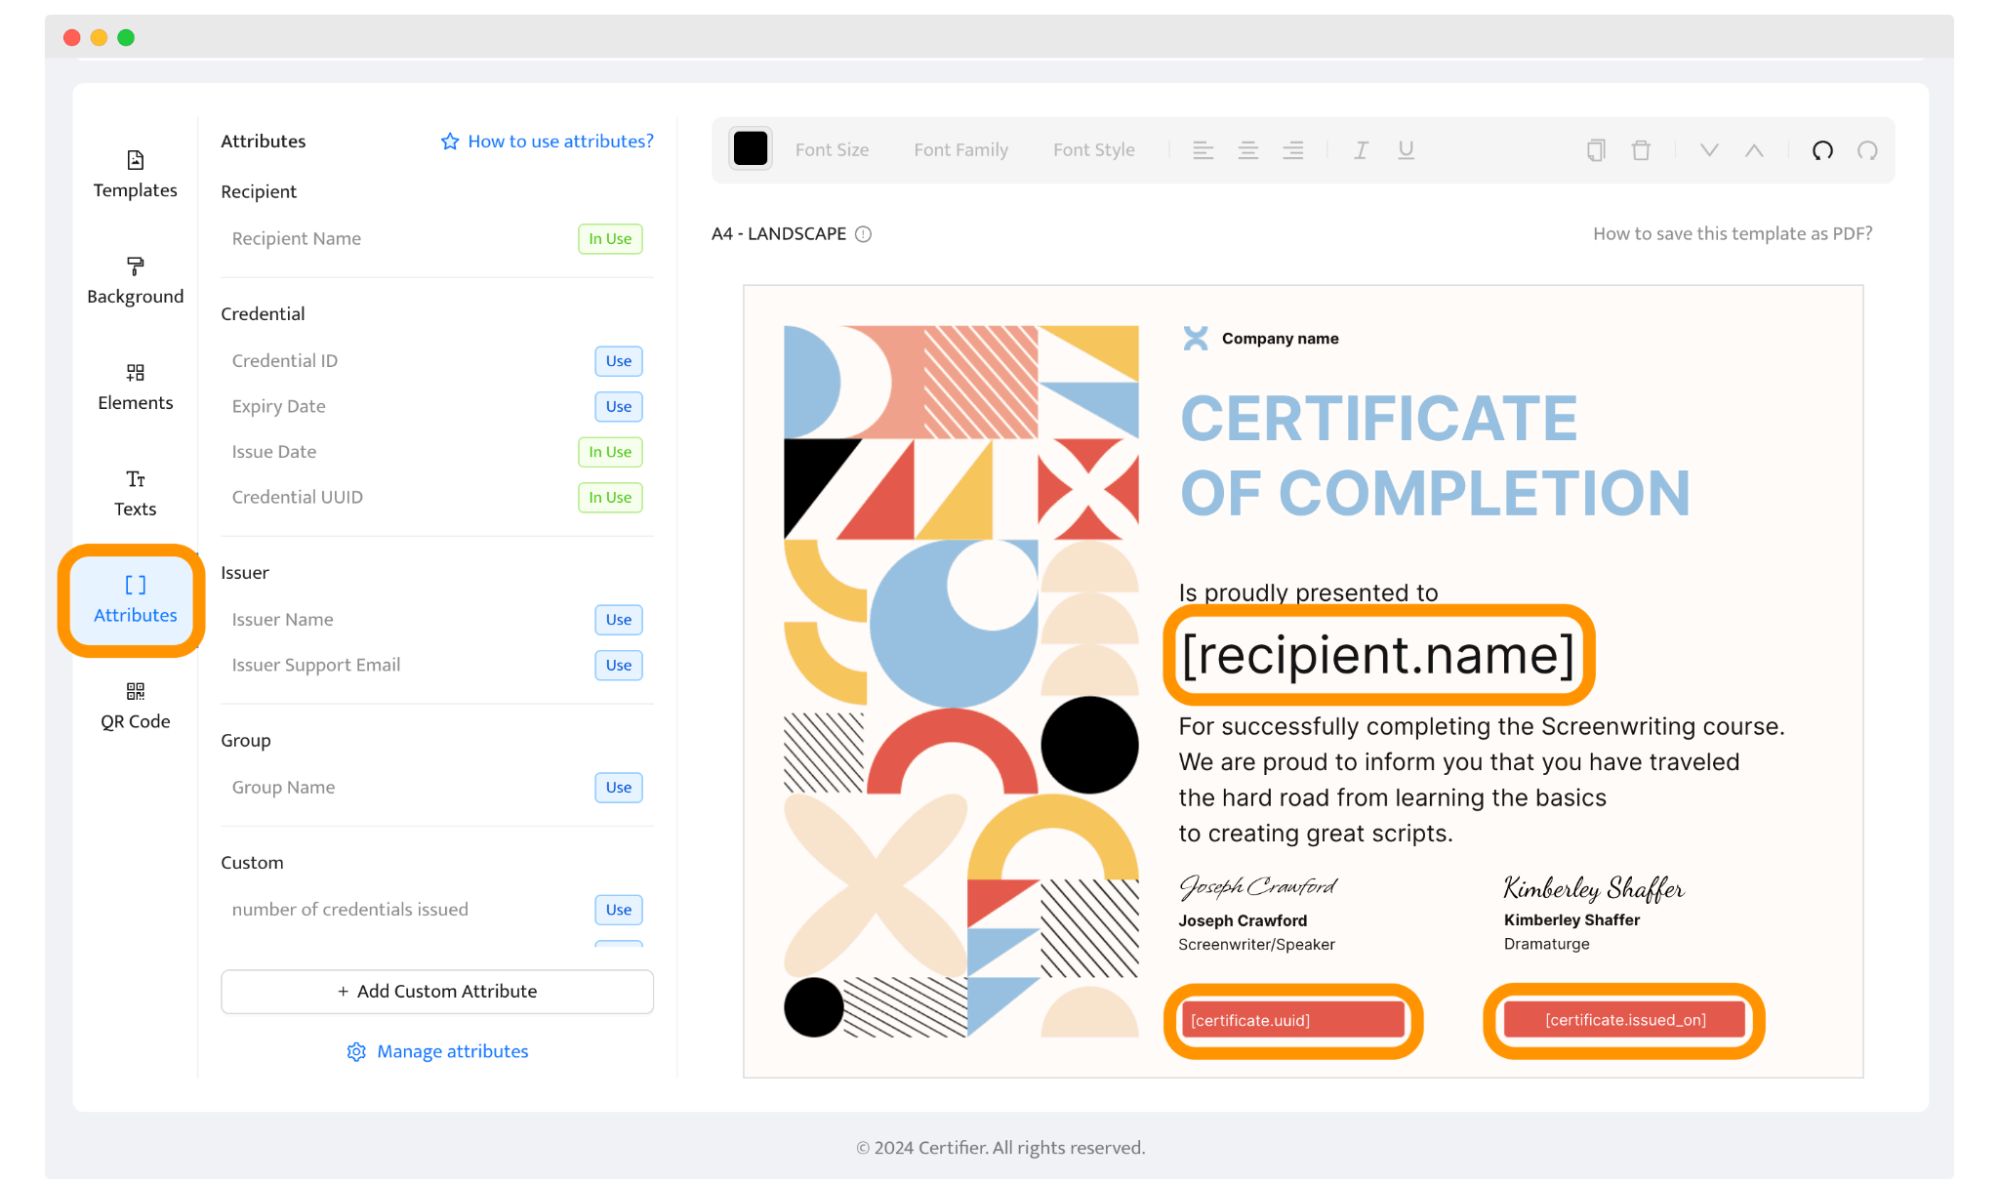
Dynamic attributes in certificate templates are like fill-in-the-blank spots. They let you put in different information every time you use the template.
If you have a spot labeled [recipient.name], when you make a certificate, Certifier replaces that with the real name of the person getting it. This way, you can use one template to make lots of personalized certificates at once.
Tip: You can also add your own custom attributes and manage them all from one single dashboard. These can be things like a person's age, job title, grade, score, or any other information you want to add. You can also add custom messages or images to create a more personalized certificate.
Bonus: Personalize the certification experience even more
The Certifier’s dashboard allows you to not only use dynamic attributes and personalize the certificate designs. It allows you to create branded email templates to send certificates.
It's up to you whether you use default Certifier email templates or not. If you want to, you can create fully personalized emails. With Certifier, you can customize anything – body, subjects, CTAs, text, buttons, backgrounds, logos, and more.
To create your own email template, click on the Emails tab and then click Create Email Template. Next, choose which type of email you want to create now. By default, Certifier allows you to send three types of emails – delivery, reminder, and expiration. This is a great way to re-engage the recipients through follow-up emails.
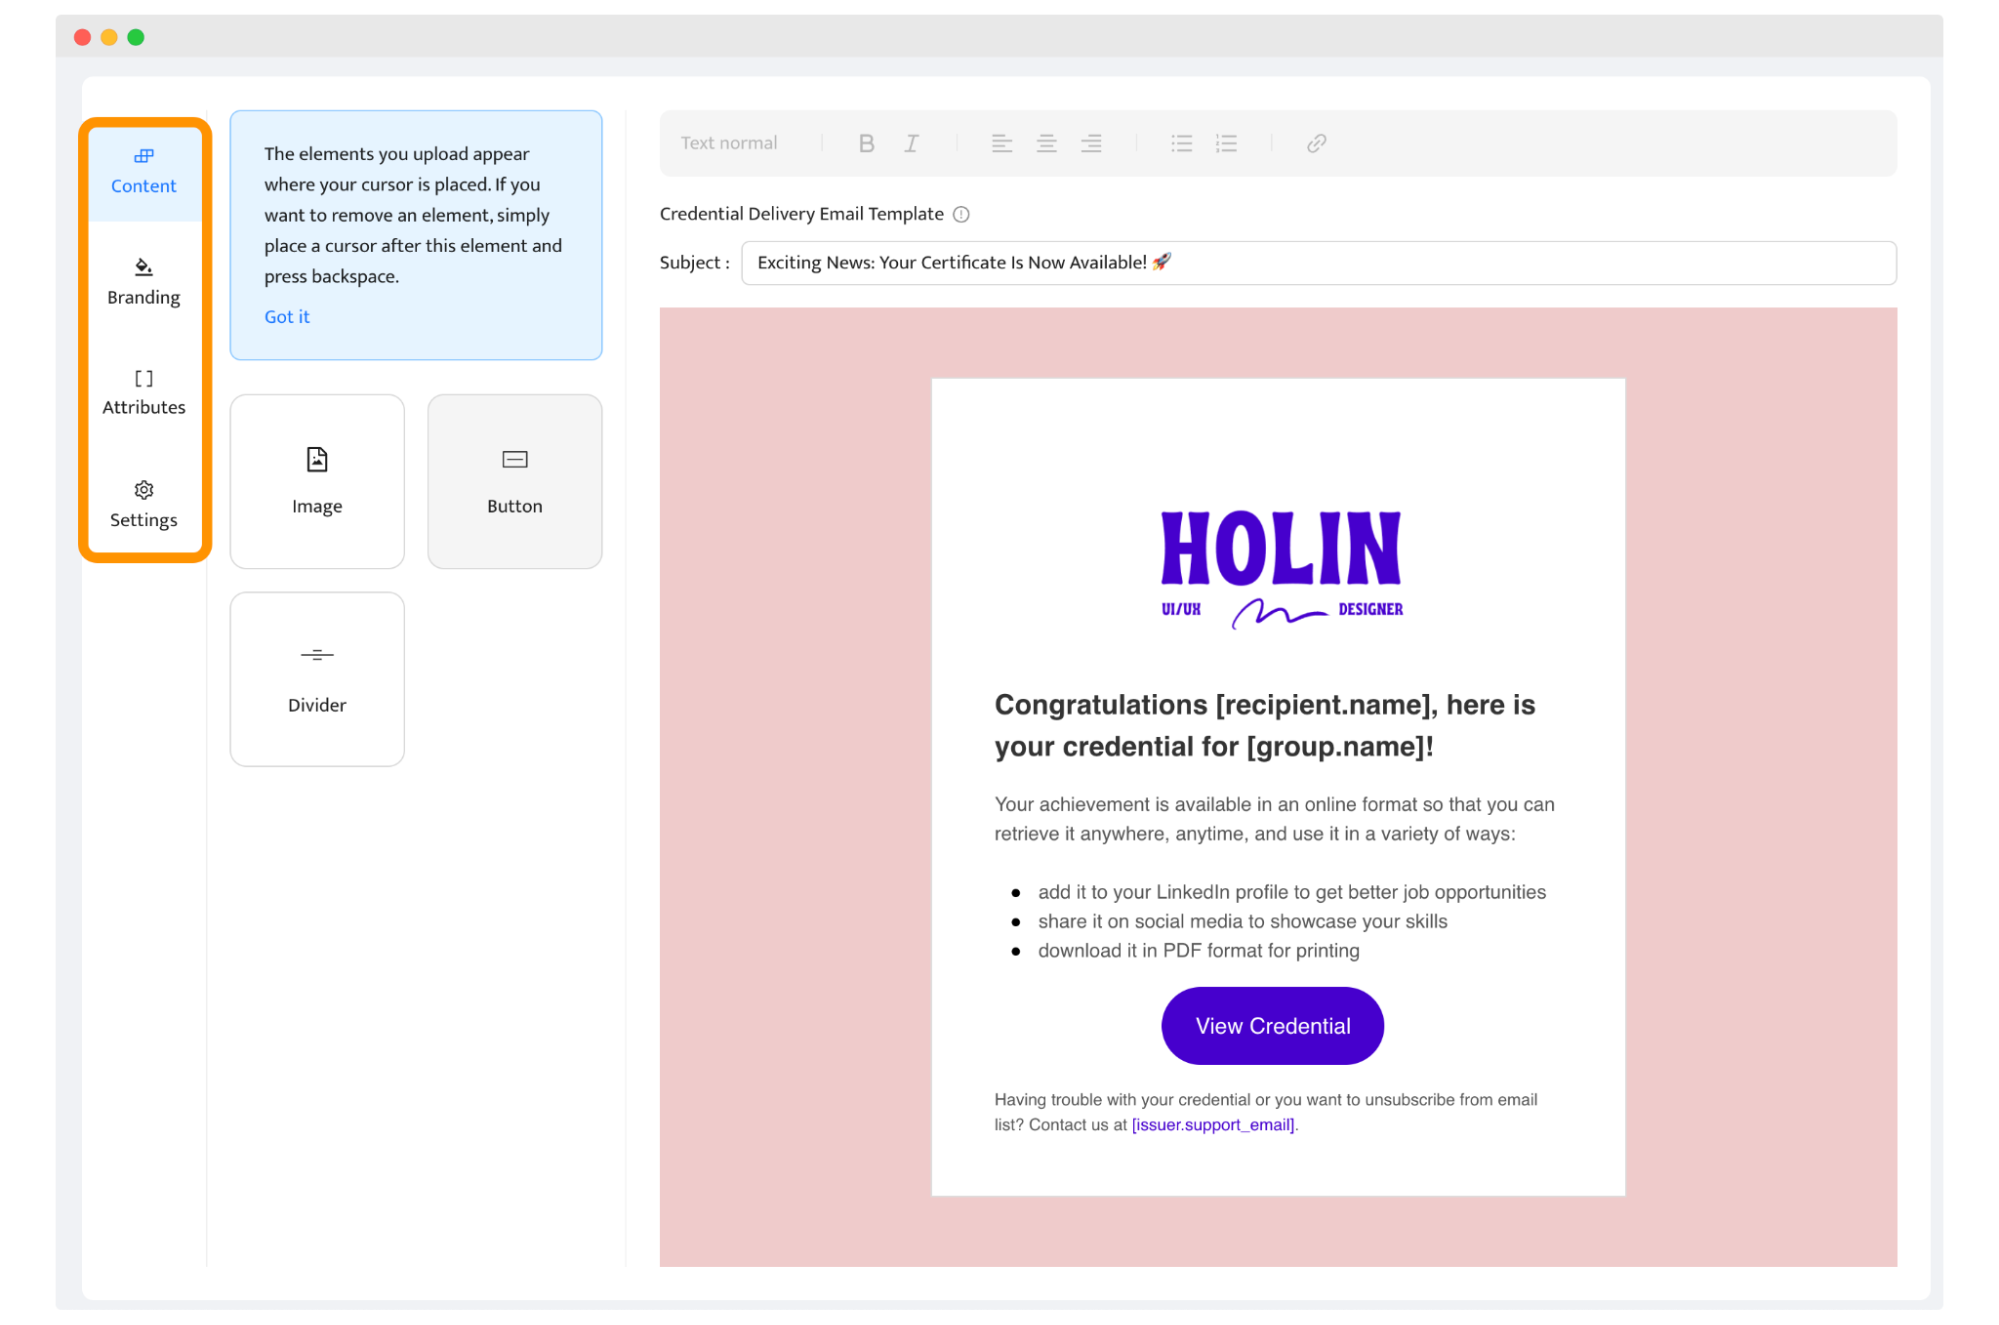
Using the dynamic attributes, you can set up personalization for each email, e.g., you can add the [recipient.name] attribute to the subject line to encourage the reader to open the message.
Step 4: Set up a group
Certifier allows you to organize your certificates and recipients into groups. This makes the workflow much easier if you have to handle multiple different certificates at once.
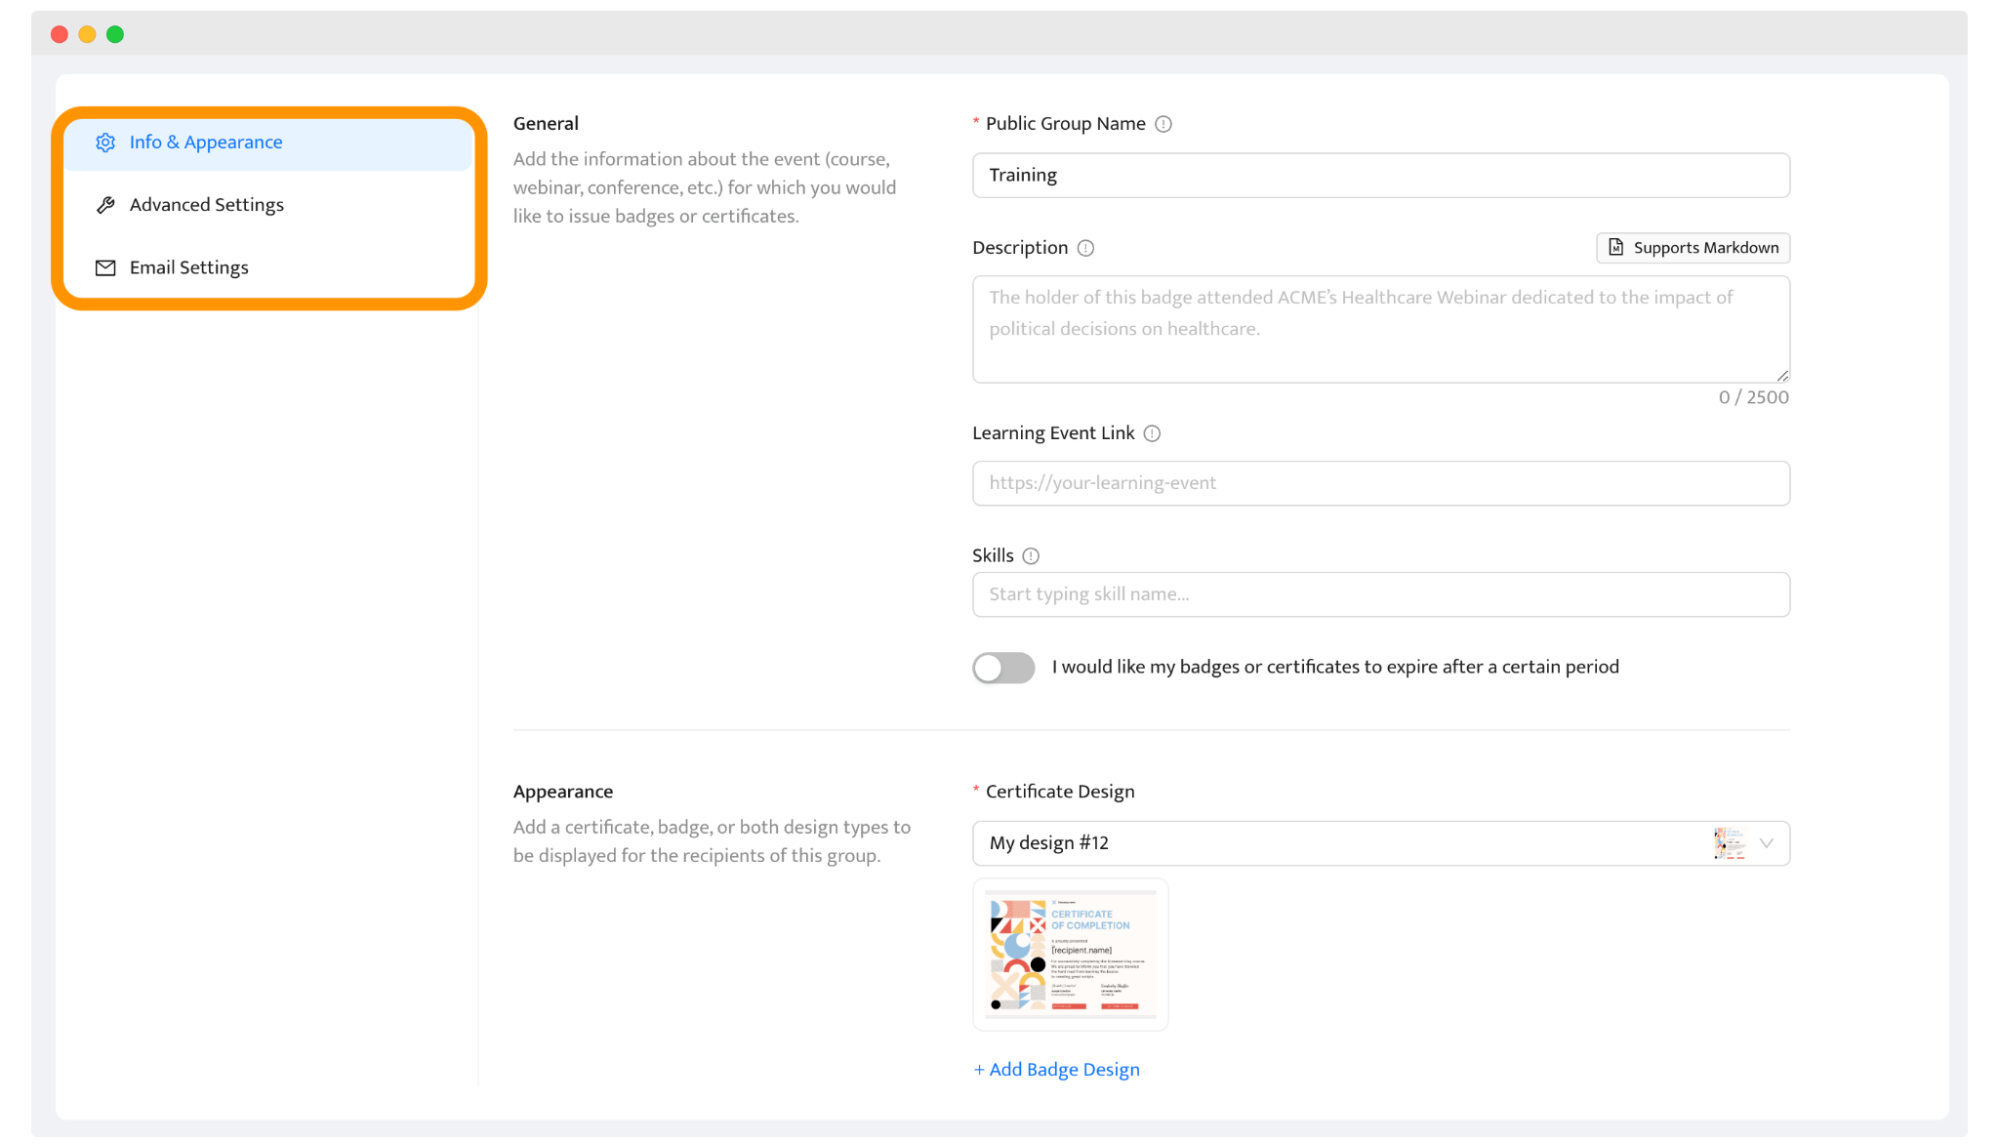
Go to the Groups tab and click Create Group (if you’ve created a personalized certificate template for the first time, the group will form automatically). Choose the certificate design, name and describe the event.
From there, you can also specify whether the certificate should expire after a certain period of time. You can customize the digital wallet in Advanced Settings and adjust the email template to branding if you want to send certificates to your recipients.
Step 5: Make and upload a list of recipients
Before sending your certificate, you should clean up the recipient list. Excel or Google Sheets work best here.
Why is it so necessary? You will be able to take advantage of all of the automated certification workflow potential. Having this file to export all the data will help you minimize the manual work as much as possible.
How to prepare a list of recipients for the certification process? The easiest way is to create a CSV file with 2 columns (you can use our ready-made template):
Participants' names in one.
Email addresses in the other.
Go to the Credentials tab and click the blue button on the top right, Issue Certificates or Badges.
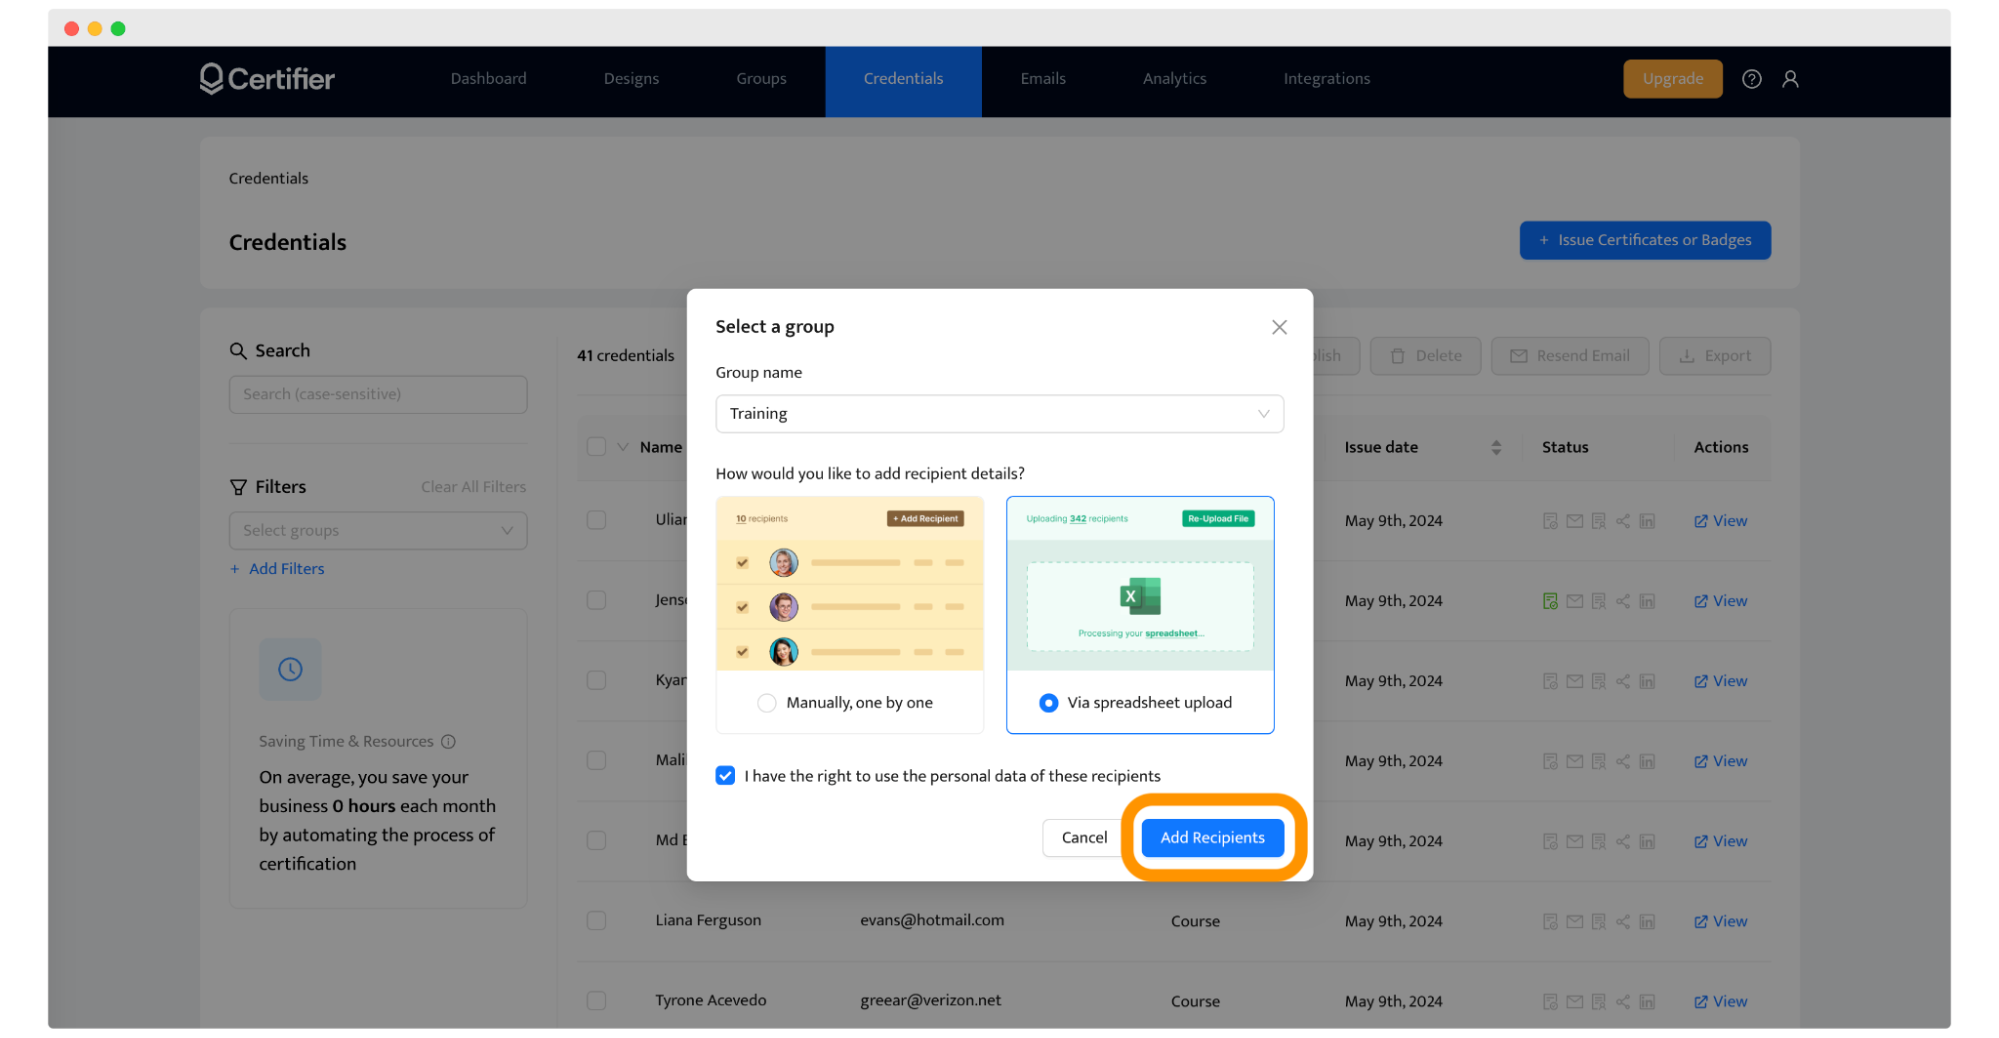
Choose the Group name and the option to add your data via spreadsheet upload (recommended). Select the file to pull over the recipient data.
Then, link the attributes with the particular spreadsheet columns. As a result, the tool will know exactly where to place which data.
Tip: You don’t have to send certificates by email. If you prefer, you can skip the email address column during the mapping and then just download the certificates in PDF and print them out for your recipients to hand in person.
Step 6: Preview and send the certificates
Certificate automation minimizes the risk of making mistakes during creating and sending certificates. It makes your process much more secure and professional. To make it even more perfect, Certifier offers a preview option to ensure that all certificates and emails have been generated correctly.
After uploading the recipients’ data, in the top right corner of your screen, you will see the option that says Preview Before Publishing. Click it to approve all the credentials and emails. The process is pretty straightforward – you can easily check all certificates in one go.
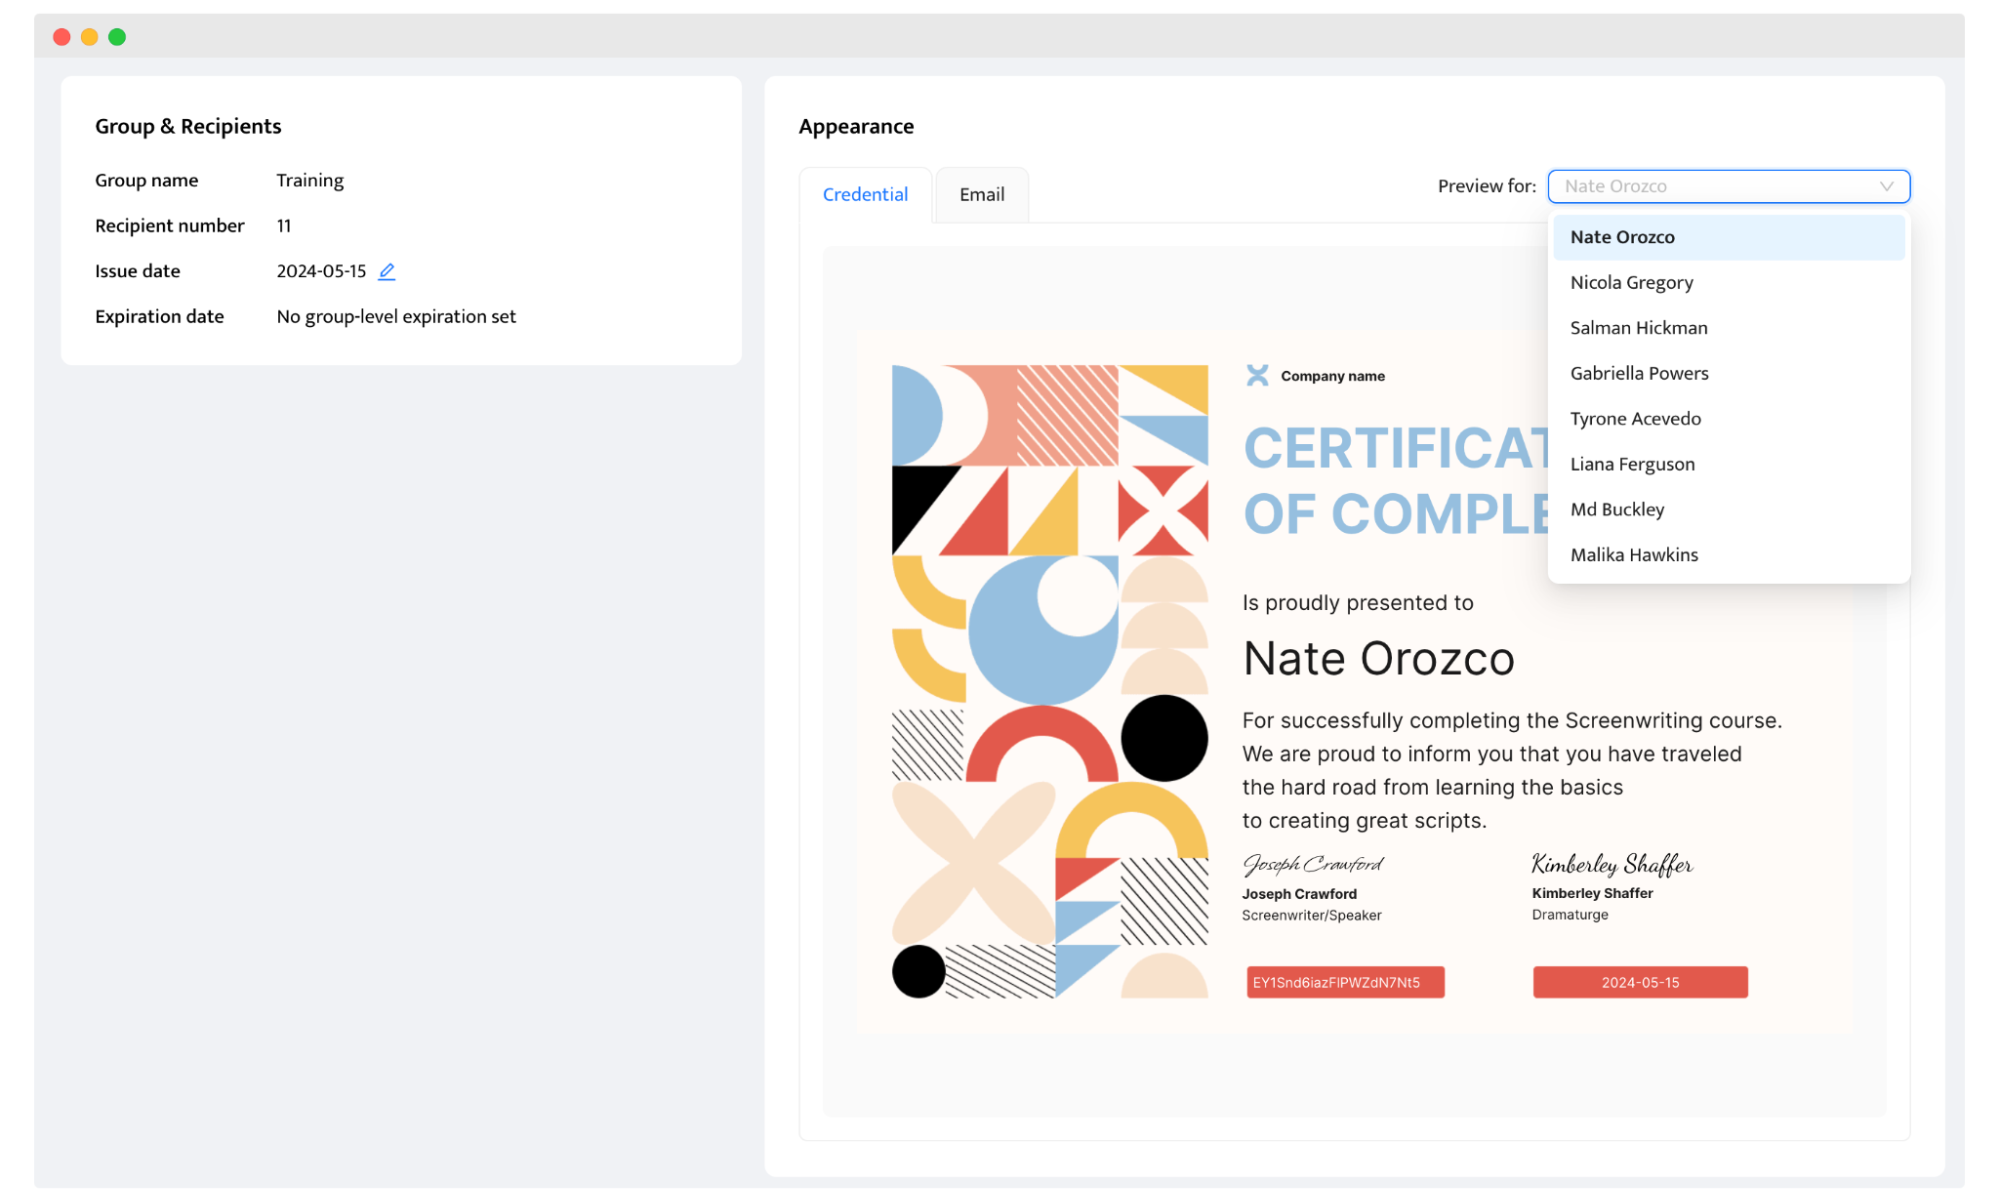
Now your custom certificates are ready to be sent! Click Issue Certificates to generate personalized certificates all at once.
Create and Send Digital Credentials
Adjust these design elements to create custom-made gift certificates
To conclude our guide, we can't leave you without some certificate design tips for all kinds of personalized gift certificates. Follow these basic guidelines if you want your recipients to receive the nicest bespoke certificates they've ever received.
Certificate background
First, let's discuss the background of your certificate of appreciation. It's not just a blank canvas but a stage where all other elements perform. Rather than settling for a standard white background color, consider mixing it up with patterns or subtle gradients that align with your brand. Play around with a variety to achieve a unique blend of aesthetics and brand representation.
Branding color themes of certificate design
Don't shy away from experimenting with your brand's color palette to evoke the right emotions. Your color scheme should resonate with your brand personality. Whether it's the calming blues of a spa certificate or the vibrant reds of a foodie voucher, colors can truly set the mood.
Your own company logo
Your logo – the face of your brand –deserves a prime spot on the certificate. Think of unique ways to present it. Maybe it's subtly watermarked in the background, or perhaps it takes center stage. You could even play around with its size and orientation. The point is to make it stand out without overshadowing the other certificate details.
Branded fonts
Beautiful fonts have personalities, too, and the right one can truly accentuate the look of your certificate. You have to keep your brand's image consistent. If your brand vibe is formal and elegant, stick to a script font. Meanwhile, a modern business might require a clean, sans-serif font. Size matters, too; check that your text is readable yet doesn't dominate your certificate's design.
Custom size certificates (and shape)
When choosing the dimensions of your printable certificate templates, consider the final presentation – whether it's meant to be framed or kept in a digital wallet. Also, take into account whether you need to prepare eye-catching certificates for printing.
Then, you should follow some rules to cover all the details required to print your certificates professionally. Certifier also offers two typical certificate sizes and orientations to choose from in its built-in editor: A4/US Letter and vertical/horizontal.
QR code
Last but not least, consider adding a QR code. It's more than just a cool digital element It could link to a personalized digital wallet from which your recipient can share, download, or verify the credential.
QR codes are easy to implement with Certifier (great for adding an additional layer of verification). Certifier provides two QR codes: static with custom URLs and dynamic with the verification page, mentioned above. Be clever with its placement, though, so it doesn’t disrupt your favorite certificate design.
Learn how to add QR codes to certificates and make them even more personalized.
Certificate automation of personalized certificates
This is just a quick wrap-up of what you got to know today.
Auto certificates can help minimize the time, effort, and risk spent on creating personalized recognitions.
It takes 6 simple steps to set up certification and automate the process of its creation.
To provide truly unique personalized certificates, experiment with such elements as certificate background, theme of certificate design, logo, fonts, size, and shape – and don’t forget to add QR codes.
Certifier is the easiest and the best automatic certificate generator that provides convenient features, simplifying the certification management and creation process to the maximum.
If you take care of all of these areas – good job! You are taking full advantage of this automated certification workflow. Start for free to unlock the full potential of automated, personalized certificates.
FAQ for automated personalized certificates
Here are the most common questions related to the topic of manual vs automated certification workflow.

- Product Management
- Customer Research
- Digital Credentials
- Product Strategy
- Design Systems
Product Manager
Uliana leads product management at Certifier, using her UI/UX background to explain platform features and help organizations maximize their credentialing capabilities.

