Trusted by:
Updated: December 05, 2025
8 min read
How to Use Certifier Bulk Certificate Generator (2026 Update)
This tutorial is a step-by-step guide on how to create and issue certificates for your online school students, webinar attendees, or course graduates via a one-click automatic email using Certifier.
Certifier is a unique solution for those who want to generate dozens of digital certificates in bulk with minimum effort and time. The creating and issuing process of professionally-designed certificates requires these three easy steps:
01 Choosing the digital certificate template
02 Uploading recipients' data
03 Auto-send all certificates at once
Let's get to know the steps closer to create beautiful certificates in bulk with the Certifier automatic certificate generator!
Bulk certificates - what do they mean?
Bulk certificates are necessary for those who want to issue multiple certificates at once instead of creating separate individual certificates for every student or course participant. It’s the feature that streamlines the workflow a lot. You can forget about the hours spent on creating certificate templates. Using a bulk certificate generator, you can reduce the process to a few clicks.
How to bulk generate certificates?
Let’s face the truth. Using a bulk certificate generator may appear difficult and intimidating. But actually, a bulk certificate generator is a tool that allows you to create a large number of certificates quickly and easily. With just a few clicks, you can generate multiple certificates at once, saving you time and effort. The Certifier certificate builder makes the process of creating certificates in bulk easy and user-friendly. Good news, you can use our bulk certificate generator free, and the creation process takes only three steps. Keep reading for details.
3 easy steps to create an endless number of certificates:
01 Choose a ready-made template: Pick a professional design from Certifier's template library. Customize it with your brand elements, colors, fonts, and dynamic placeholders like recipient names or course details.
02 Upload recipient data: Prepare a spreadsheet with recipient details (e.g., names and emails) in formats like CSV or XLSX. Upload it directly to Certifier and map the data to your placeholders.
03 Preview and auto-generate certificates: Check everything with the preview feature. Once confirmed, auto-send all certificates to recipients’ emails instantly or save them as drafts for later.
Step 01: Choose the certificate ready-made template
Once logged into our certificate editing app, you will be automatically redirected to our Designs tab. The first thing you should do is to click on the Create Design button, which will lead you to our certificate creation process.
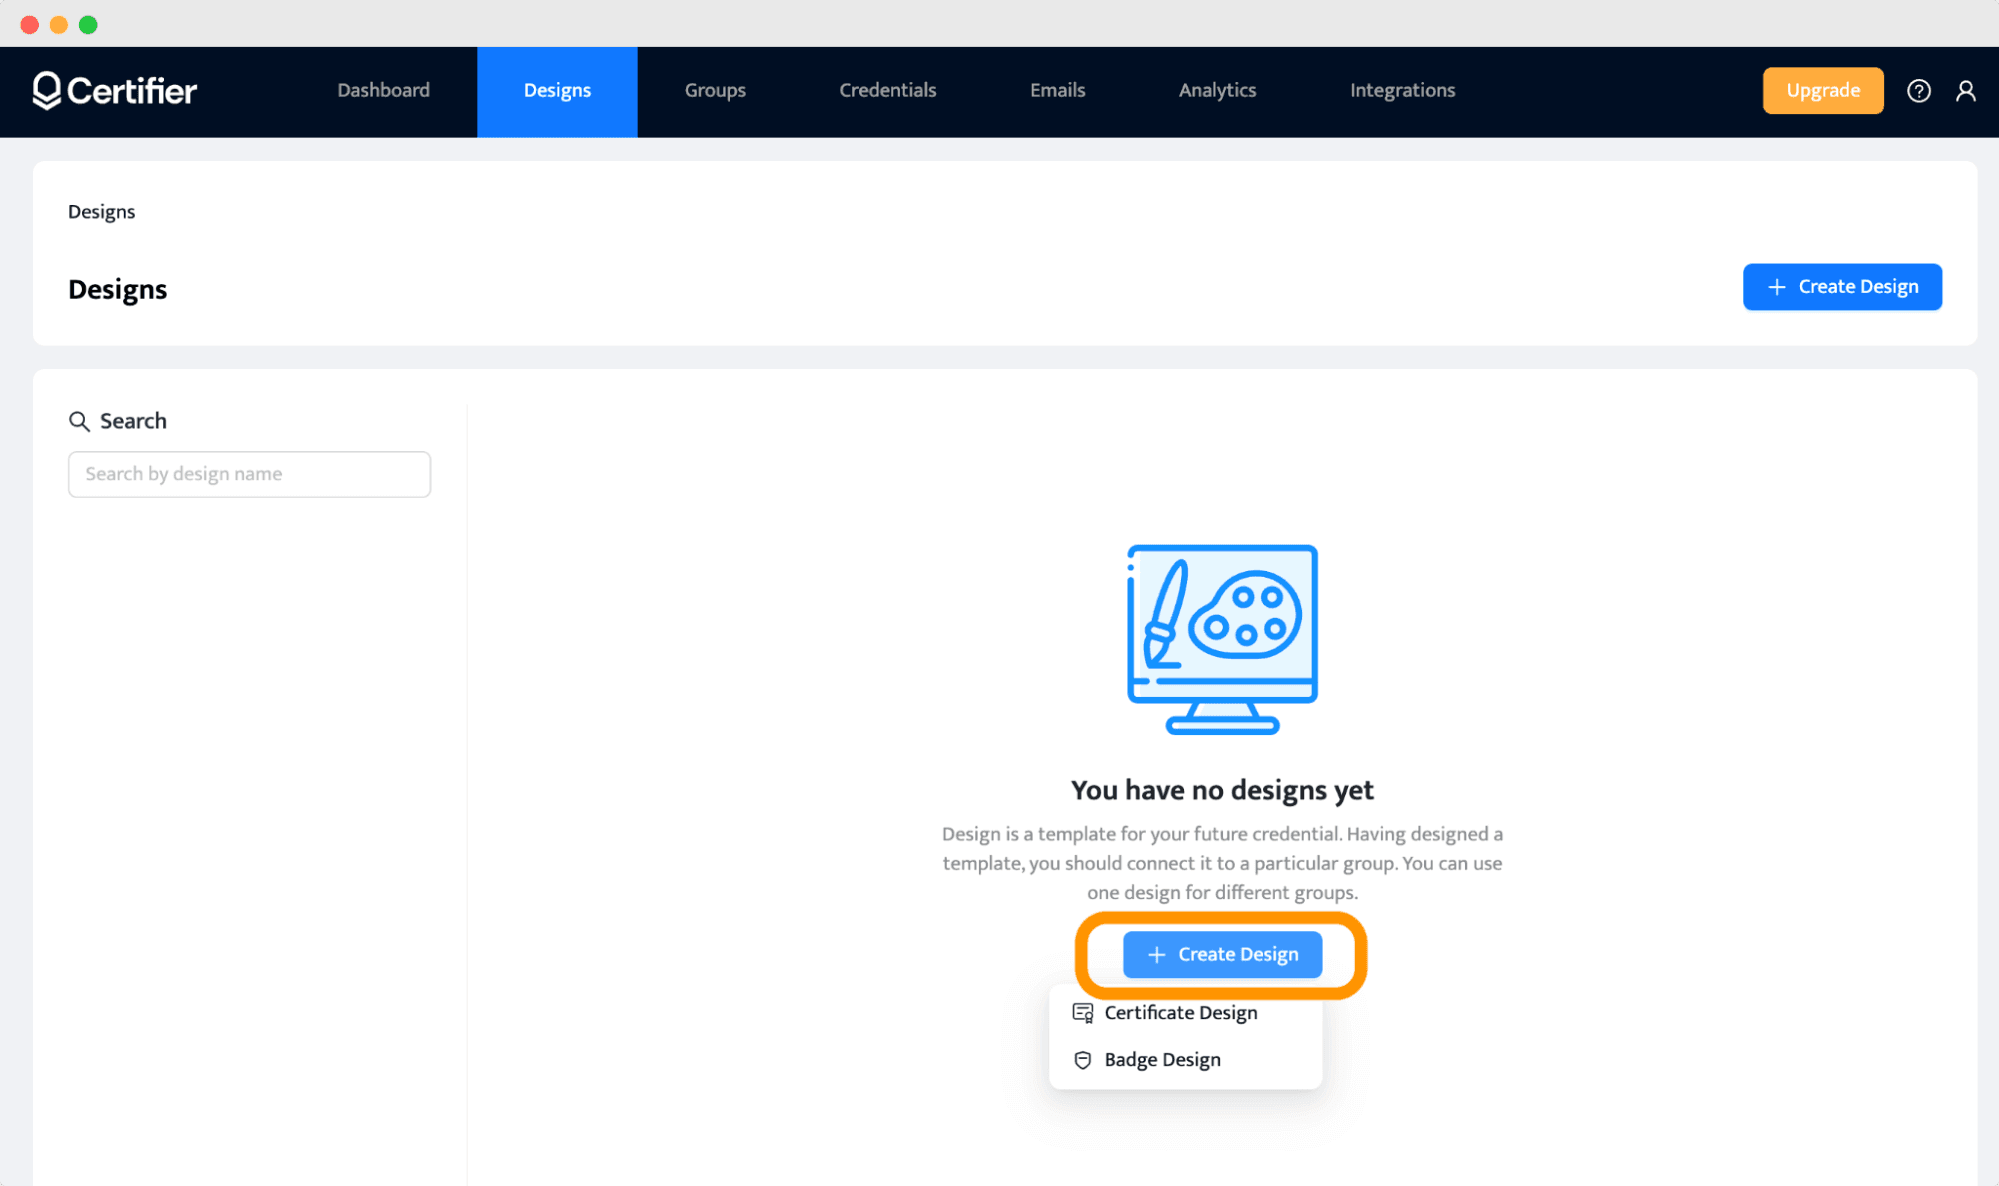
Our online certificate maker works just in the same way as any standard builder does. Most of our users prefer to go directly to the Templates tab and choose a pre-made certificate template that has been professionally designed and prepared for your use.
Create and Send Digital Credentials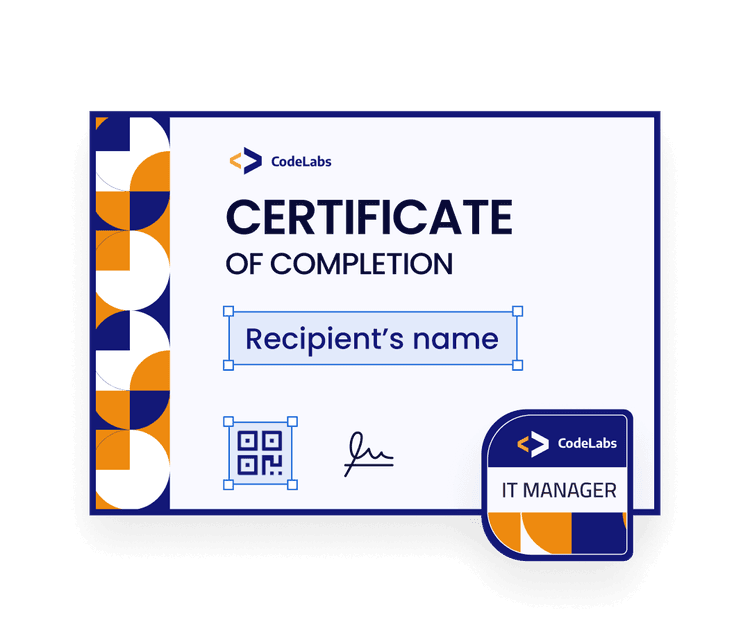
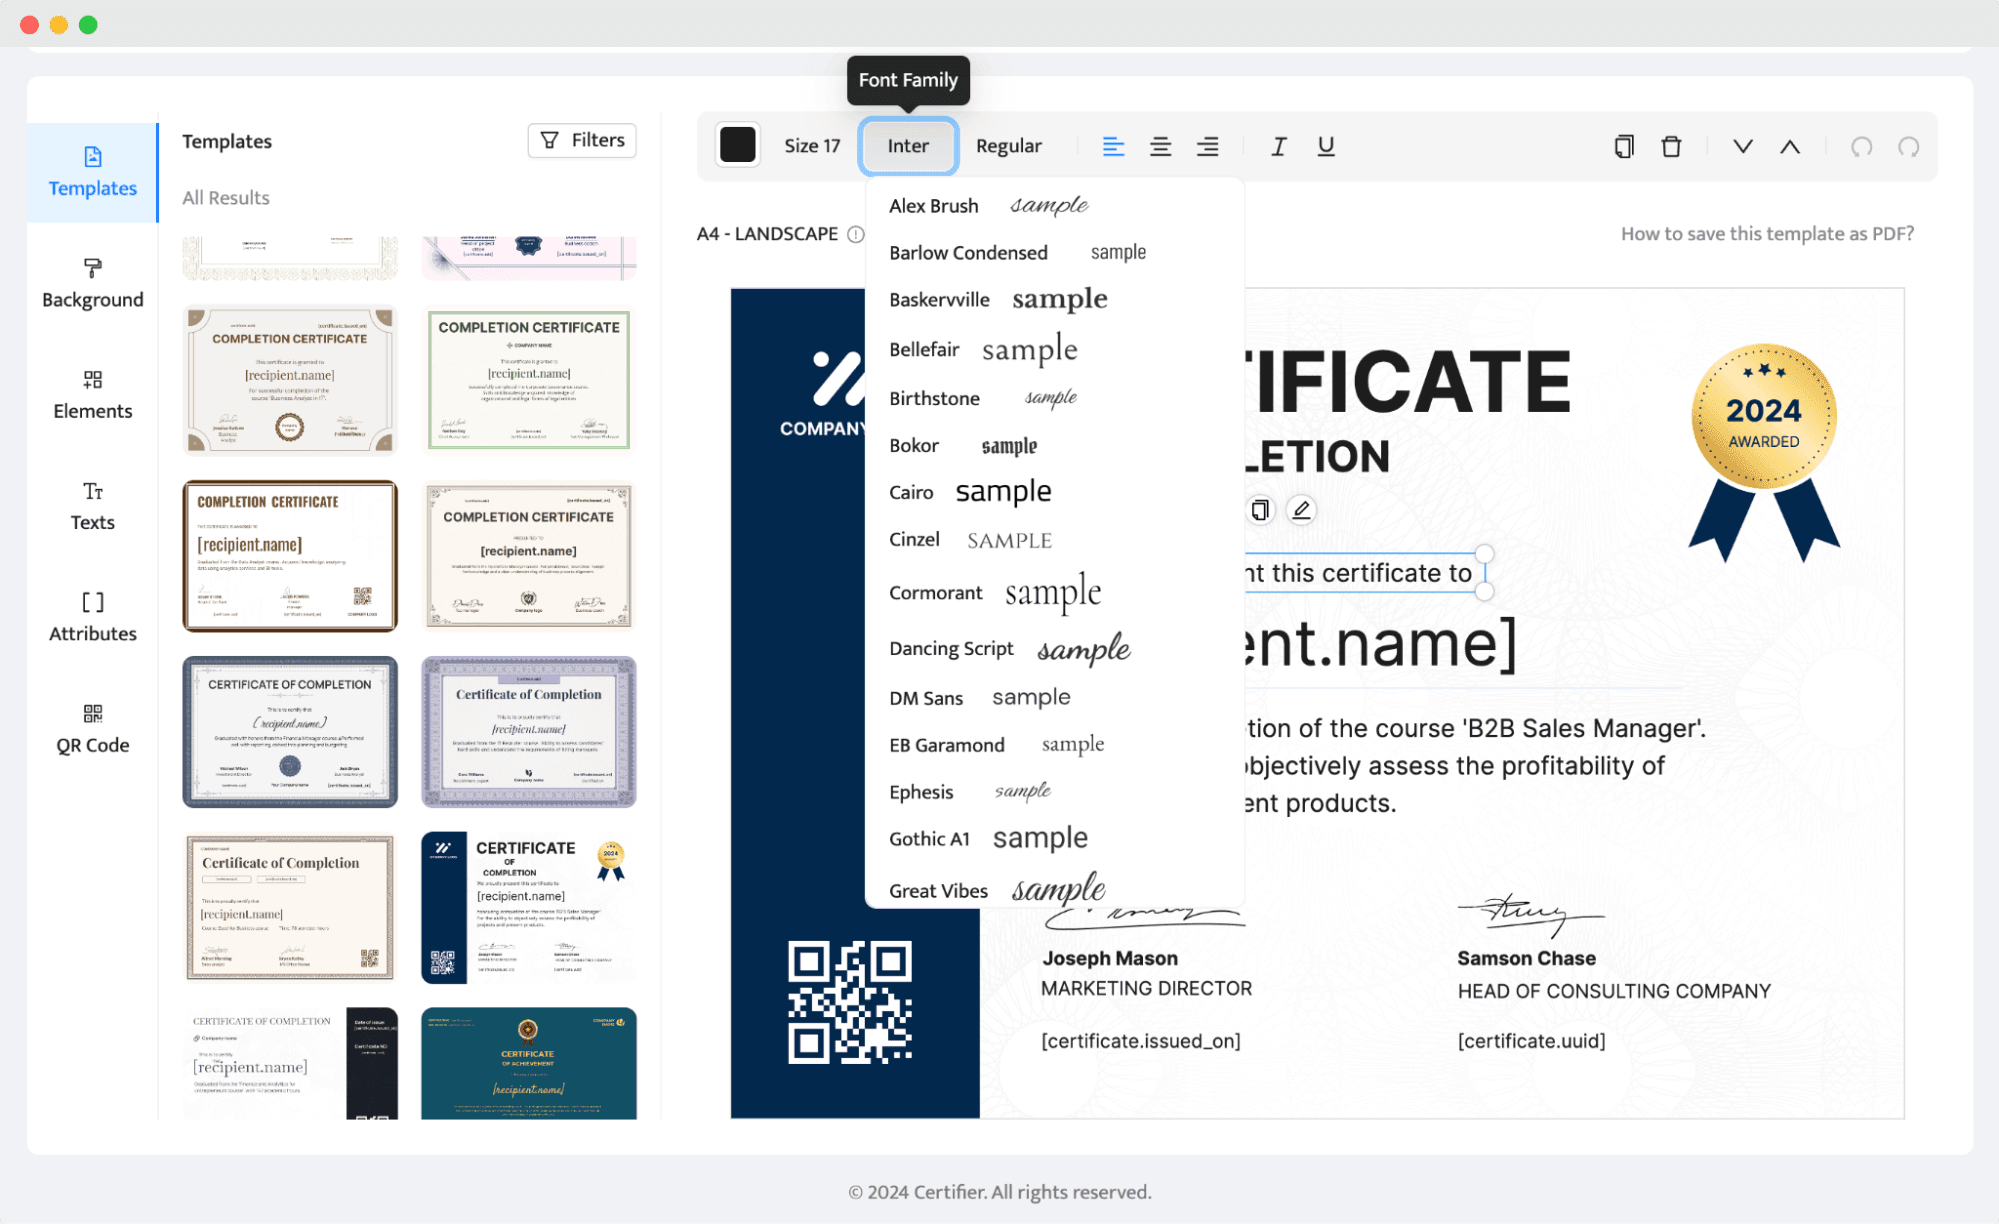
🚀 Good to know: You can customize each template however you want to. Use our bulk certificate generator to change the fonts, colors, and upload branding elements, the company’s logo, and a custom background to create personalized certificates. The sky is the limit here. The Background tab gives you also the possibility to set up the paper size and orientation. You can also generate a QR code to give your certificate an extra layer of verification.
The possibility to add dynamic attributes is the feature that makes Certifier exceptional among other apps because it enables our customers to send dozens of certificates to different recipients in just one click. To make a long story short, you can think of an attribute as a placeholder for the information that will be derived automatically.
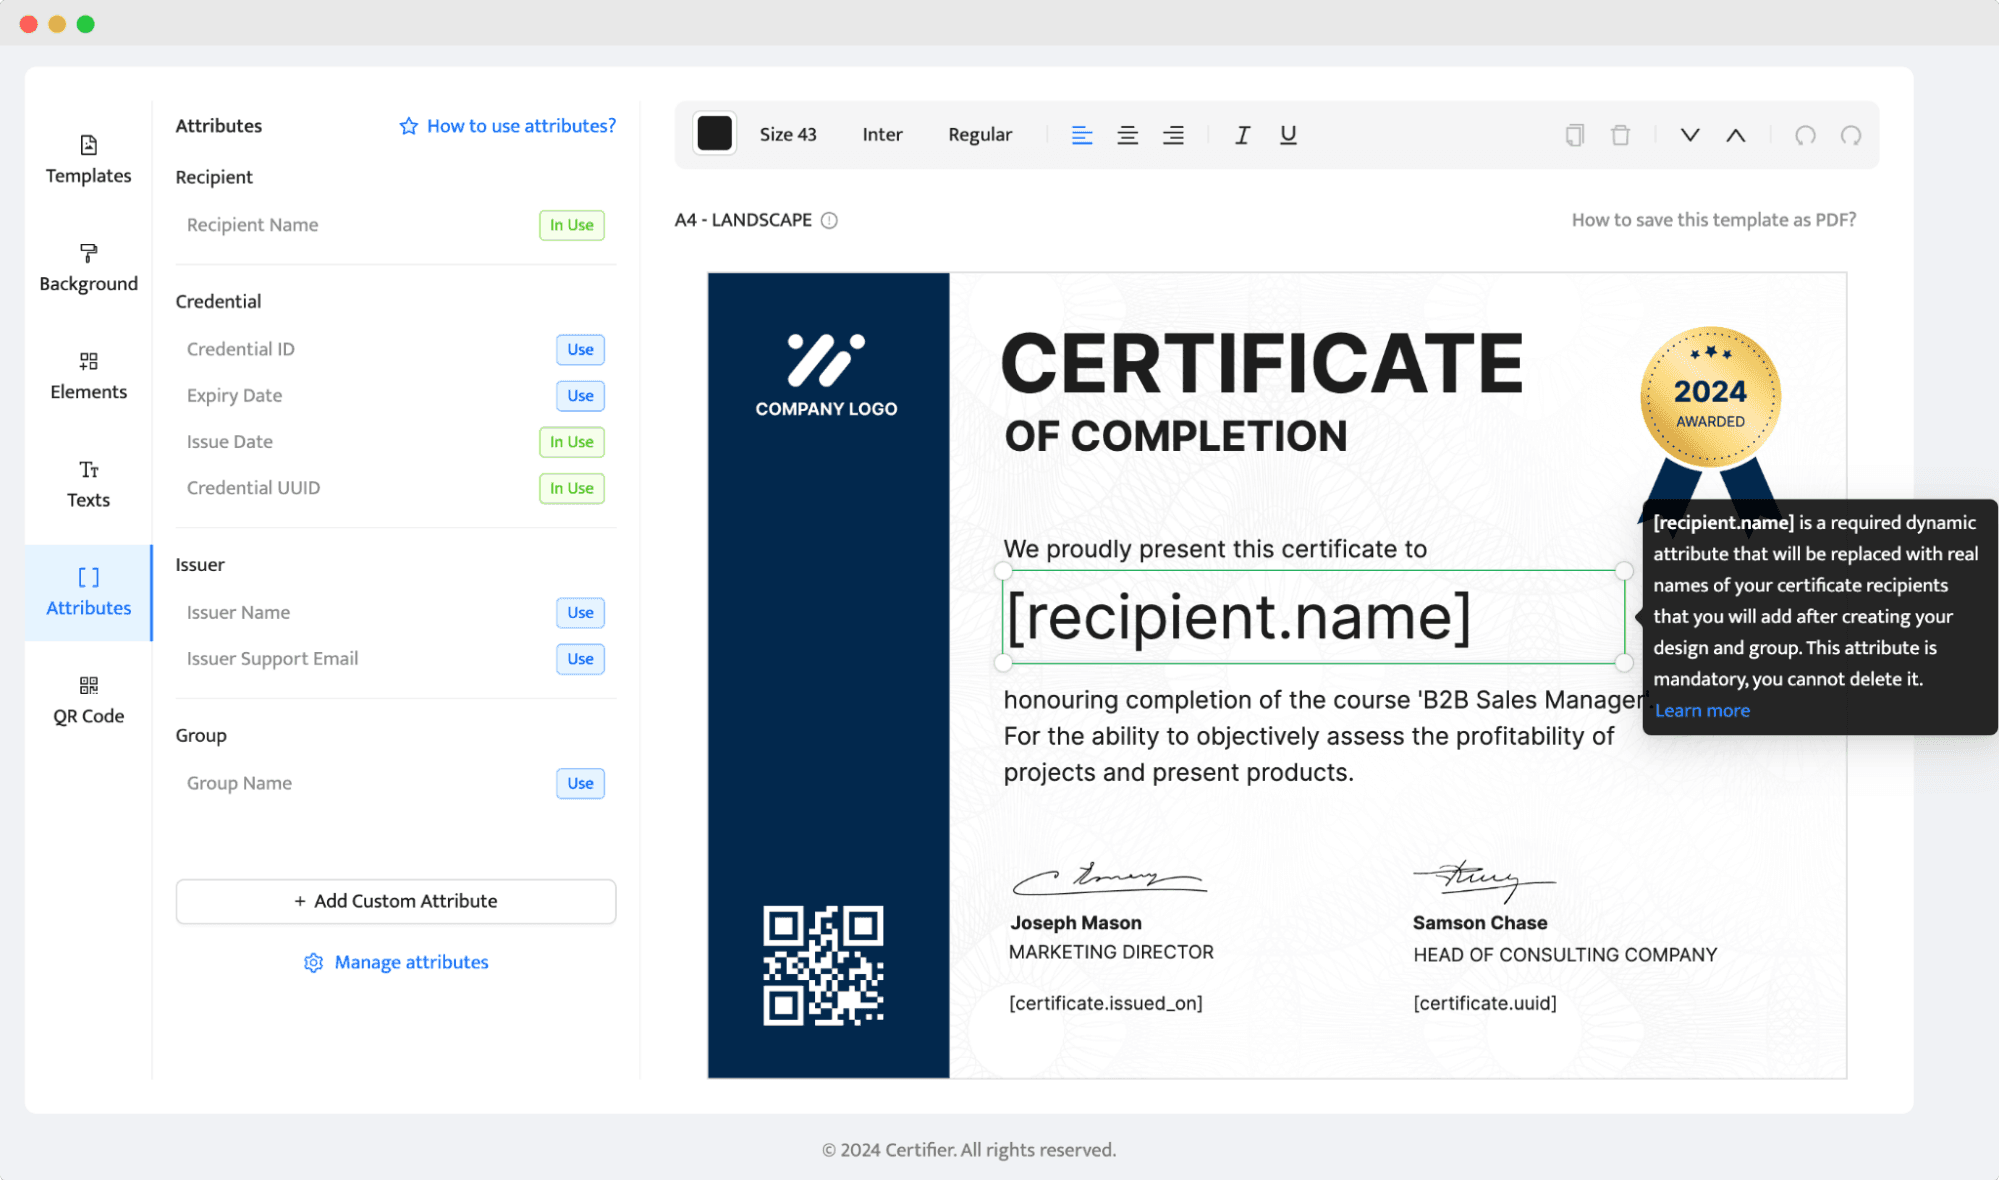
👋 Please note: You should not delete the attribution on certificates and type the full name of your recipient instead of the [recepient.name] attribute provided. This dynamic attribute will get automatically replaced by the name and surname of your recipient based on the data you upload to the Certifier tool in the next step.
Name your design using the empty field in the upper right corner of the builder and press the Create Certificate Design or Save button.
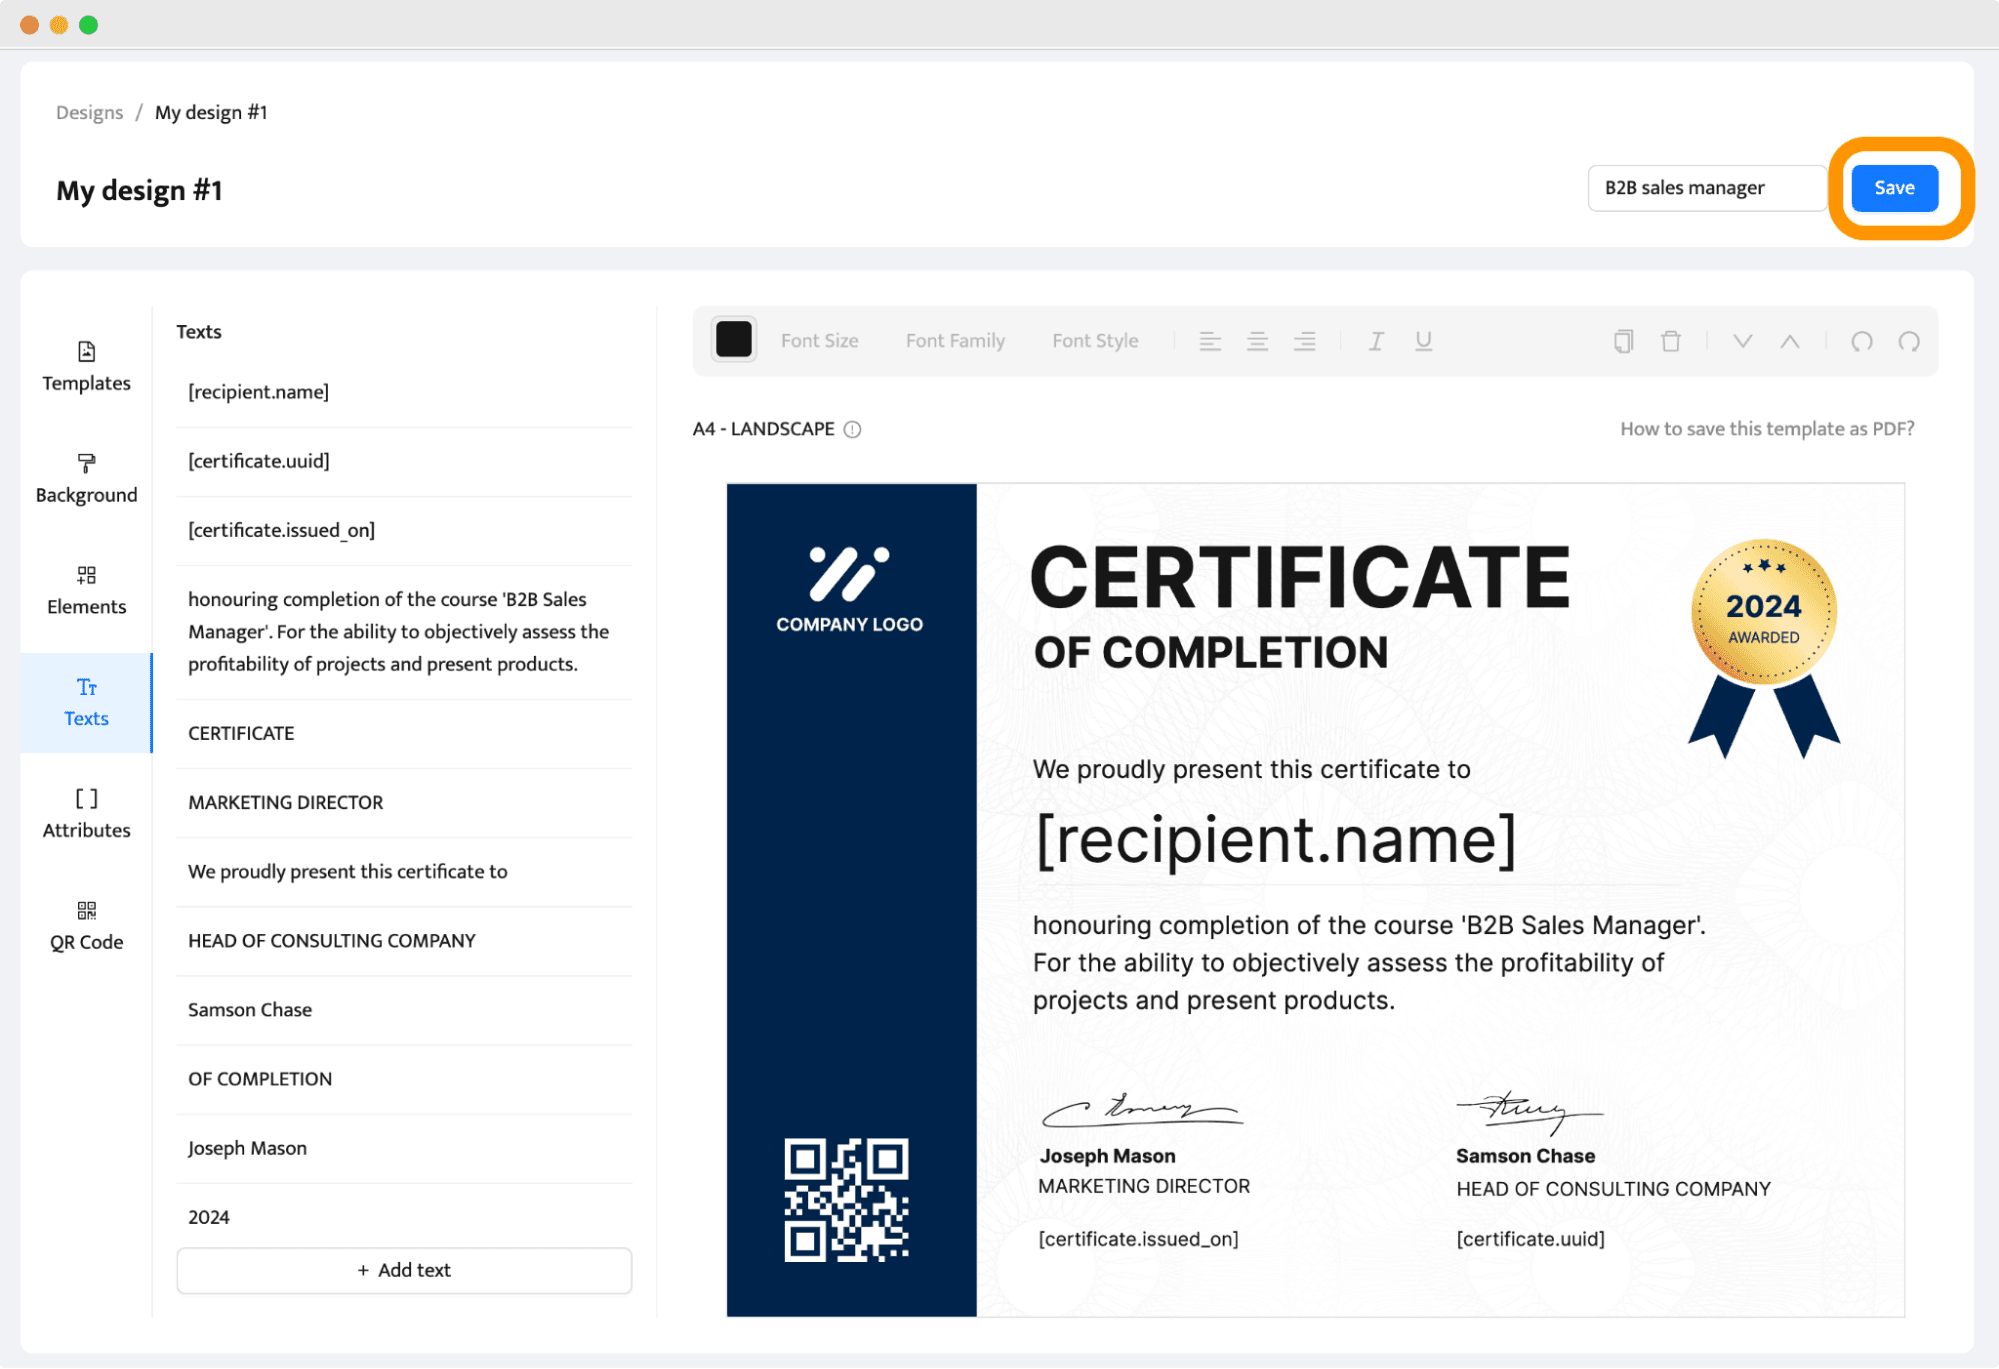
🙋 Please note: Do not start looking for a Download button, or try downloading your design template because this is not how Certifier works. The possibility to save your certificates will become available only once these very certificates are issued.
All the designs that you create and save are stored in the Designs tab so that you can reuse your templates in the future.
Step 02: Upload recipients' data
Once you have successfully finished the digital certificate creation process, it is high time to upload recipients data and link them both together with the dynamic attributes in the template. Don’t worry, the process is pretty straightforward. Once you save your first design, it will trigger the pop-up window with uploading your data.
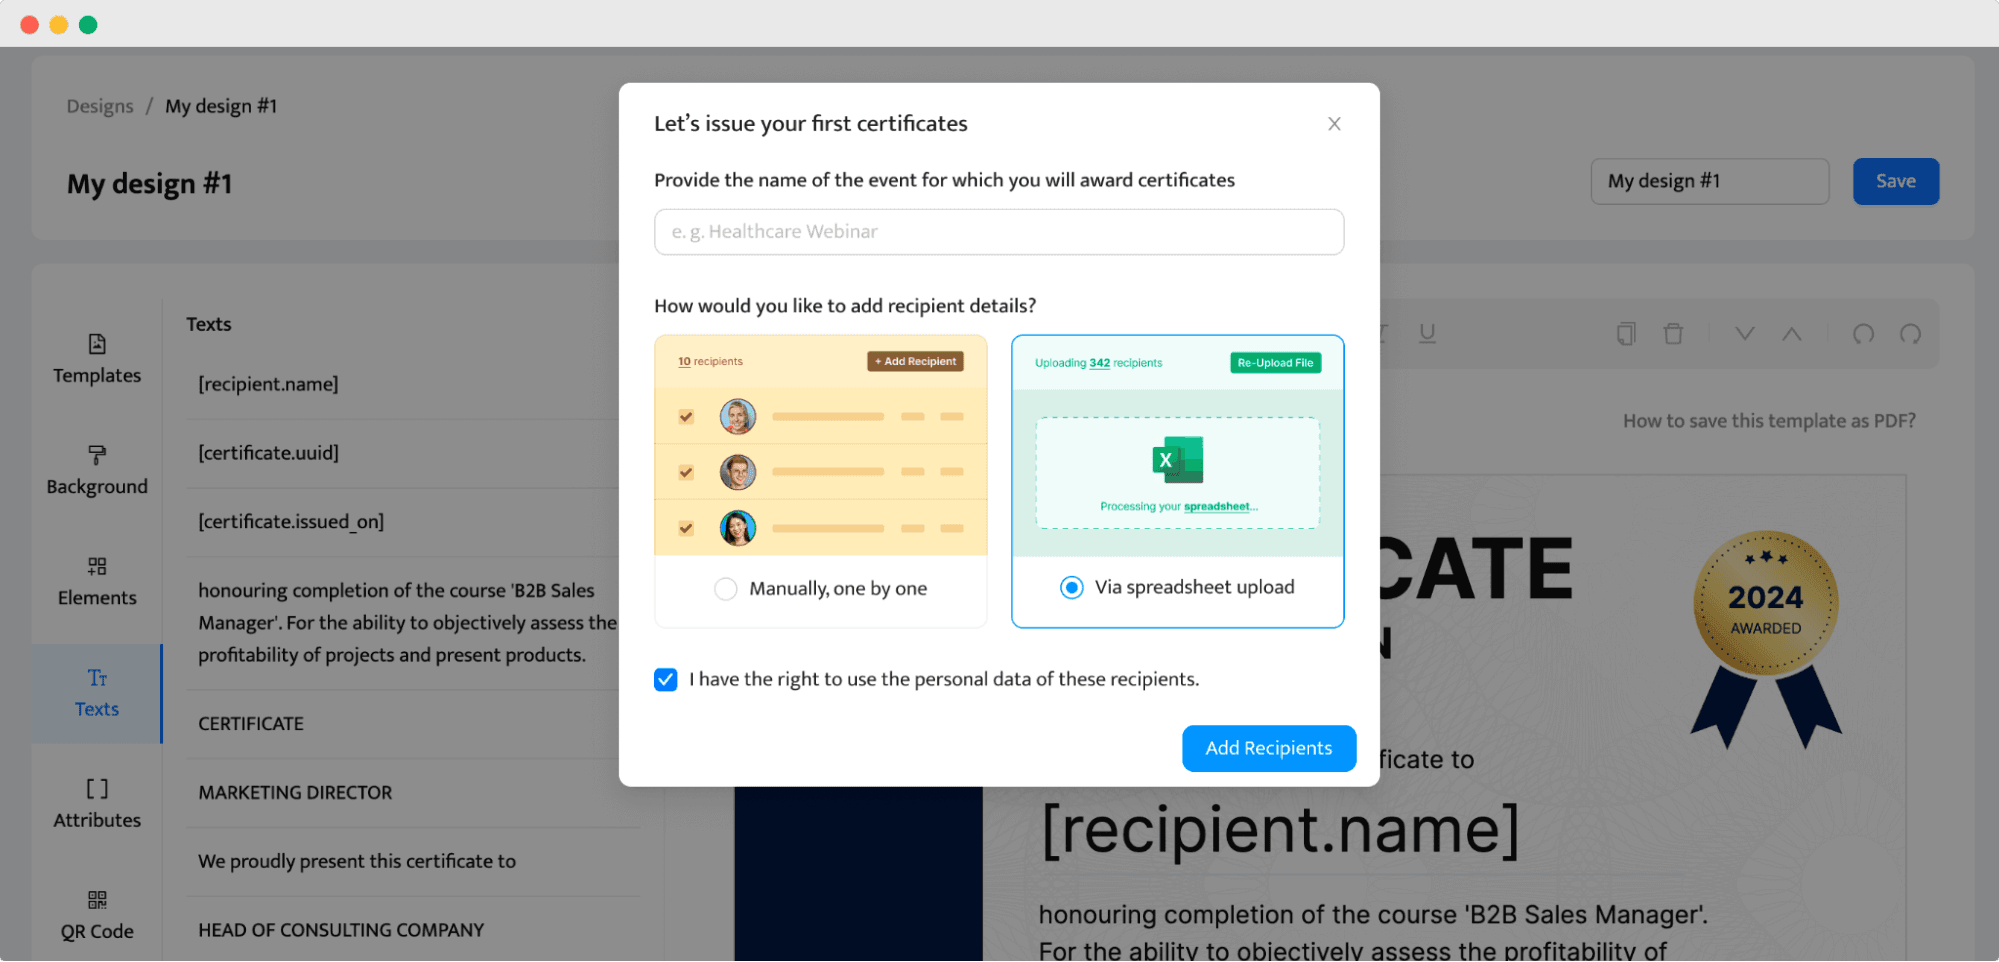
💡 Our recommendation: Name the certificate design template using the names of a course/webinar/or any other occasion that you want to issue your certificates on because it will be visible in the recipient’s wallet from which the recipient can download and share the certificate further.
You can upload the recipients’ data in two ways:
One by one – so you will insert the name and email address of each recipient manually.
Via spreadsheet upload (recommended) – automatically, the tool will pull out the necessary data from the spreadsheet in CSV, XLSX, XLS formats. Our certificate generator from Excel allows you to upload all data at once and link it to dynamic attributes in seconds.
Our bulk certificate generator will suggest you to download the template of this spreadsheet to ease the process a little bit. If you launch webinars using Zoom, WebinarJam, or ClickMeeting, then you can export a list of your attendees directly from the platforms.
📄 Download the online spreadsheet template
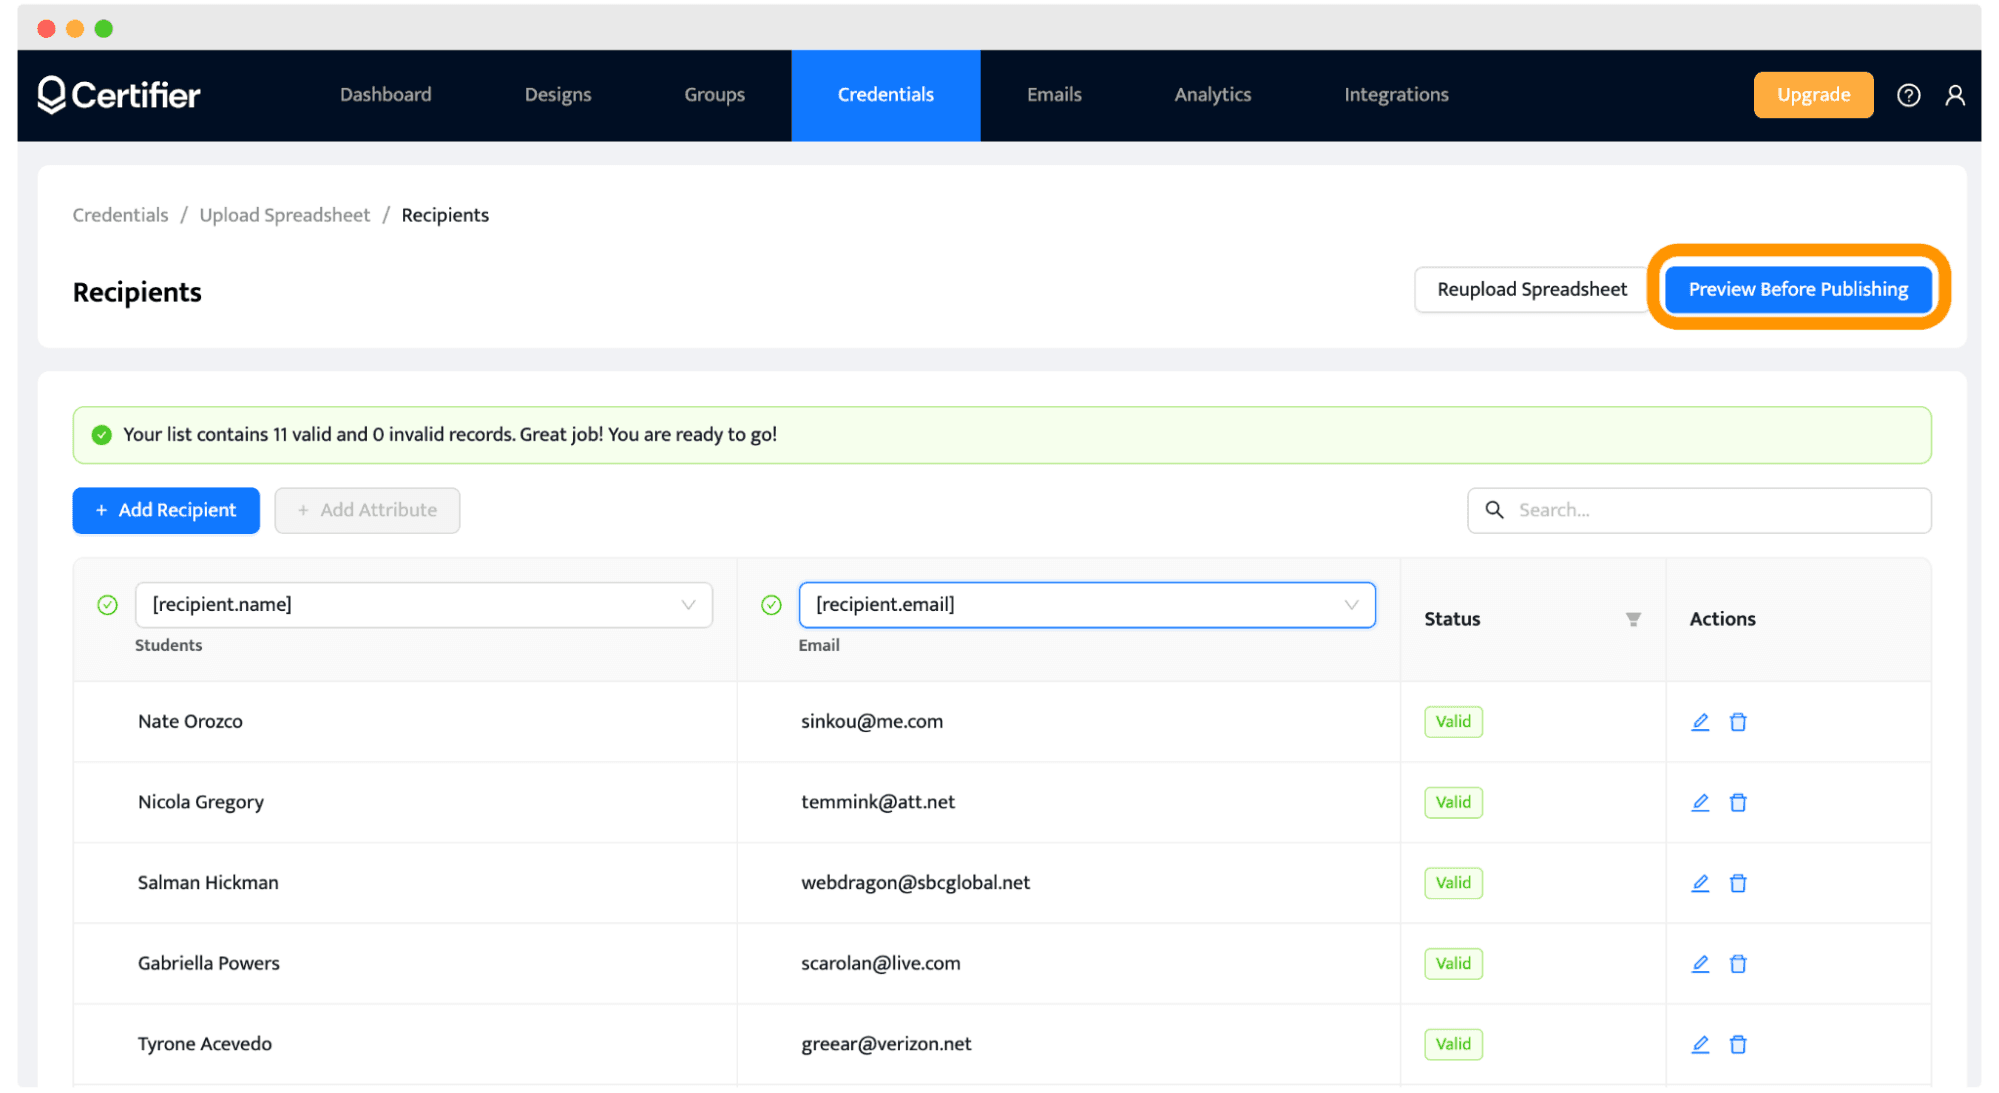
Our template includes two columns called Recipient Name and Email. You may have already guessed that the entities from the Recipient Name column will replace the [recipient.name] attribute, while the emails from the Email column will be used to send your certificates to lots of students with just one click. You can change our template depending on your needs, for example, by adding the columns that you used as attributes on your design template.
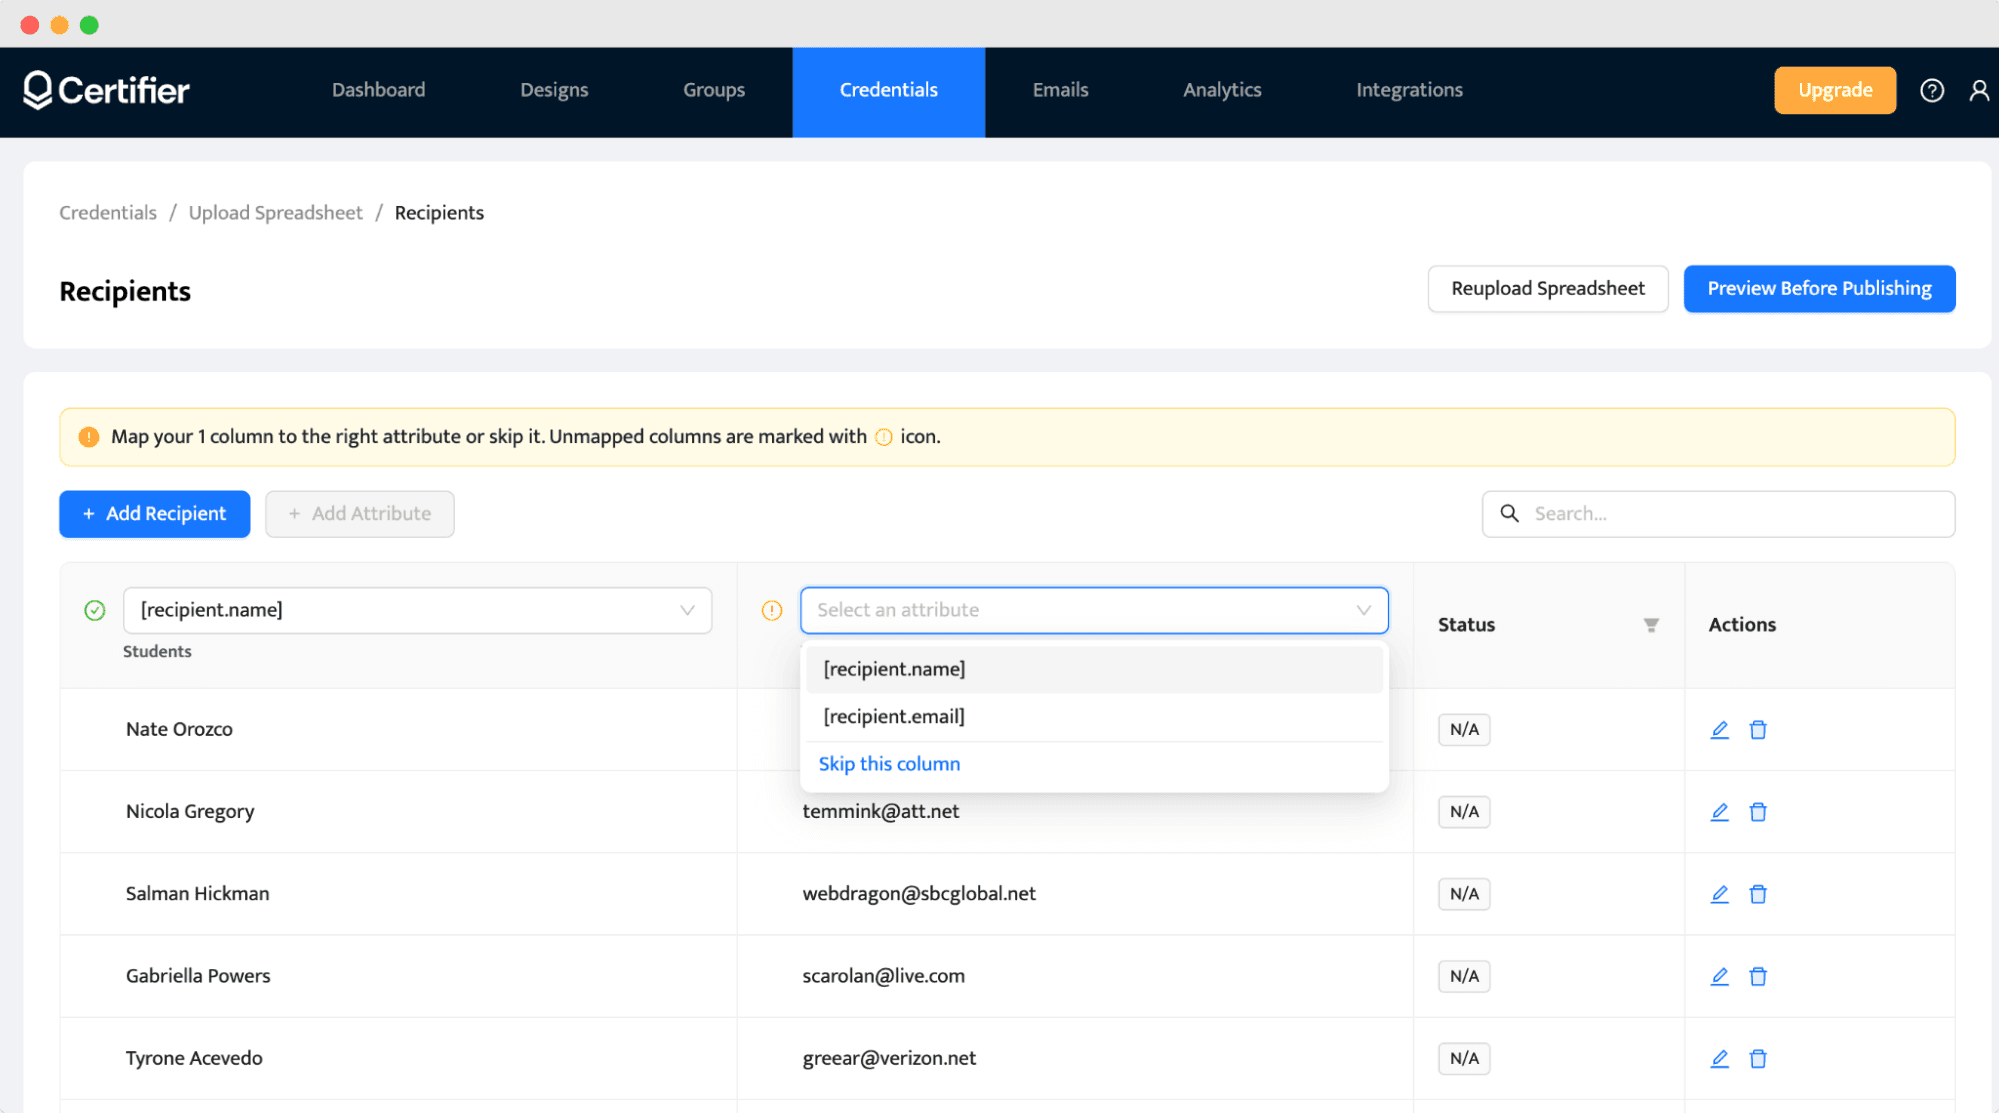
Once a spreadsheet is uploaded, you will be asked to map (link) the columns from your document with the attributes you placed on your template.
Step 03: Auto-generate certificates all at once
Once you have mapped the attributes and columns together, you should press the Preview Before Publishing button so that our multiple certificate generator can check whether everything is alright. If there are any errors, the Certfier tool will let you know how to fix them.
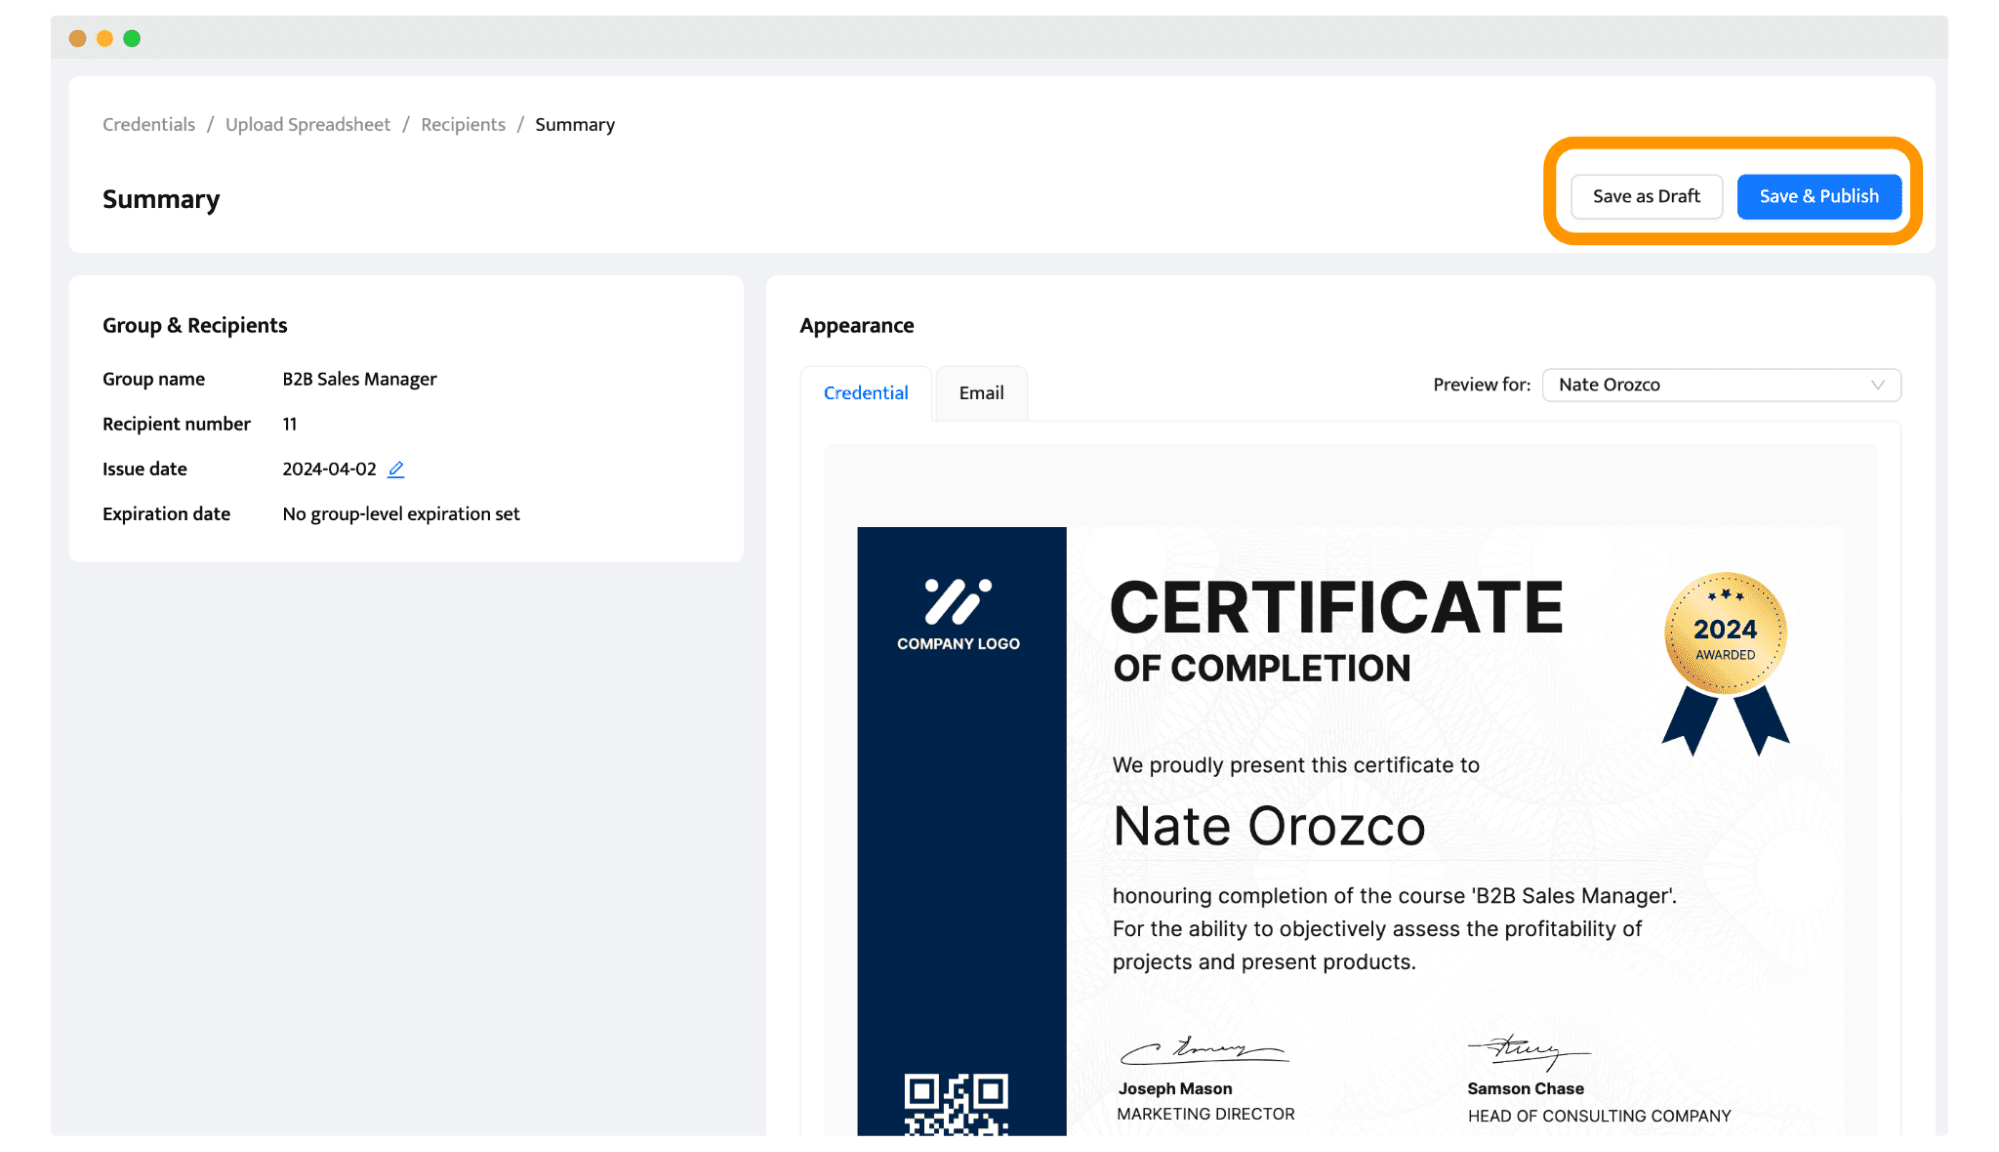
Following this, you have two options:
Hitting a Save as Draft button and issuing your certificates later.
Press the Save & Publish button and the certificates you have just created will be sent directly to the emails of your students in seconds!
So now, when your certificates are issued, you can download them to your computer, resend, or delete them.
⚠️ Be careful: Once you delete a certificate from the dashboard of Certifier, your students will not be able to open them through their email anymore!
That’s it – everything about how to generate bulk certificate. With our multiple certificate generator, it's easy, isn't it? And the best part is that you can use bulk certificate generator free – just sign up.
Create and Send Digital Credentials
Using bulk certificate generator at 100%
The number of your learners does not matter anymore since it does not influence the amount of time you spend on creating and issuing certificates for students :)
Sounds cool, doesn't it? Start for free and see for yourself!
FAQ: Bulk certificate generator
Here are some of the most common questions that may appear while starting with bulk generators.

- Product Management
- Customer Research
- Digital Credentials
- Product Strategy
- Design Systems
Product Manager
Uliana leads product management at Certifier, using her UI/UX background to explain platform features and help organizations maximize their credentialing capabilities.

